Calculating and Releasing Grades
The Grades tool allows you to calculate a grade that shows a student's cumulative achievement.
Learn about:
- Calculating a Midterm Grade
- Creating a Final Grade Column for Manual Grade Entry (optional)
- Calculating and Adjusting Final Grades
- Releasing Final Grades in eLC
Calculating a Midterm Grade
You can use the eLC gradebook to calculate and display a midterm grade for students. This calculated grade won't be included in the final grade calculation, but will give students a midterm report on their progress. These instructions provide the steps necessary to calculate and display a midterm grade for students.
- From the course navbar, select Grades.
- Select the Manage Grades tab.
- Click New, and select Item.

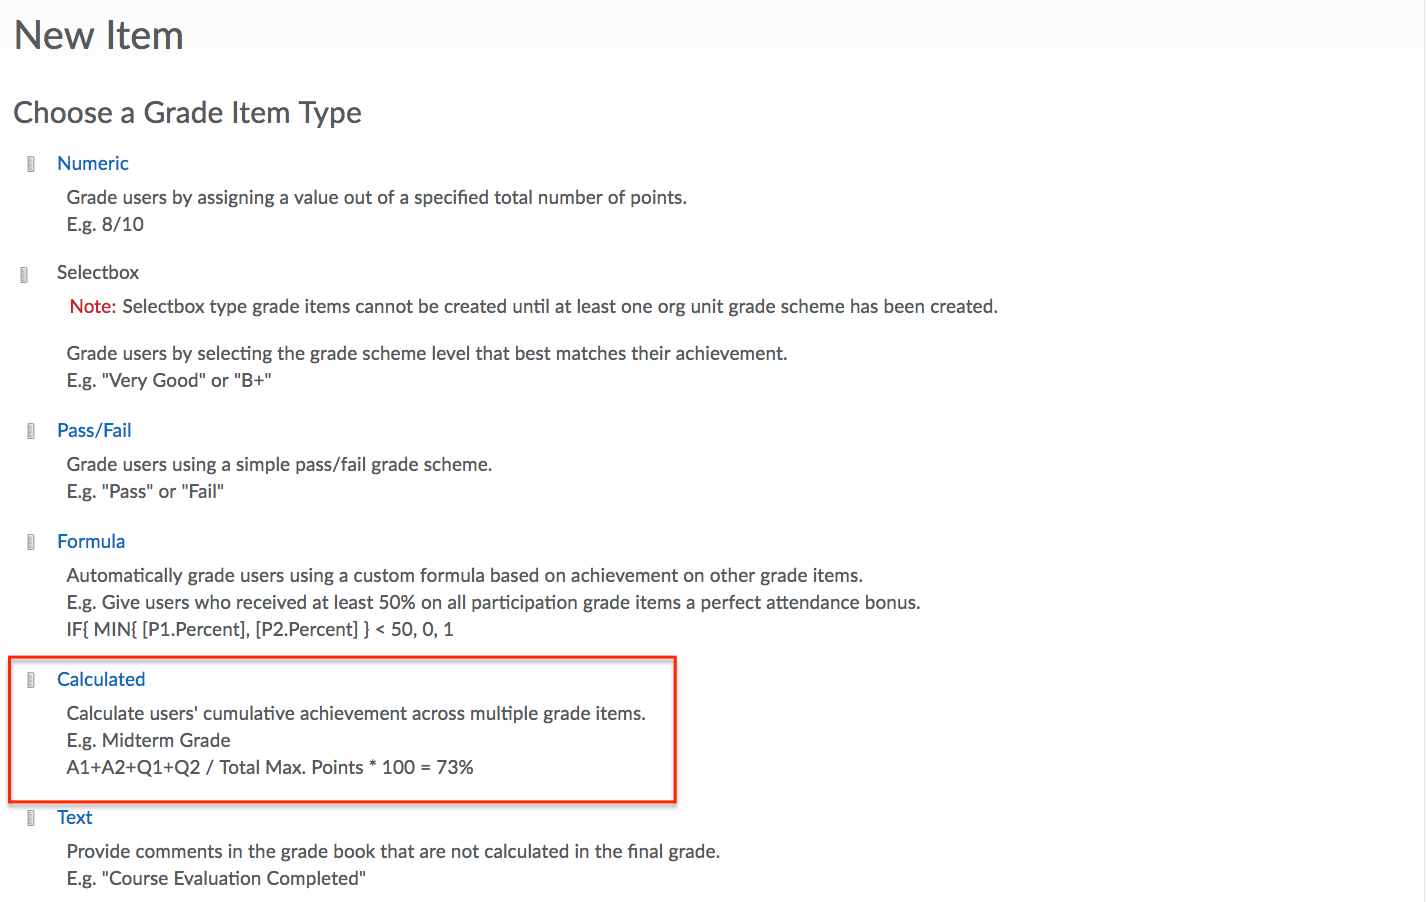
- Choose Calculated as the Grade Item Type.
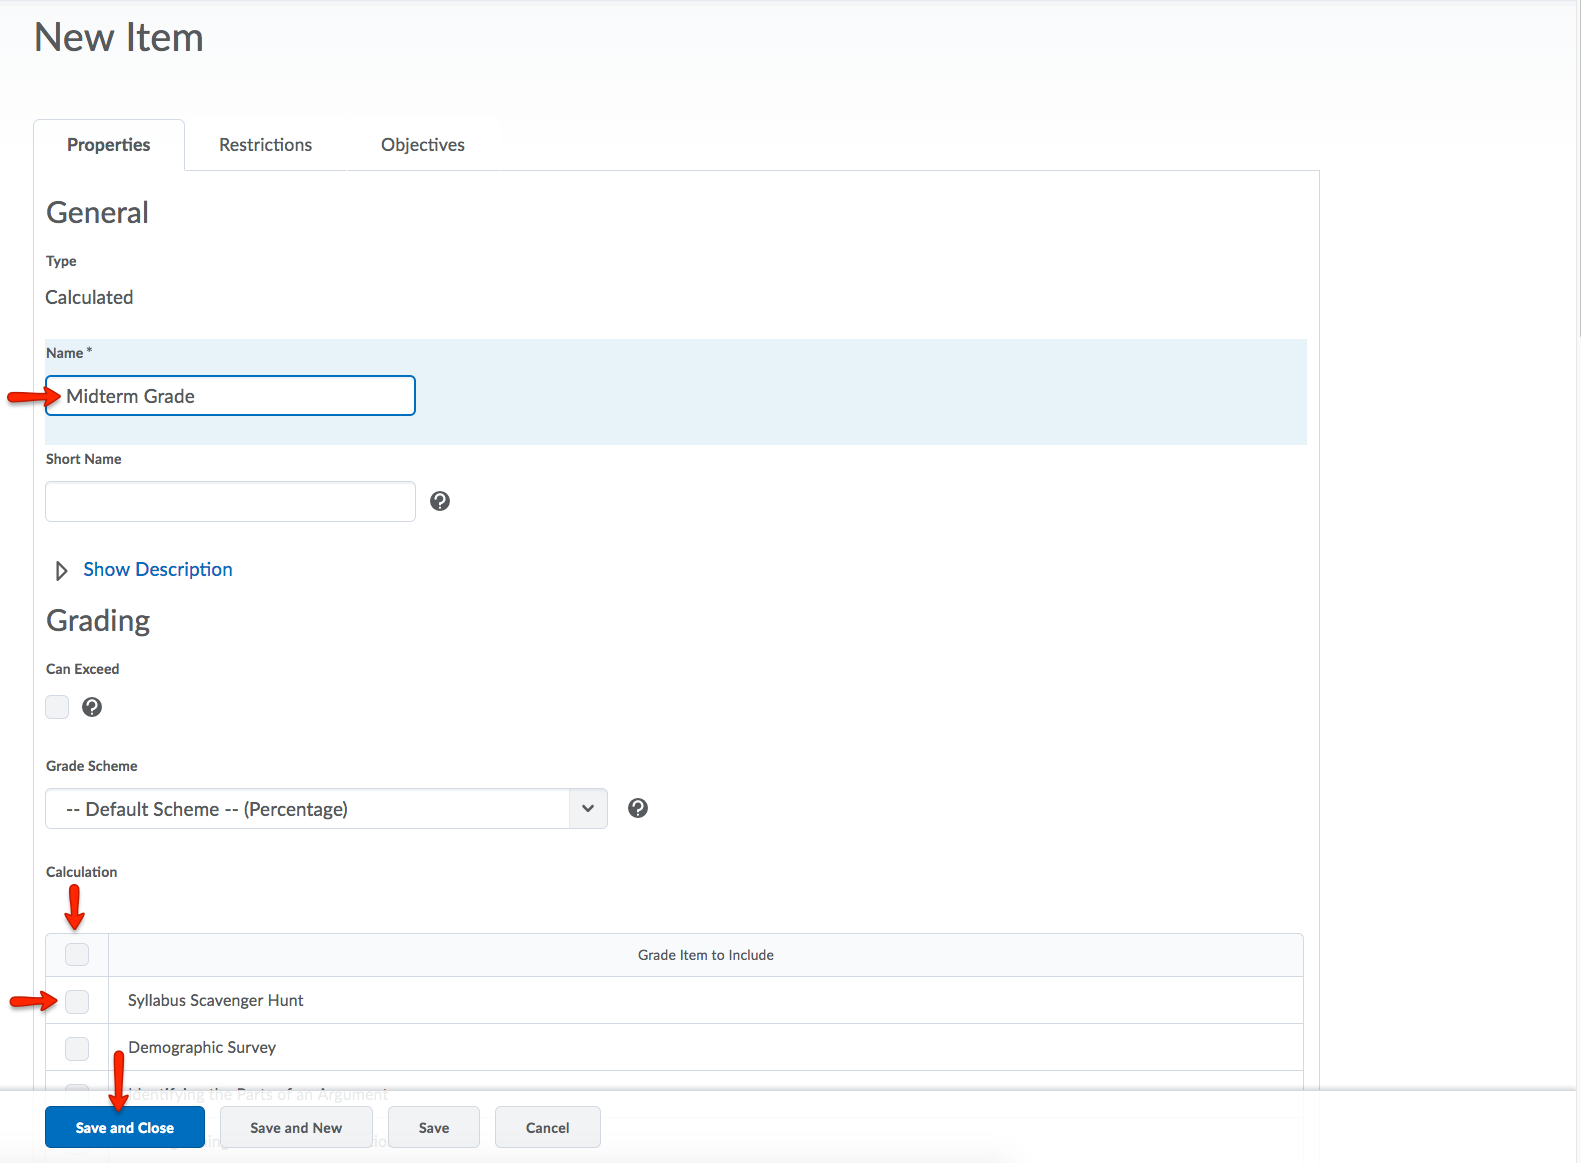
- Name the Calculated Grade Item. Scroll down and select the grade items you want to
include in the calculation. If you want to select all, click the checkbox above the
list of grade items. Click Save and Closeto save the grade item.
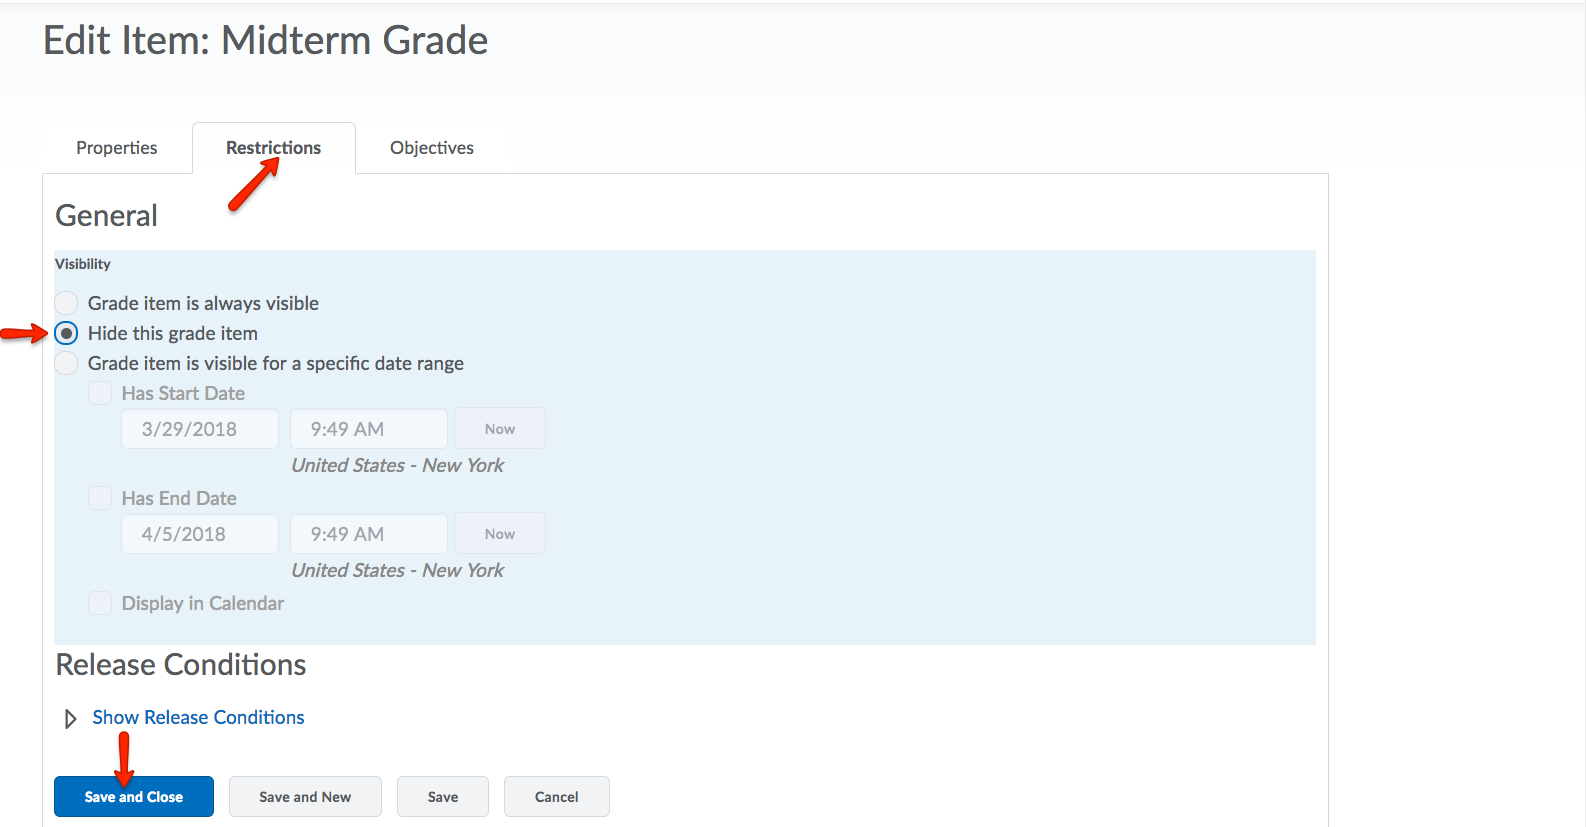
- If you would like to hide this new grade item from your students' view: select the
Restrictions tab of the grade item then click Hide this grade item. Click Save and Close to save the Restrictions for the grade item.
Creating a Final Grade Column for Manual Grade Entry
Creating a final grade column for manual grade entry is an optional alternative to using the Final Calculated or Adjusted Grade columns in eLC. You can manually create a final letter grade column and enter a text letter grade to display to students. Follow these instructions to enter the final letter grade manually instead of using the automated columns provided in eLC.
- Follow steps 1-3 in the Calculating a Midterm Grade instructions above: navigate to your course, select Grades from the course navbar, select the Manage Grades tab, then New and Item.
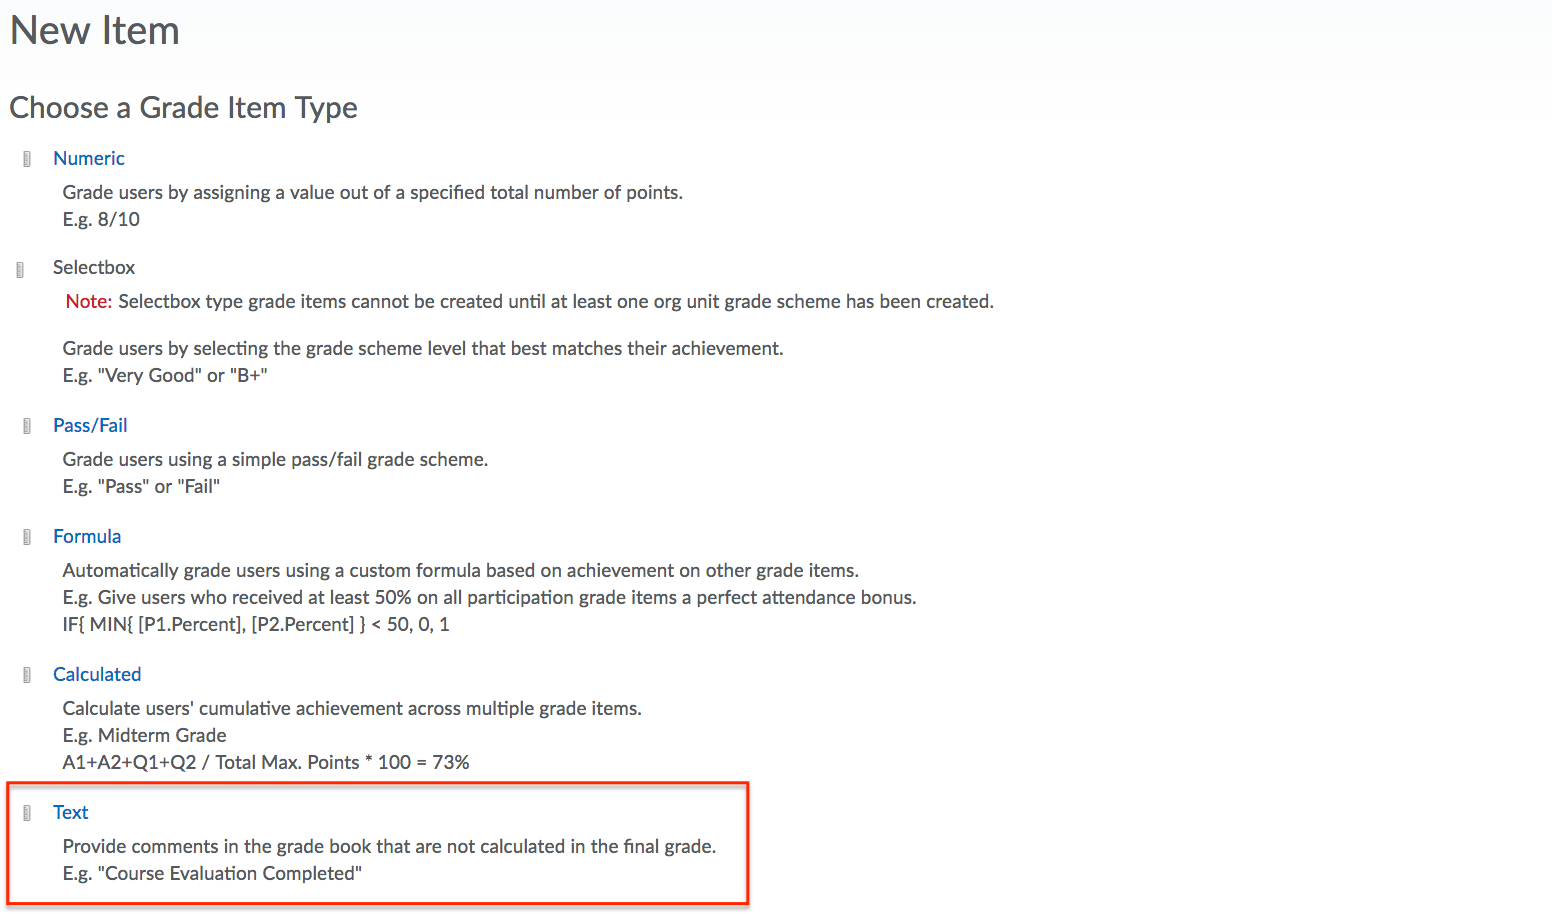
- Choose Text as the Grade Item Type.
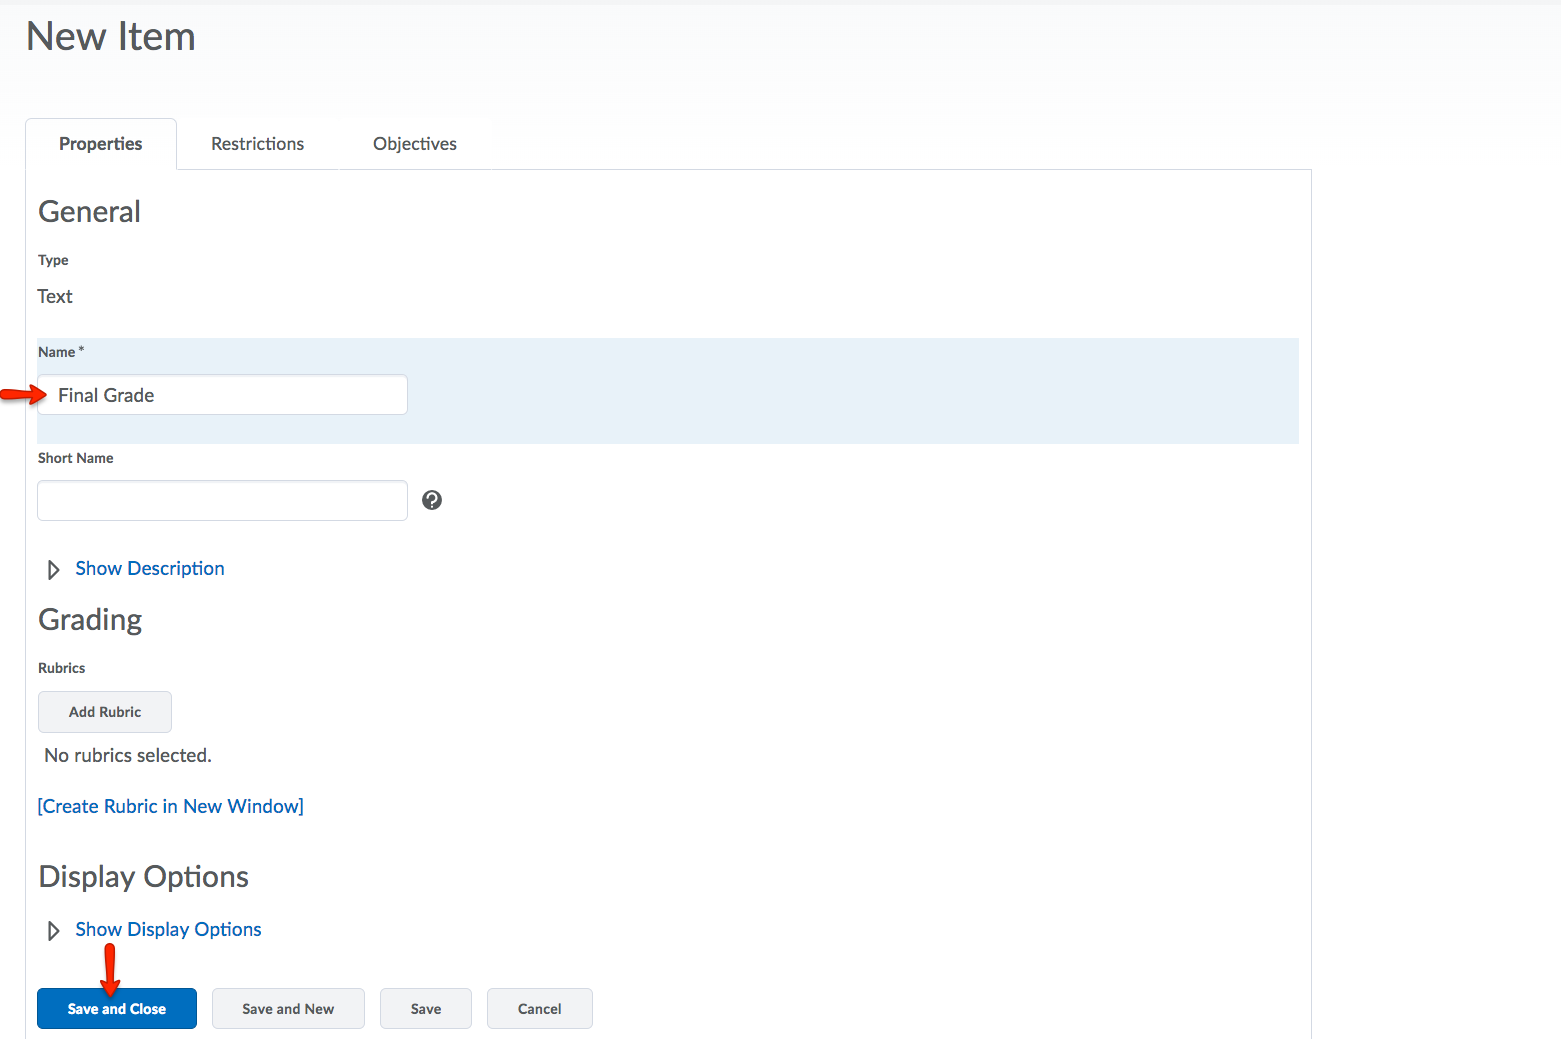
- Name the Text Grade Item. Click Save and Close.
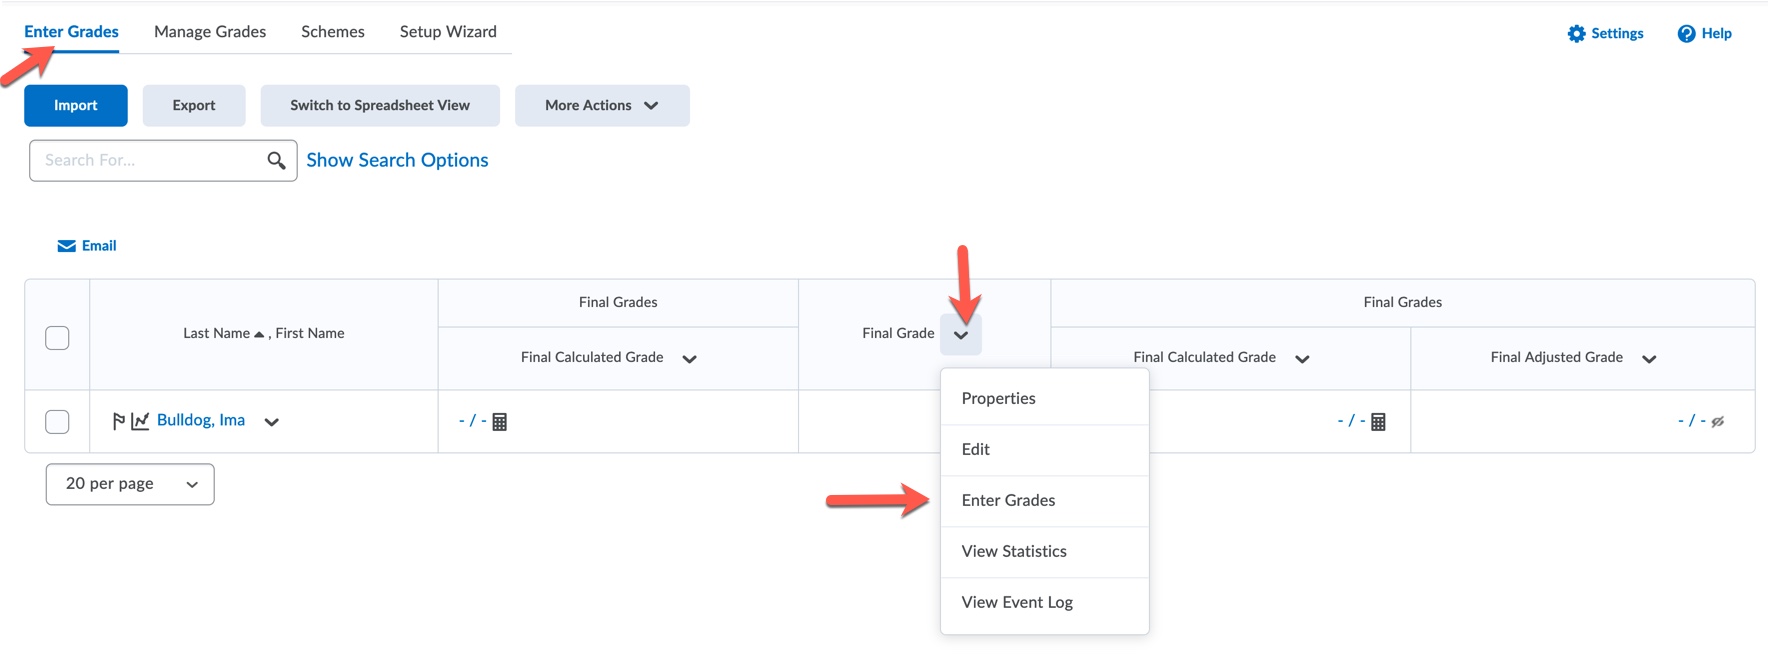
- To enter student letter grades into this new final grade column, select Grades from the course navbar. Next click Enter Grades. Locate the Final Letter Grade column you created, by scrolling right, and click
the dropdown arrow. Select Enter Grades.
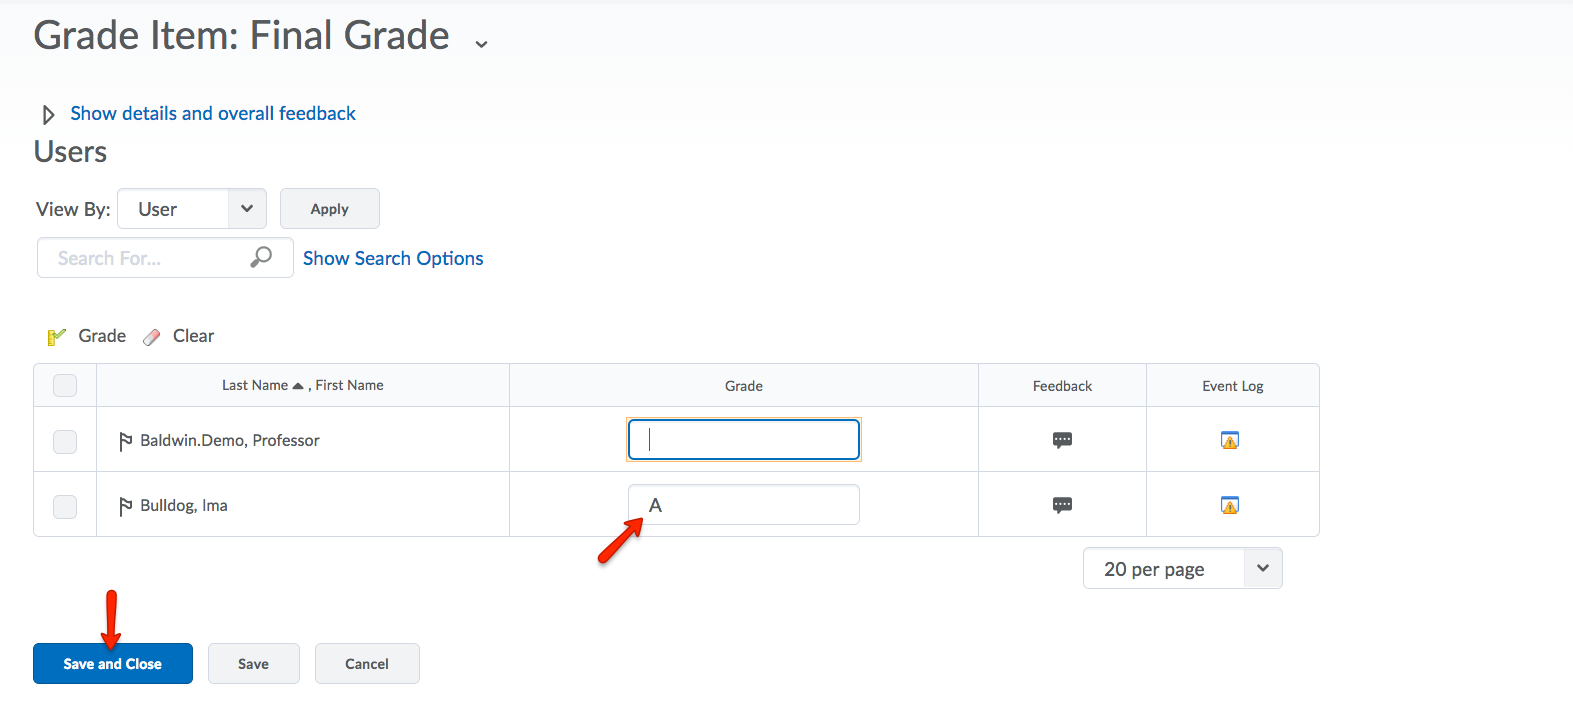
- Enter the letter grades on the Users screen. Click Save and Close when you are finished.
Calculating and Adjusting Final Grades
If students' grades are not showing in the Final Calculated Grade column in your gradebook, you may need to calculate final grades for your course in eLC. In addition, you can make use of the Adjusted Final Grade column to make adjustments to individual student grades.
- Navigate to the desired course and select Grades from the course navbar.

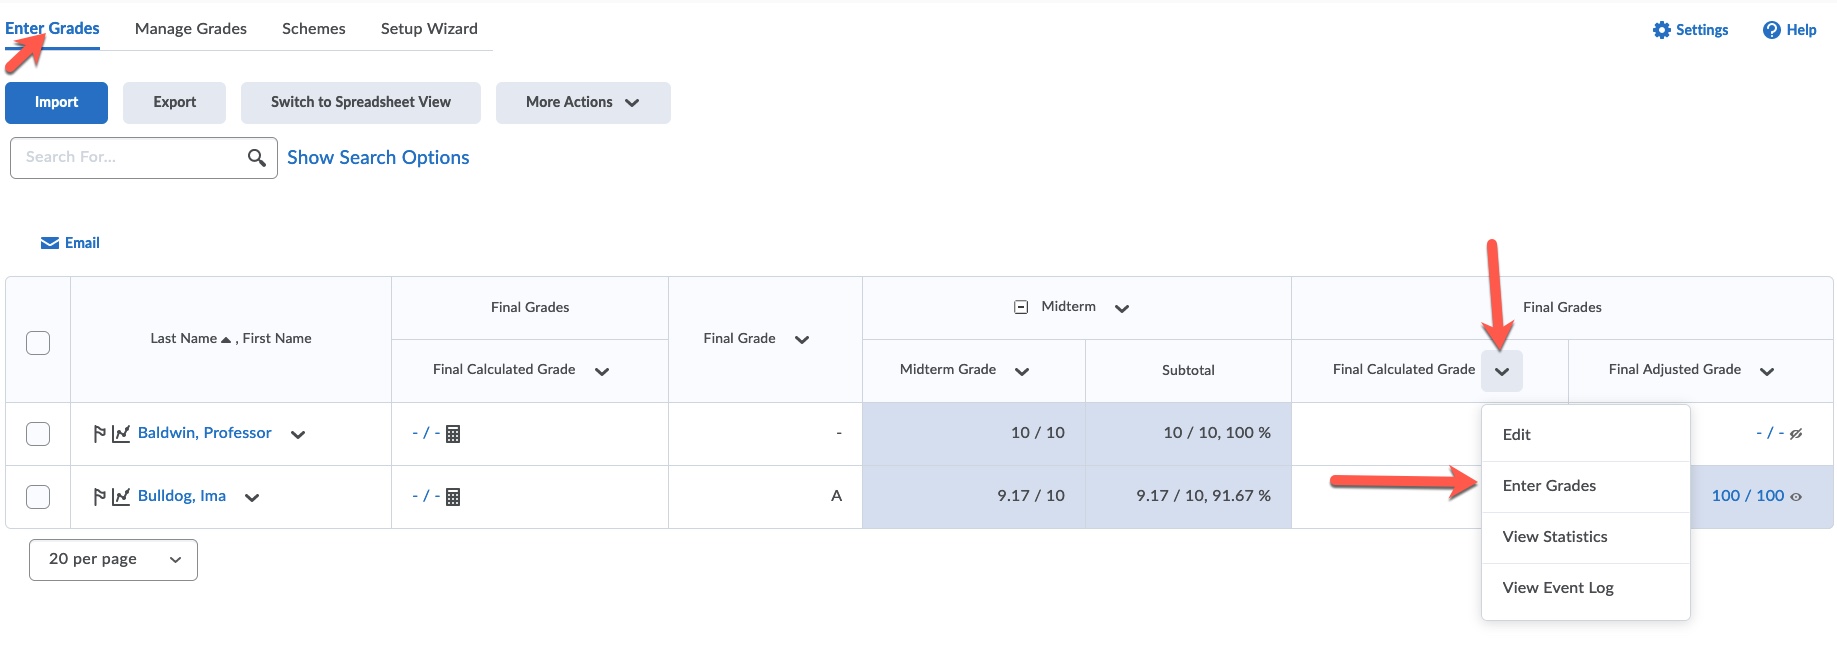
- Select the Enter Grades tab from the grades navbar. Locate the Final Calculated Grade column, click the dropdown arrow and select Enter Grades.
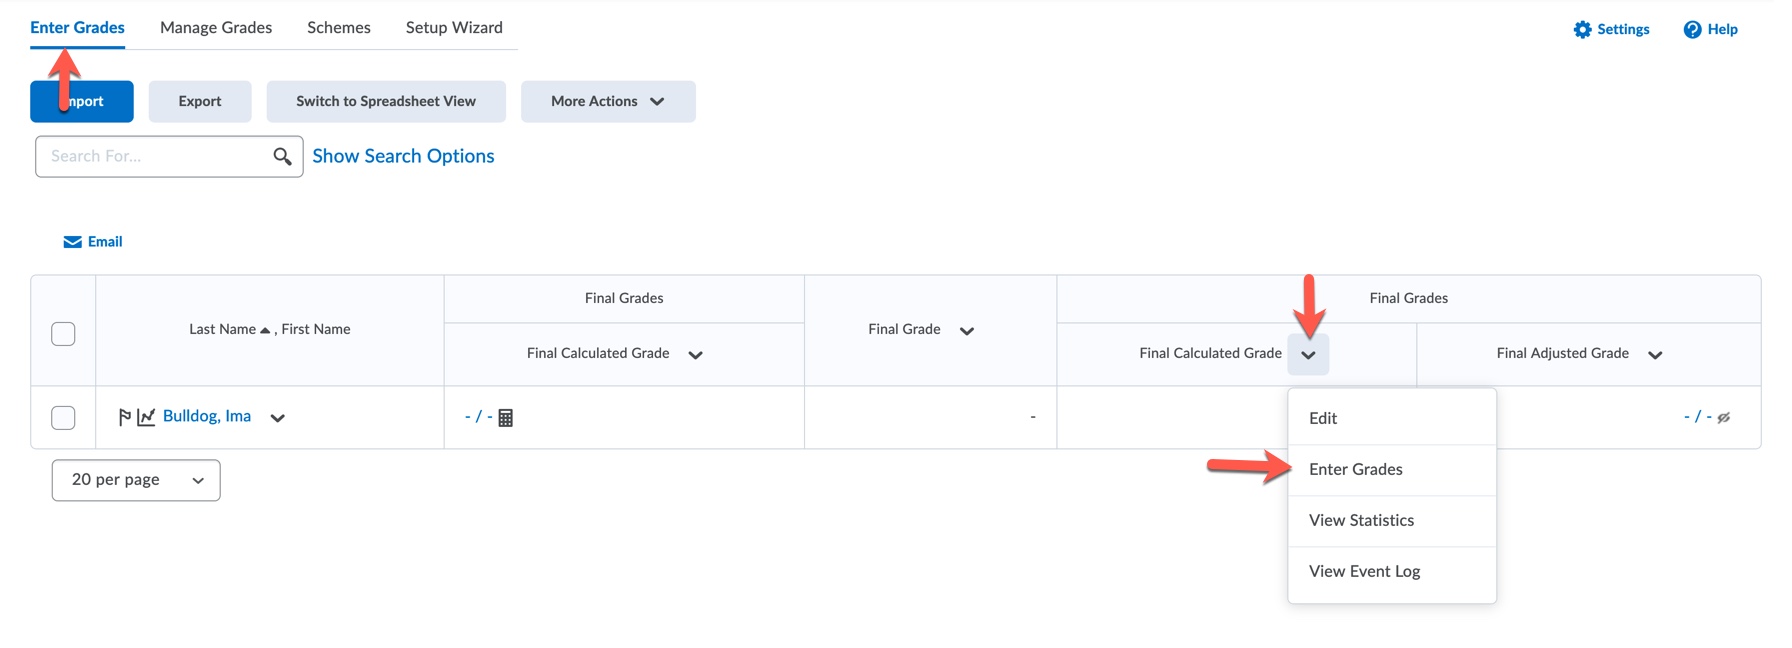
- Select Recalculate Al from the Final Grades dropdown menu.

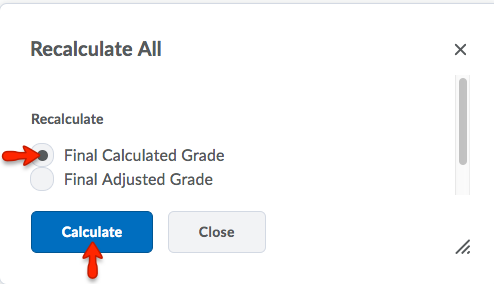
- In a new window, under Recalculate All, select Final Calculated Grade. Click Calculate.
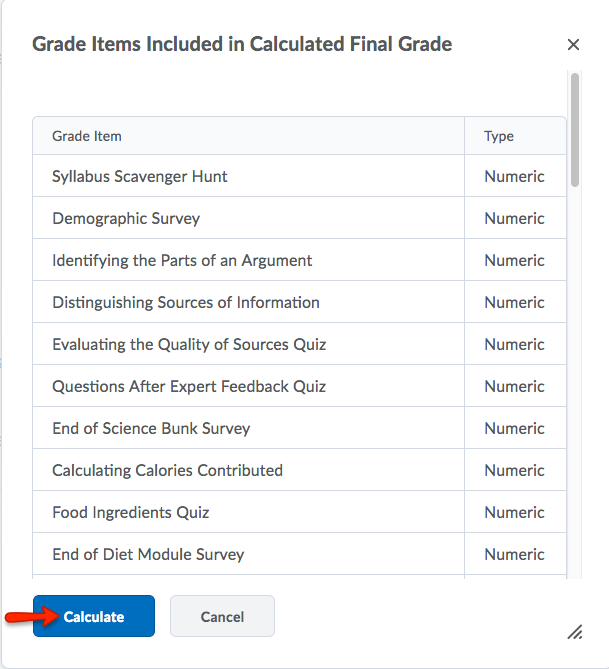
- You will now see a list of all grade items included in the Calculated Final Grade.
If you would like to remove anything from this list, you will need to return to your
gradebook, select to edit the relevant grade item, and select Exclude from Final Grade Calculation. Then repeat steps 1-4 above and review your list again.
- Click Calculate to continue.
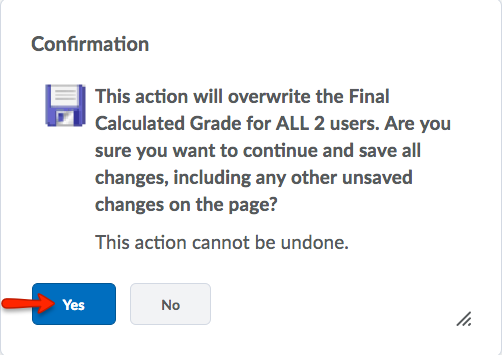
- Click Yes to confirm that you want to calculate the Final Grade.
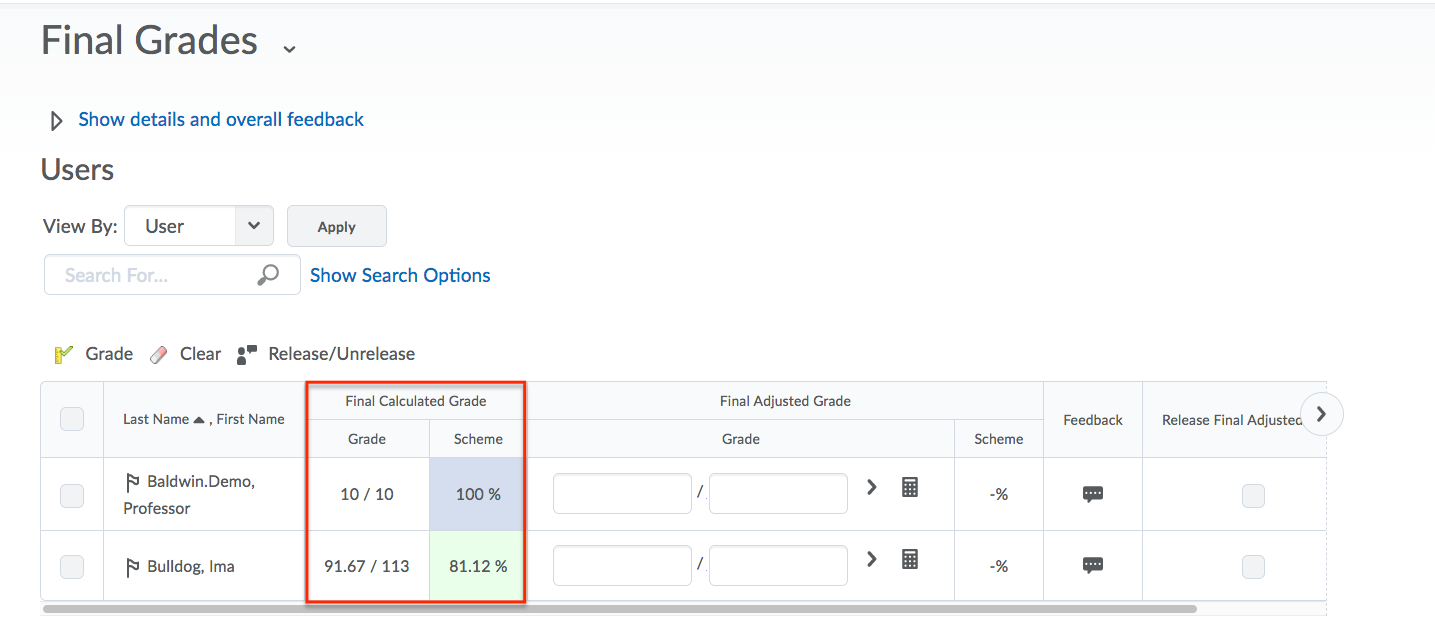
- The Final Calculated Grade now appears in the Final Calculated Grade column.
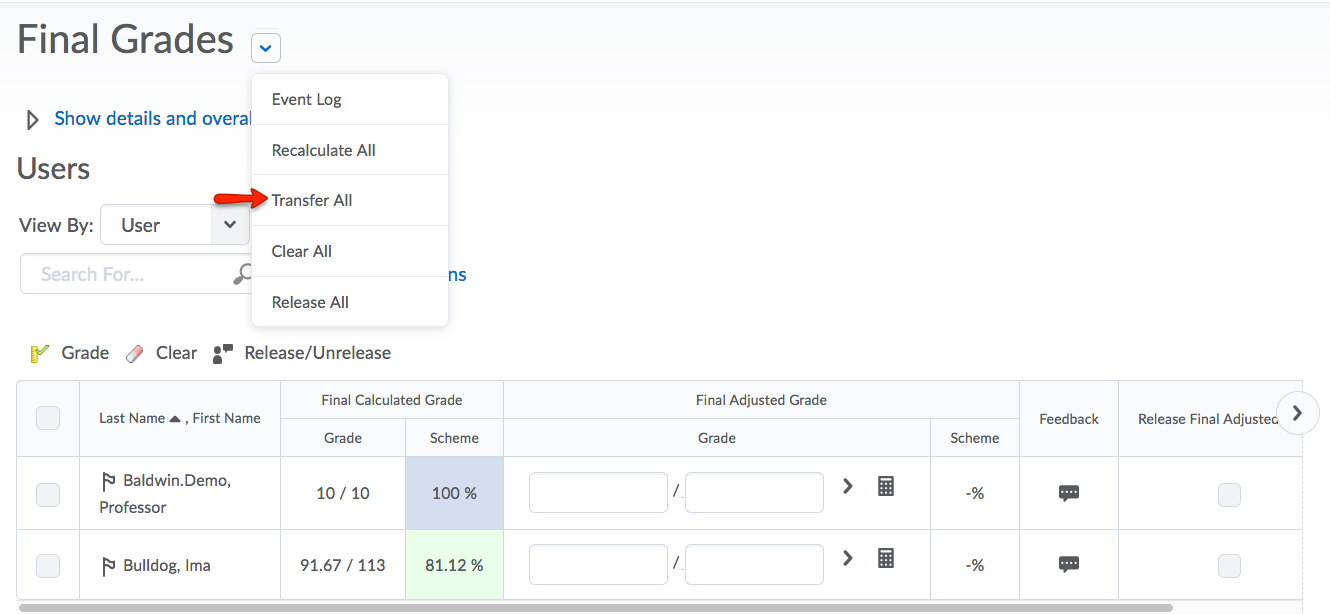
- Optional: The Final Adjusted Grade column allows you to adjust final grades for individual students. To use this option,
you should first transfer your Final Calculated Grade data into the adjusted column. To transfer, select the Final Grades dropdown menu and click Transfer all. Click Yes to confirm.
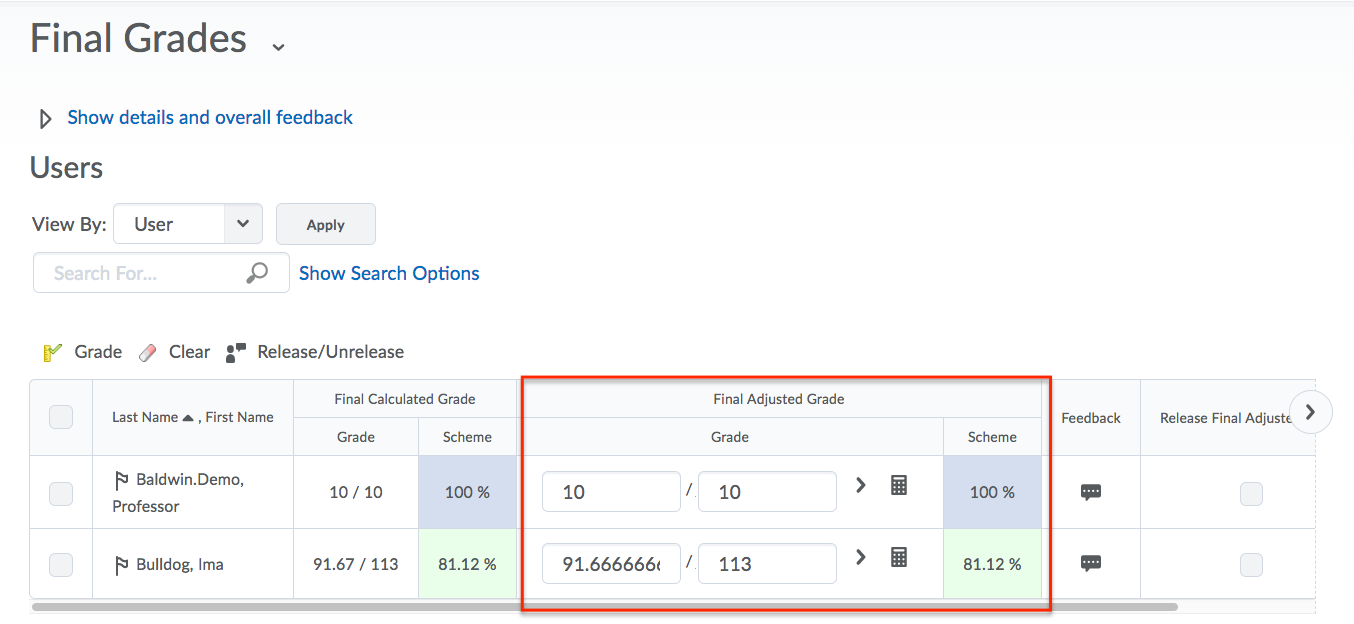
- The Final Calculated Grade now appears in the Final Adjusted Grade column. You can make adjustments to grades in the column before releasing to students.
Releasing Final Grades
Once you have calculated your final grades in eLC, you may want to make them visible to students. This is called releasing final grades. Item 3 in the instructions below provide options for releasing grades to your whole class, or to only selected individual students.
- Navigate to the desired course and select Grades from the course navbar.

- Select the Enter Grades tab on the grades navigation menu. Locate either the Final Calculated Grade or the Final Adjusted Grade column, and click the dropdown arrow. Select Enter Grades.
- To release final grades for all students: From the Final Grades dropdown menu, select Release All.
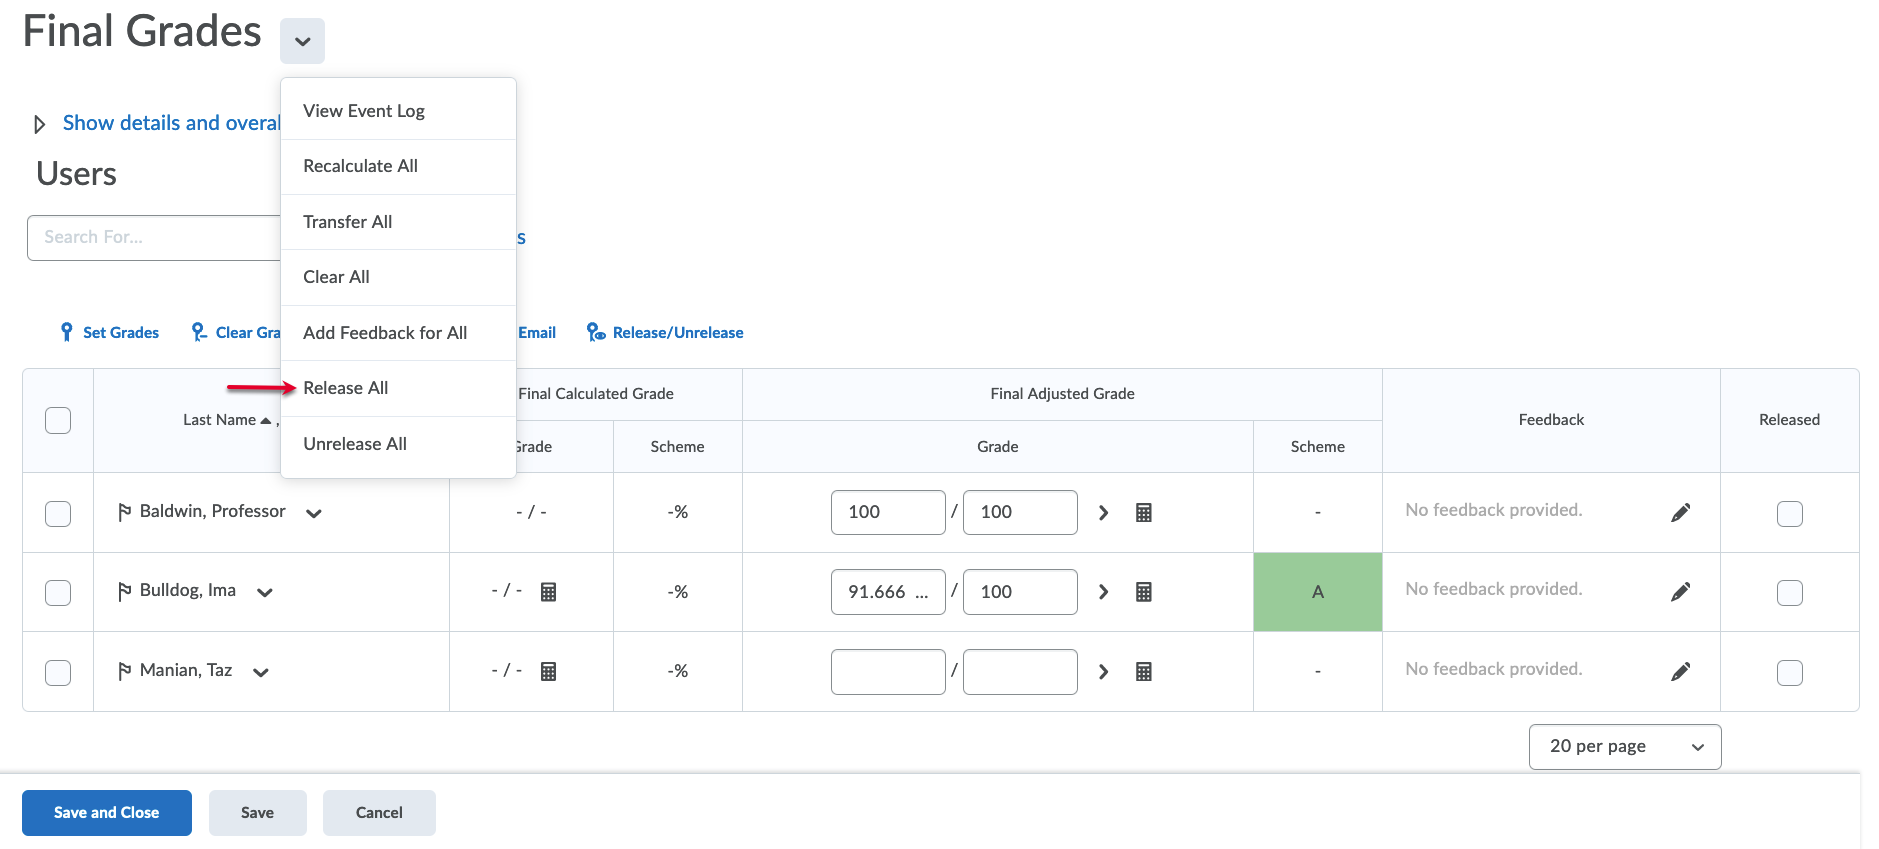
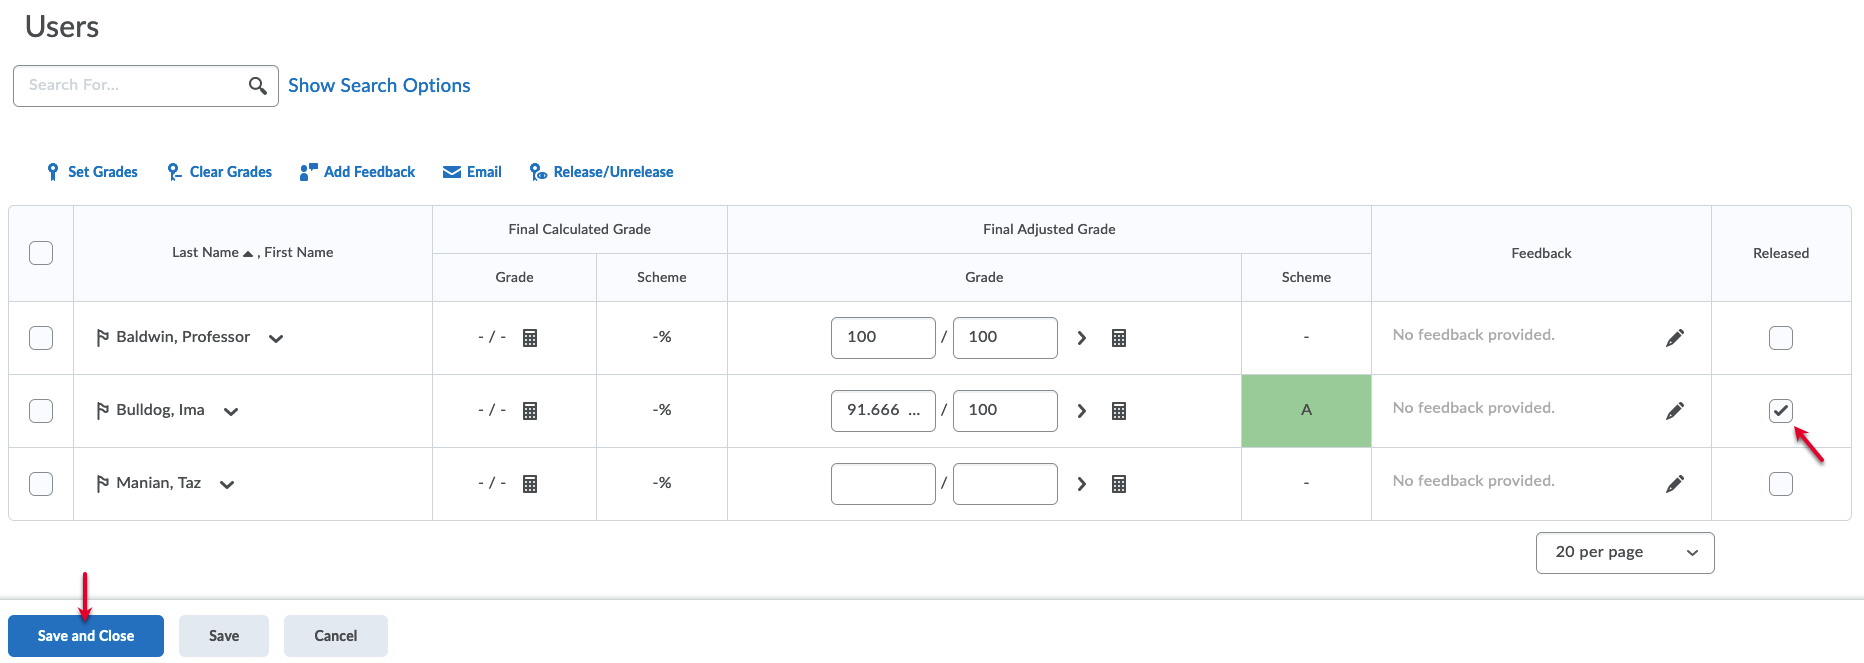
- To release grades for an individual student or set of students: Select the user(s) whose grade you want to release, click Release/Unrelease, then click Save and Close.
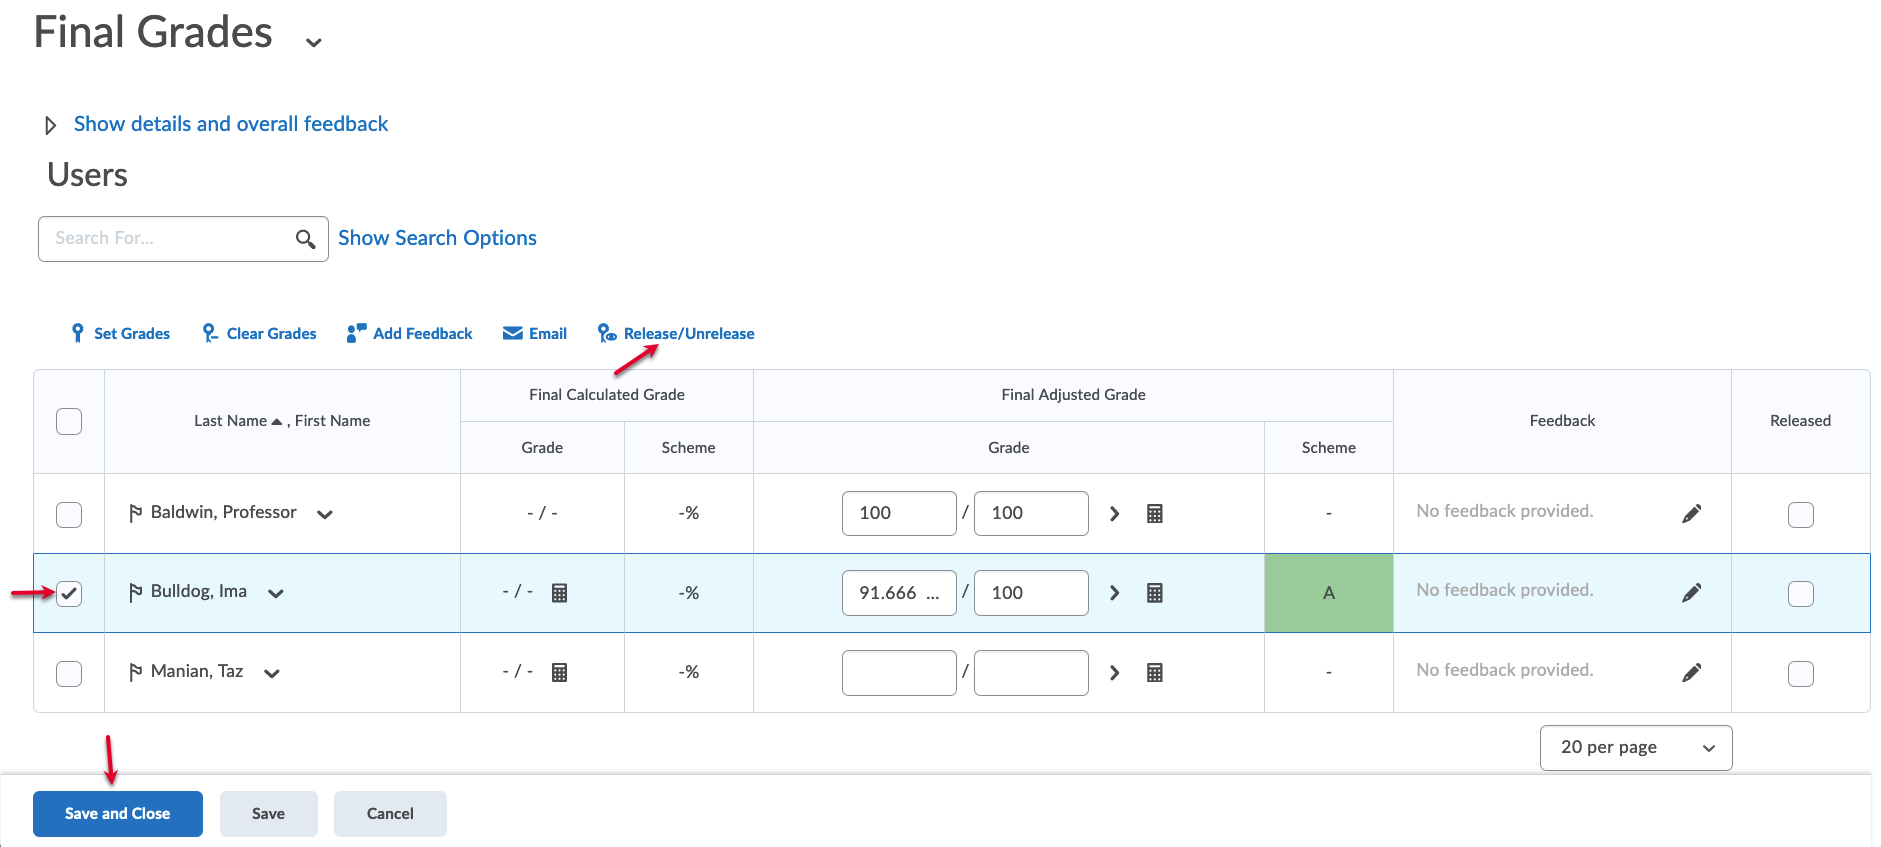
- Alternative Option (individual student grades release): Select the Released check box for the user(s) whose grades you want to release, then click Save and Close.
