Intelligent Agents
The Intelligent Agent tool is used to monitor a course to find activity that matches criteria set by you. The tool can also be set up to send emails when it finds certain types of activity. For example, you might set up an intelligent agent to email students with grades below a certain level, check for users who have not logged in within a specific number of days, or check for users that have or have not viewed a specific content topic.
Learn about:
- Creating an Intelligent Agent
- Running an Intelligent Agent Manually
- Performing a Practice Run for an Intelligent Agent
- Creating Categories
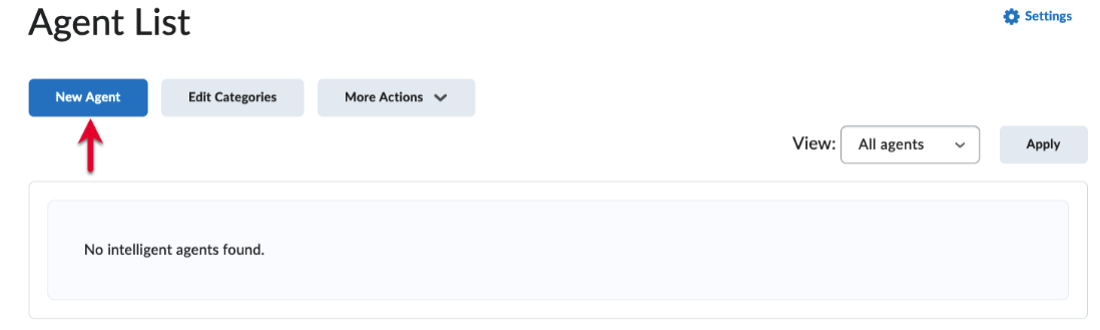
Creating an Intelligent Agent
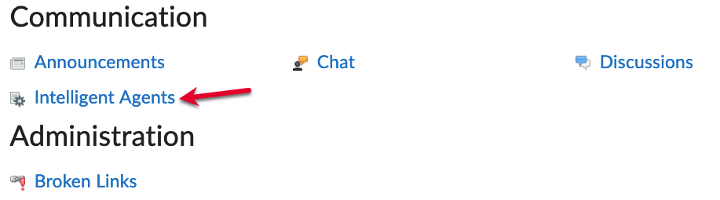
- To create an agent, on the navbar, click Course Admin.

- Under Communication, select Intelligent Agents.

- On the Agents List page, click New.
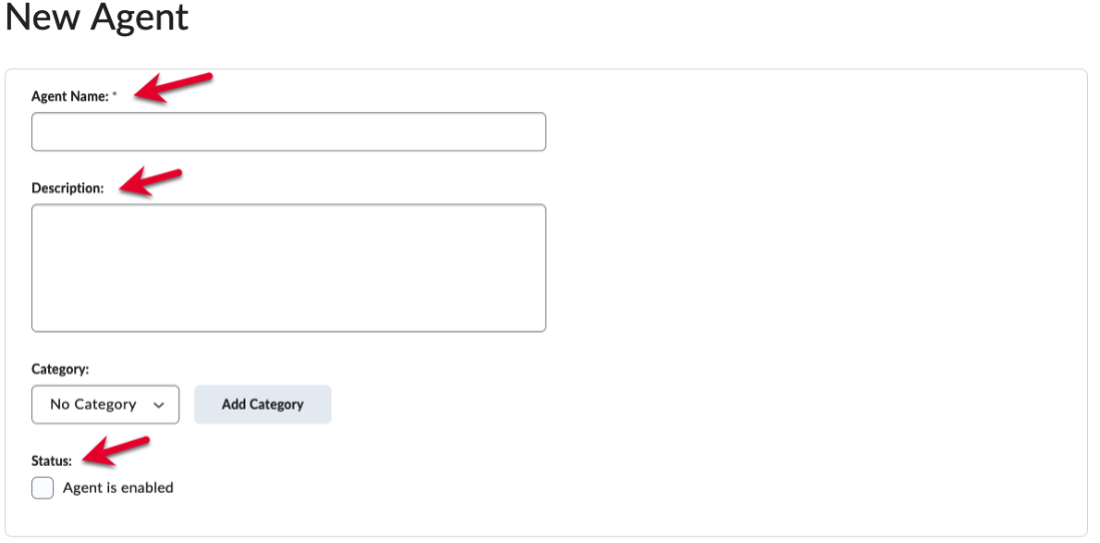
- In the Agent Details area, enter Agent Name and Description. If you would like the agent to be active, select Agent is enabled.
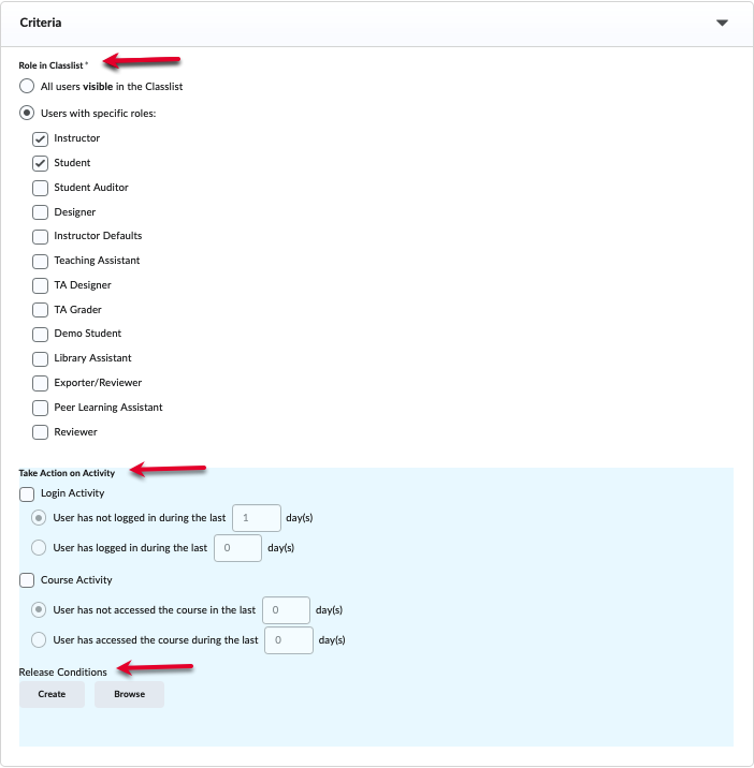
- In the Agent Criteriasection, do the following (only the first is required):
- Role in Classlist: Select the user role(s) that the agent will use in the criteria. Select either All users visible in the Classlist or Users with specific roles (to restrict the list the agent considers).
- Take Action on Activity: Use these options if you would like the agent to examine users' login and/or course access activity.
- Release Conditions: If you want your agent to run when a specific condition has been met, use the options
here to either create a new condition or use a release condition that has already
been created in this course (e.g., only users who have not completed Quiz 1, only
users in Group 4, etc.)
- In the Agent Action area, do the following:
- Select how often you want the agent to take action.
- If you want to send email, select Send an email when the criteria are satisfied.
Note 1: Intelligent agents stop running and are automatically disabled if the course is inactive, over (end date passed), or deleted. You can still set up a practice run or a manual run of an intelligent agent at any time in a course with a passed end date.
Note 2: Unless otherwise restricted, intelligent agents will run every day at a pre-set time. So if you set the agent to take action every time an agent is evaluated – and if that action involves sending students emails – then they will be emailed every day until they no longer satisfy the agent's criteria. Be sure to consider carefully whether this is the action you are hoping for!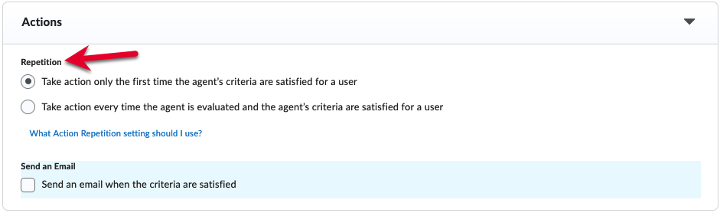
- In the Email Format area, enter your email details.
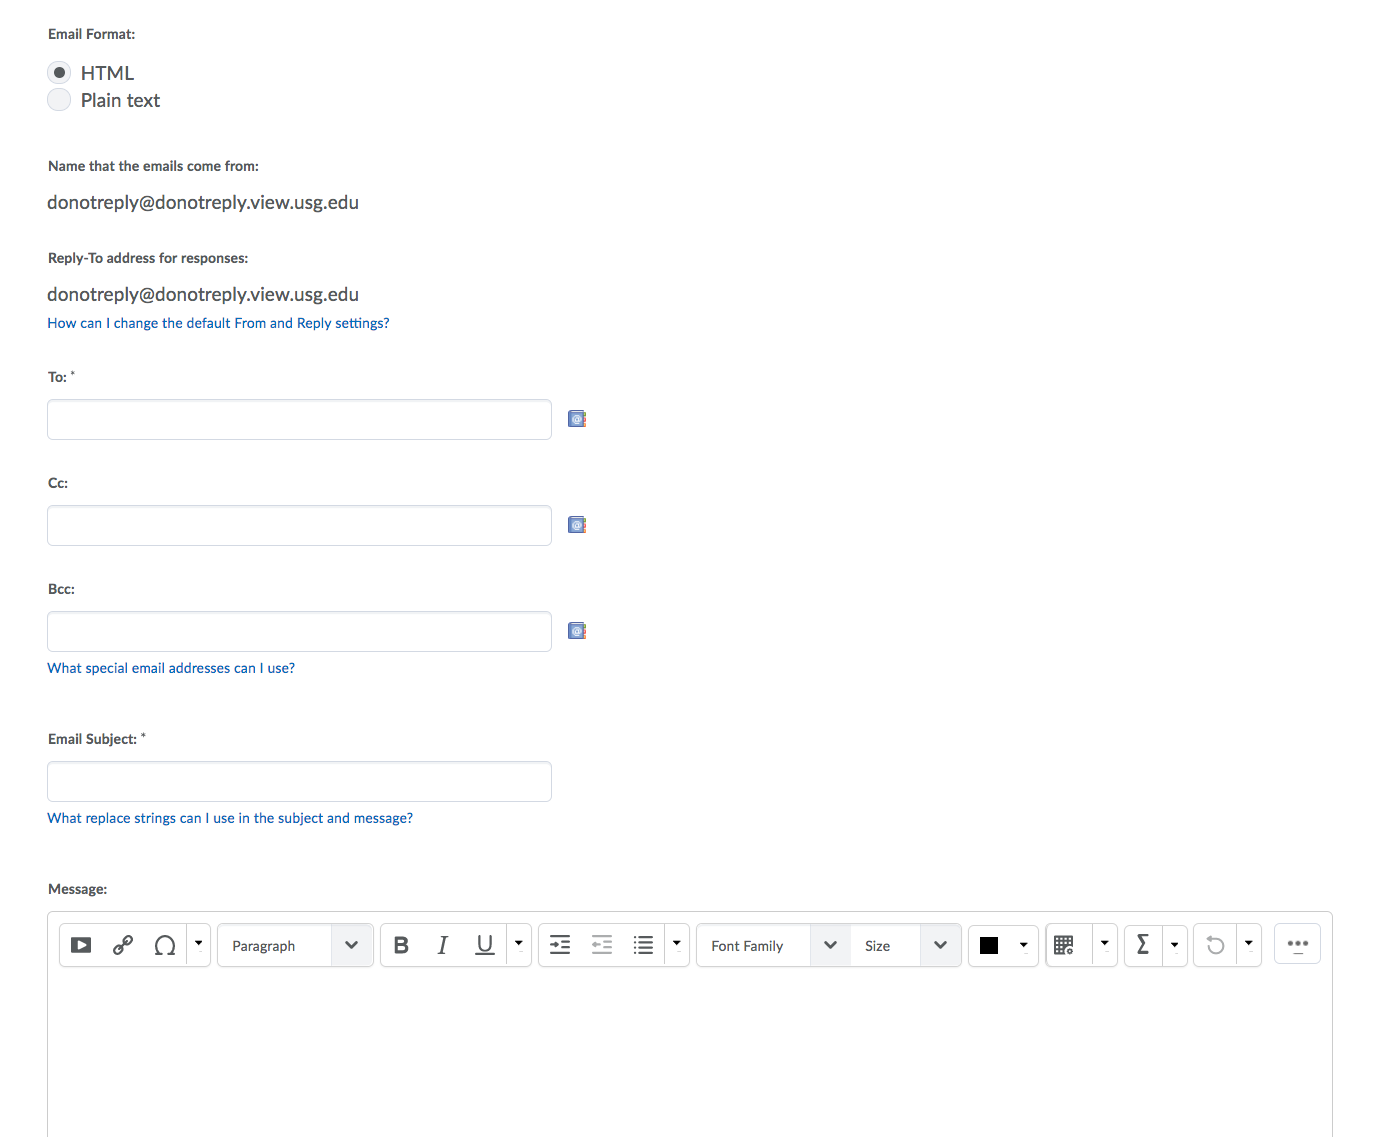
- If you want to email your classlist using the intelligent agent, type the replacement string {InitiatingUser} in the ‘To:’ field. This replacement string ensures all students enrolled into the class receive your email.
- Click Save and Close.

Note: You can also copy One-time run agents and import them into other courses, provided they haven't been run; once a One-time agent has been run it can no longer be copied or imported.
Running an Intelligent Agent Manually
Typically, agents are set up to run automatically. If you do not have a regular schedule set up for an agent, you must run it manually.
When you run an agent manually, it sends a confirmation email to the user that requested or set up the agent. This email contains the following information: org unit code and name, which agent ran, time and date the request was submitted, time and date the request was finished, and whether the agent took action.
You can set up a manual run of an intelligent agent at any time (even if the end date has been passed), and the agent does not need to be enabled in order to set up a manual run.
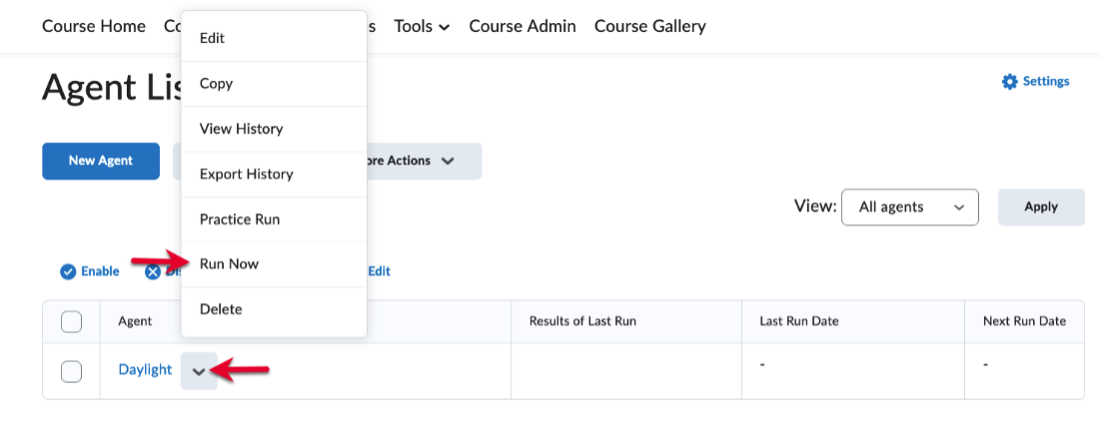
- To manually run an intelligent agent, first, on the navbar, click Course Admin.

- Under Communication, select Intelligent Agents.
- From the dropdown menu of the agent you want to run manually, click Run Now.
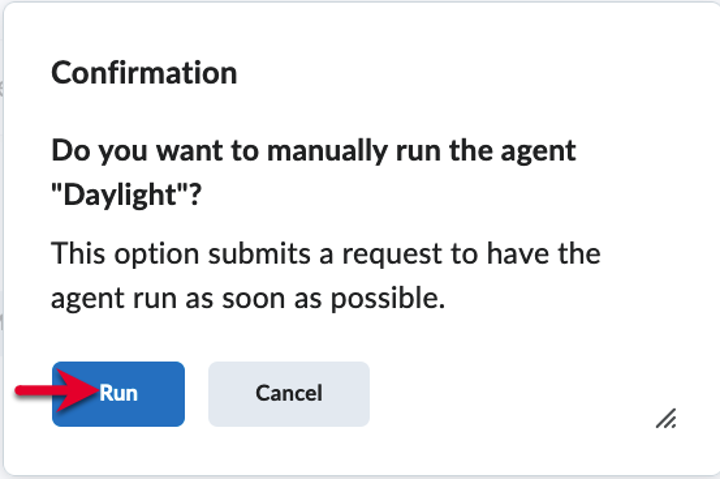
- To confirm the manual run, click Run.
Performing a Practice Run for an Intelligent Agent
You can have an agent perform a practice run to see who will be identified by the agent without sending those users an email. Agents do not need to be enabled in order to perform a practice run, and no emails will be sent to other users as a result of the practice run.
- To perform a practice run for an intelligent agent, first, on the navbar, click Course Admin.
- Under Communication, select Intelligent Agents.
- From the dropdown menu of the agent you want to perform a practice run for, click
Practice Run.
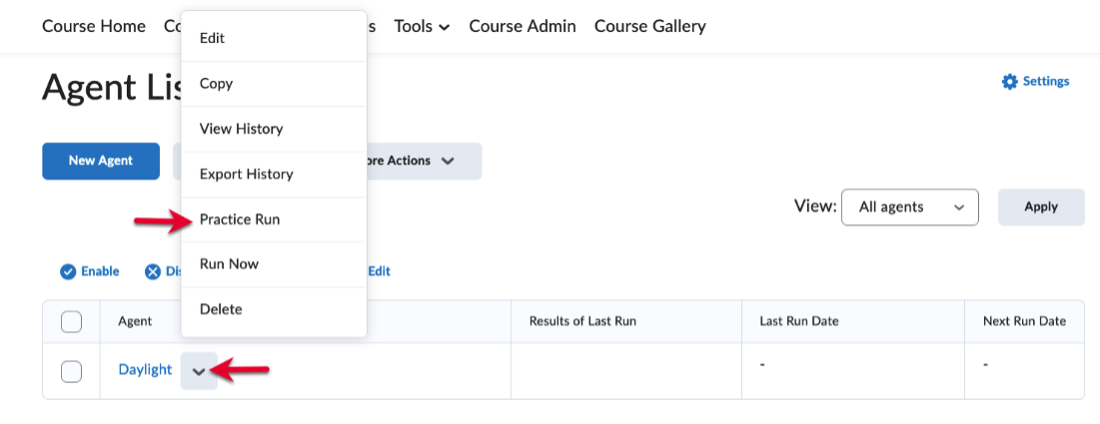
- To confirm the practice run, click Run.

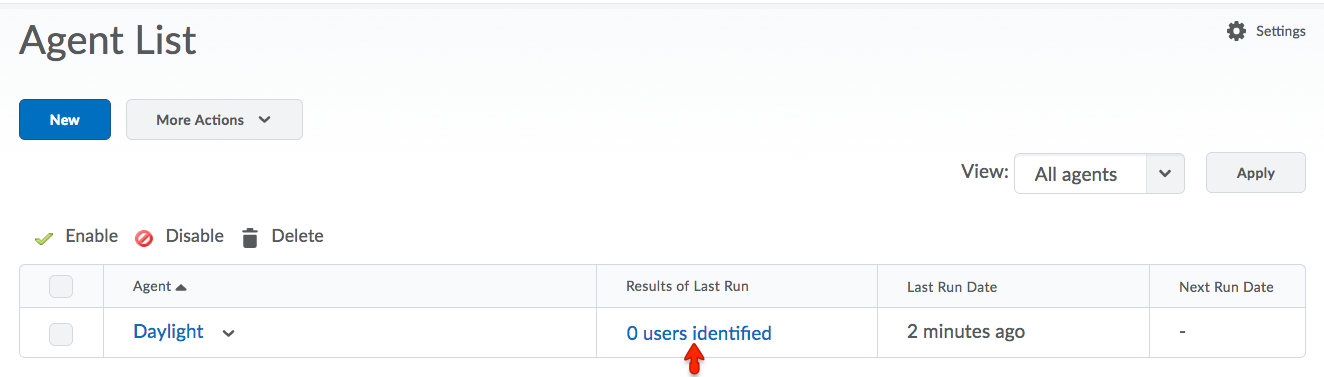
- To view the users identified, on the Agent List, in the Results of Last Run column, click the link.
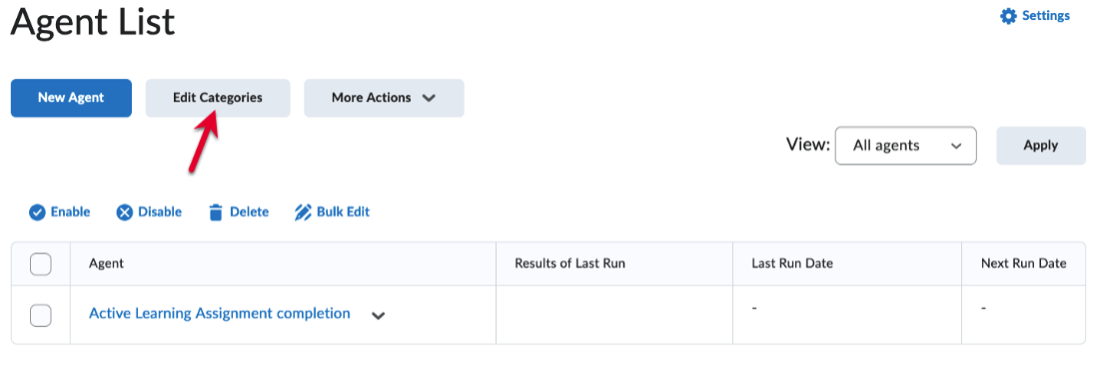
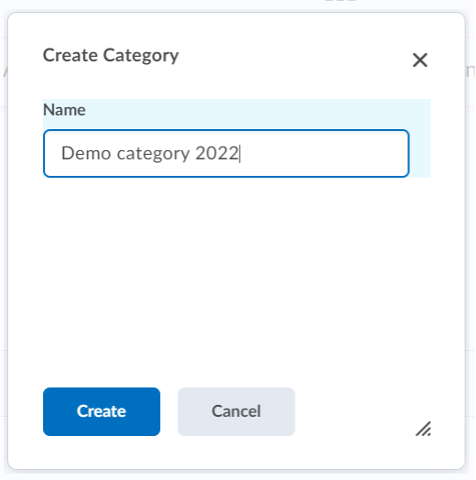
Creating Categories
You can assign categories to intelligent agents to keep track of and organize agents that perform related or similar functions. For example, you can create a category such as “Absence in the course” and assign it to all intelligent agents that are designed to evaluate and/or communicate about student absences.
To create a category from the Intelligent Agent list page, follow these steps:
- Click Edit Categories
- Click Add Category
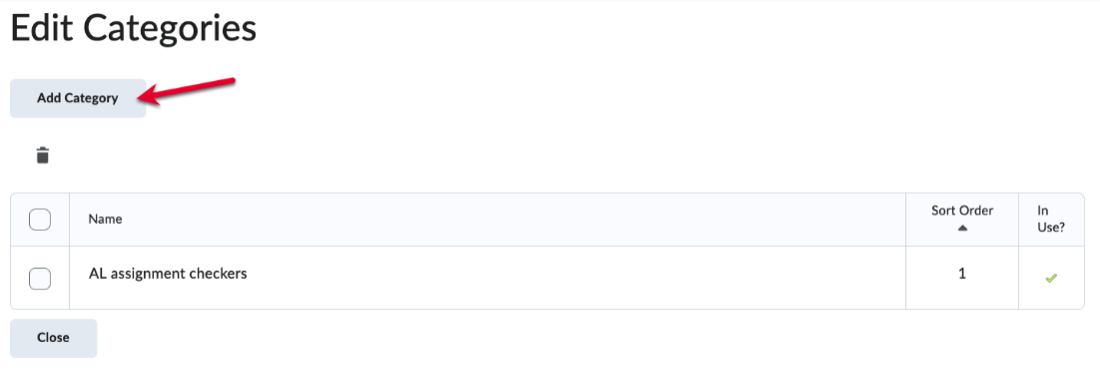
- Enter a name for the category and click Create.
- The category will be created and available in the dropdown list of categories seen in the edit/create new intelligent agent page.
Last Updated: 11/05/2024