Rubrics
A rubric is a powerful tool and a simple way to set up grading criteria for assignments--one that defines in writing what is expected of a student to get a particular grade on an assignment. eLC allows rubrics to be created at the course level and be used to assess a variety of items, from gradebook items like quizzes or papers to discussion posts.
Learn about:
Creating Rubrics
- From the course navbar, access the Rubrics tool. It may be located under the Tools dropdown, and can also be found within Course Admin.
- Click New Rubric to open the rubric editor
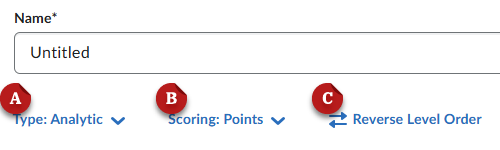
- Choose the rubric Type [A]:
- Analytic - These rubrics display levels of achievement as columns and assessment criteria as rows. Analytic rubcis include an overall achievement by totaling the criteria.
- Holistic - A rubric with a single criterion which you can use to evaluate a student's overall performance on a task.
- Choose the rubric Scoring [B]:
- Points - Applies the same point levels to each rubric criterion.
- Custom Points - Allows you to customize the point values for every level at every criterion.
- No Score - Allows you to use a rubric to provide feedback without a score or grade.
- (Optional) Use Reverse Level Order [C] to easily swap the order of the levels.
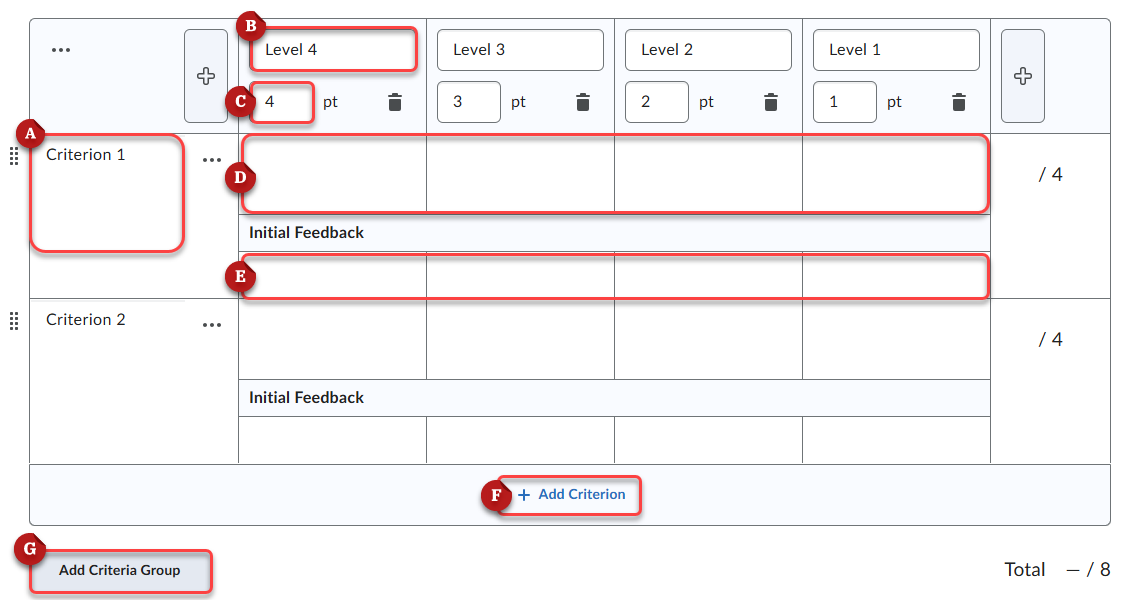
- Use the editor to create your rubric:
- Type the criterion names.
- (Optional) Type the level names.
- Modify the level point values for your achievement levels.
- Type the criterion labels for the individual levels e.g. "Meets Expectations," "Exceeds," etc.
- Type the initial feedback you want to provide for students who achieve that level for that criterion.
- Click the Add Criterion button to create more rows as needed.
- (Optional) Click Add Criteria Group to create groups of related criteria in the same rubric.
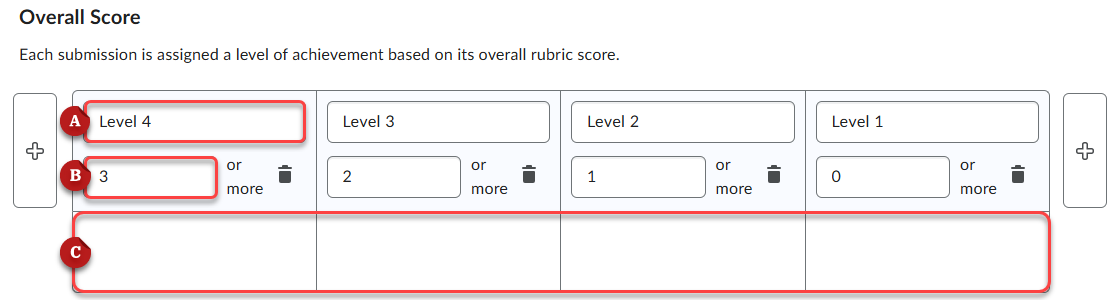
- (For analytic rubrics only) Adjust the Overall Score
- Type the level name for the overall score levels.
- Modify the point totals needed to reach each overall score level.
- Type the overall feedback that applies to each overall score level.
- Modify the rubric Options
- Rubric Visibility - Decide if the rubric will be visble to students (recommended), hidden, or hidden until feedback is published.
- Score Visibility - Decide to show or hide the score from students.
- Description - (Optional) Type a description of the rubric for your personal reference. This is not visible to students.
- Advanced Availability - Choose if you want to allow associations in Competencies and in ePortfolios.
- When you are finished creating your rubric, scroll to the bottom and click Close.
Note: Rubrics save automatically as you edit them. The saved and publication status is visible in the top-right corner.
Editing Rubrics
You can only edit rubrics in the org unit to which they belong. Also, rubrics can not be edited once they have been used to evaluate students.
- From the course navbar, access the Rubrics tool. It may be located under the Tools dropdown, and can also be found within Course Admin.
- Click the title of the rubric you want to modify to open the rubric editor.
- Make the changes you want using the rubric editor. Specific information about the rubric editor is explained above.
- When you are finished creating your rubric, scroll to the bottom and click Close.
Note: Rubrics save automatically as you edit them. The saved and publication status is visible in the top-right corner.
Attaching Rubrics to Assignments and Discussions
You can attach your rubrics to assignment and discussion tasks in your course. This allows you to grade these tasks using the rubric.
- Start by creating a new assignment or discussion, or by editing an existing one.
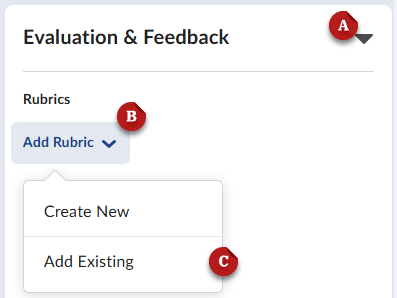
- Open the Evaluation & Feedback [A] settings
- Click Add Rubric [B]
- Click Add Existing [C] (You can also Create New if you want a new rubric)
- Search to find and select the rubric you want to add.
- Click Add Selected
- The rubric will display in the Evaluation & Feedback menu for preview.
- When you are finished, click Save and Close
Last Updated: 11/15/2024