Question Library
The Question Library is a central repository that stores and archives questions which you can reuse within a course. You can use sections within the Question Library to organize your questions by type and topic, making it easier for you to find questions for your quizzes, surveys, and self assessments.
Learn about:
- Creating Sections
- Creating and Adding Questions
- Adding Sections and Questions to Quizzes
- Creating a Question Pool
Creating Sections
Sections help you to organize questions into groups. They are also useful if you want to quickly add batches of questions to a quiz all at once. They are also necessary if you intend to create and use question pools.
- Open the Quiz tool: from your course navbar, click Tools and select Quizzes.
Alternatively, if you have the Quizzes option configured on the navbar, click it to access quiz tools.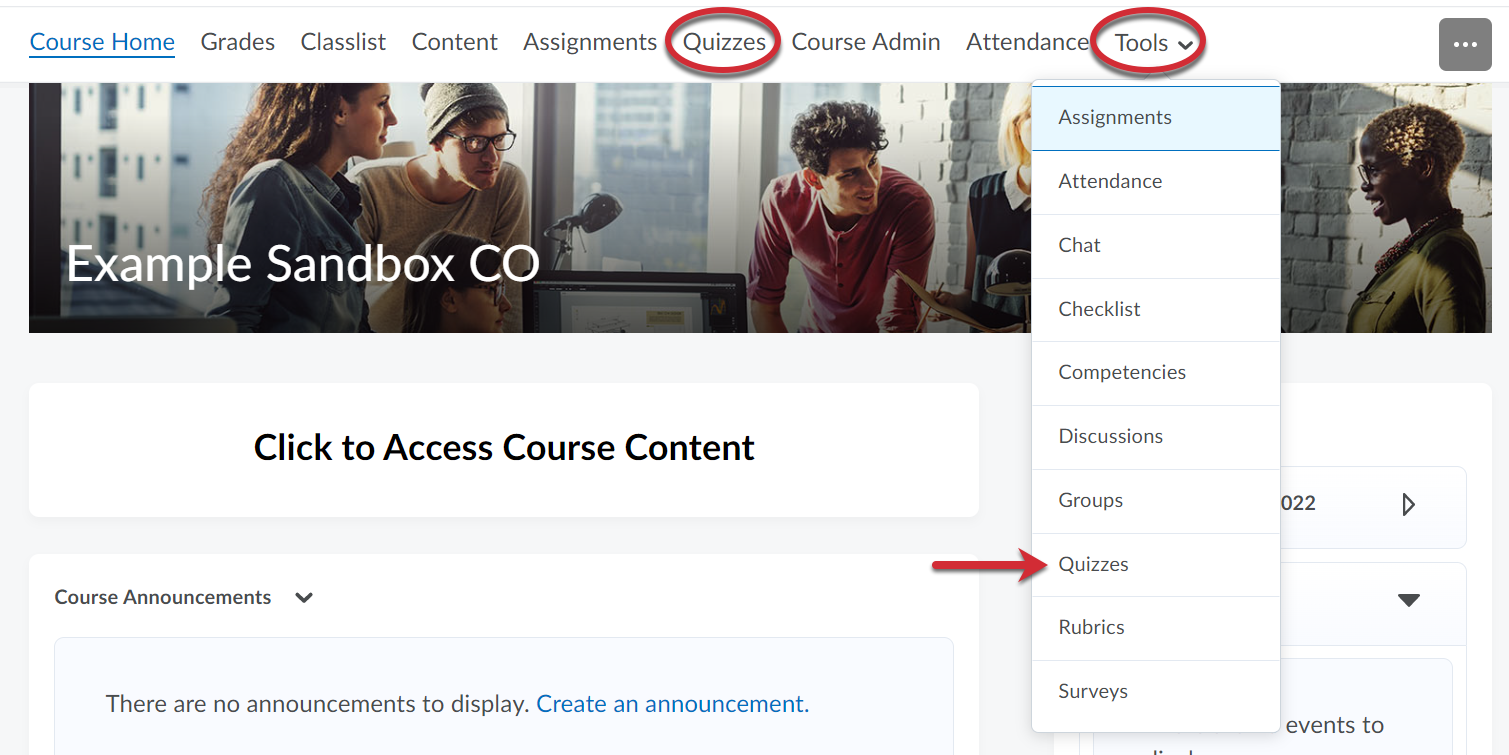
- Click Question Library.

- Click New. Then, select Section.

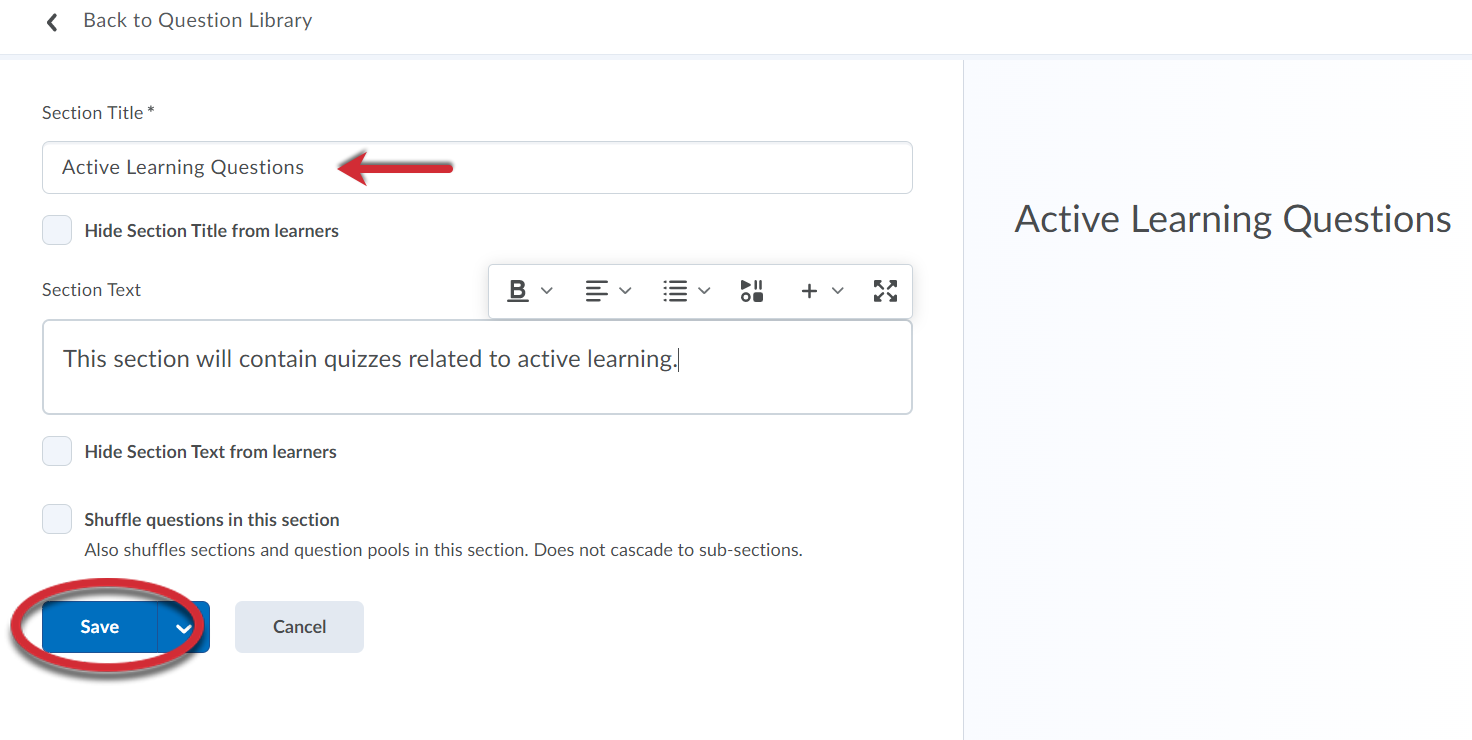
- Give the section a name. Click Save.
Creating and Adding Questions
- Open the Quiz Tool. From your course navbar, click Tools and select Quizzes.
Alternatively, if you have the Quizzes option configured on the navbar, click it to access quiz tools.
- Click Question Library.

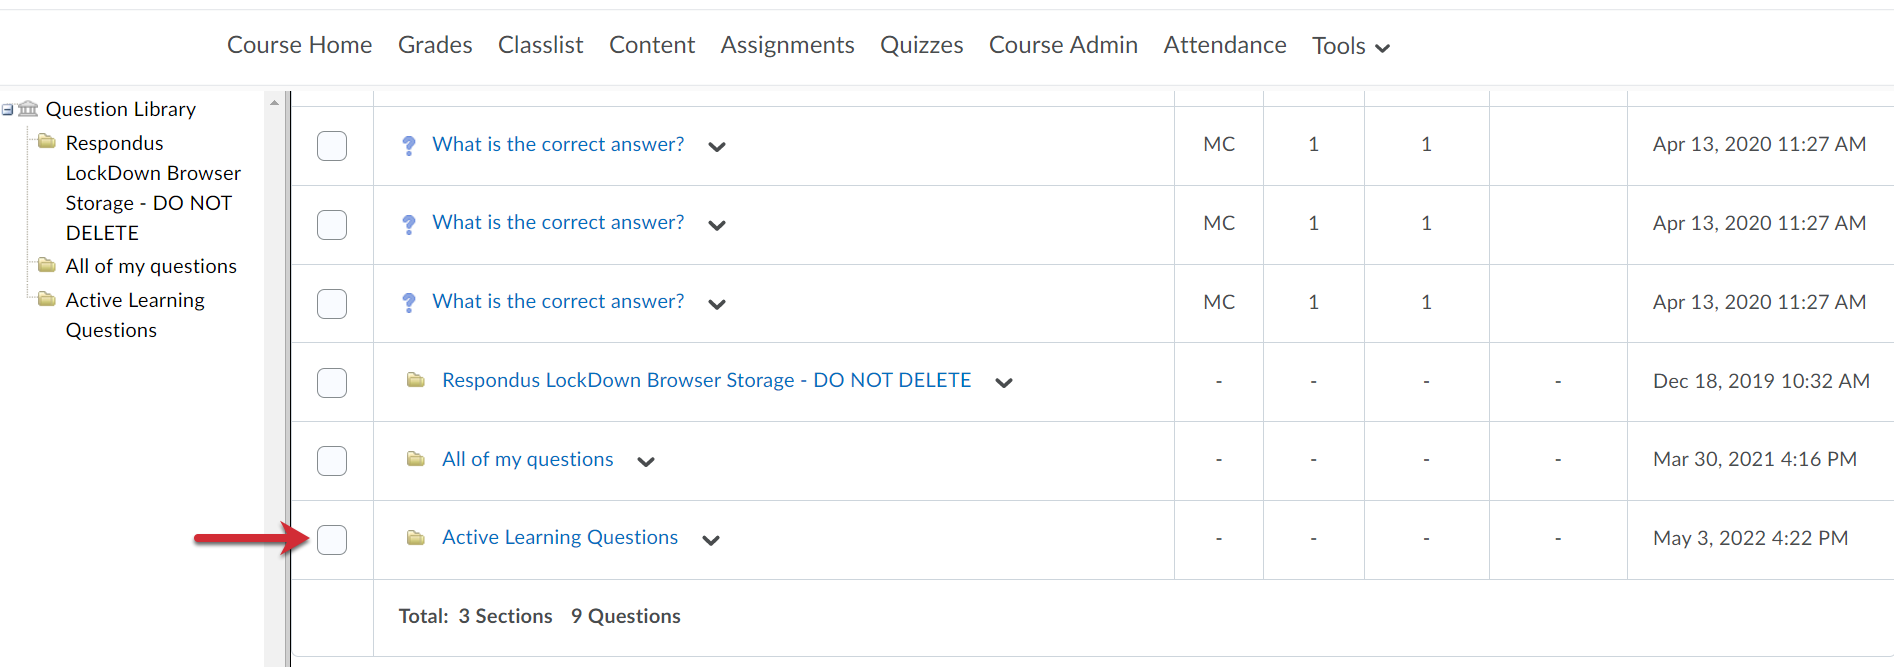
- Click the section in which you would like to add questions.
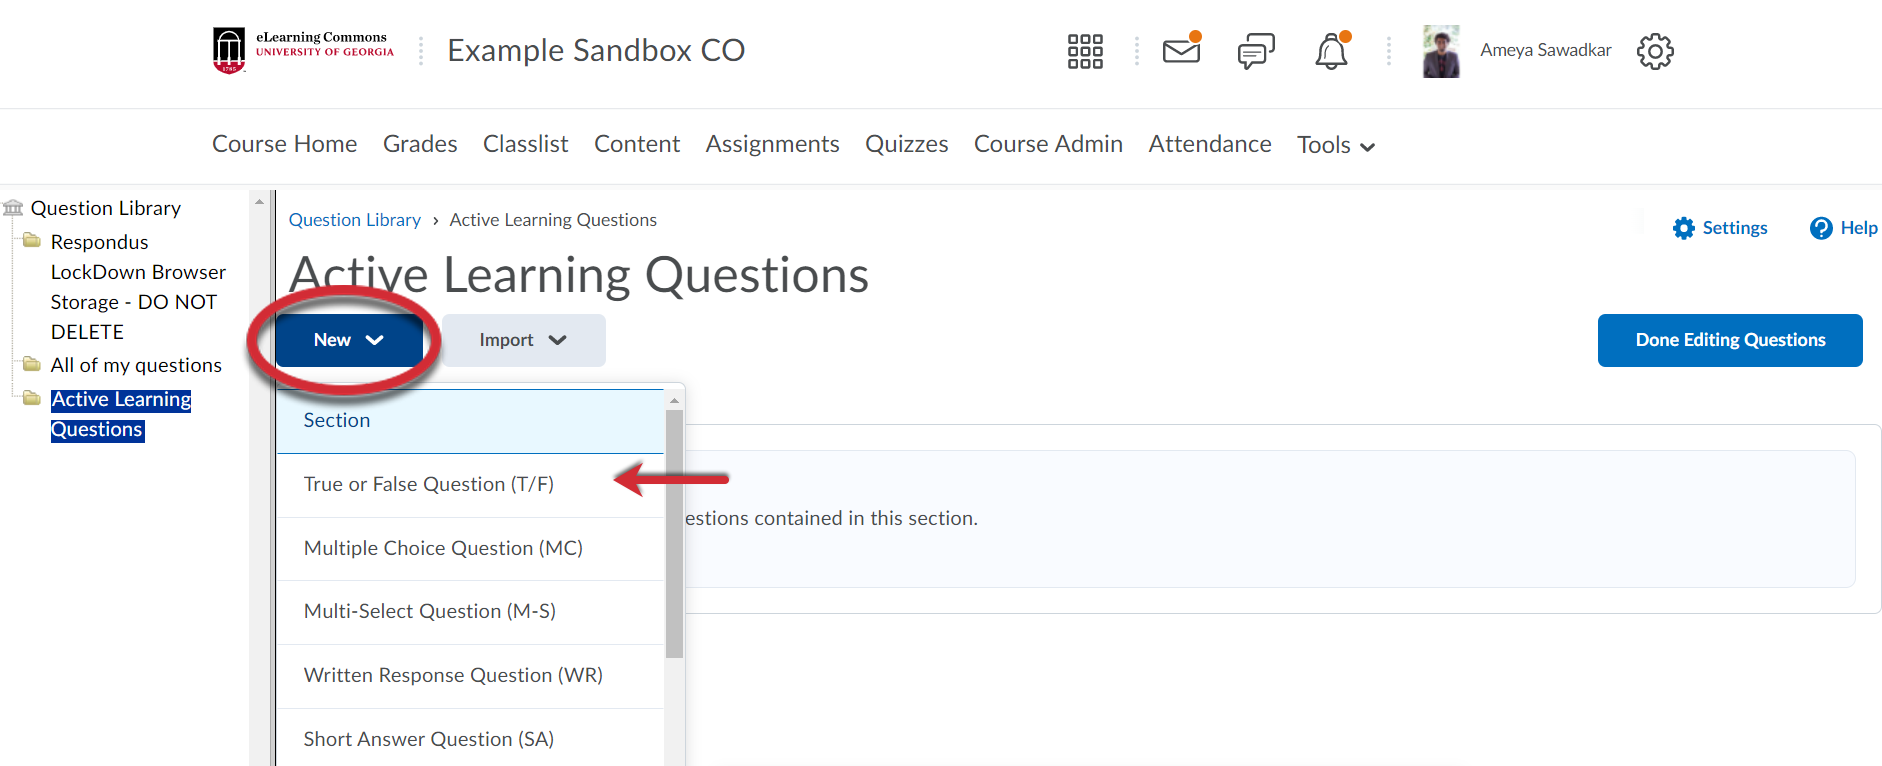
- Click New. From the dropdown menu, select the question type you would like to add. We have provided specific details about the different types of questions.
- Enter all required fields for the selected question type. We have provided specific
details about the different types of questions.
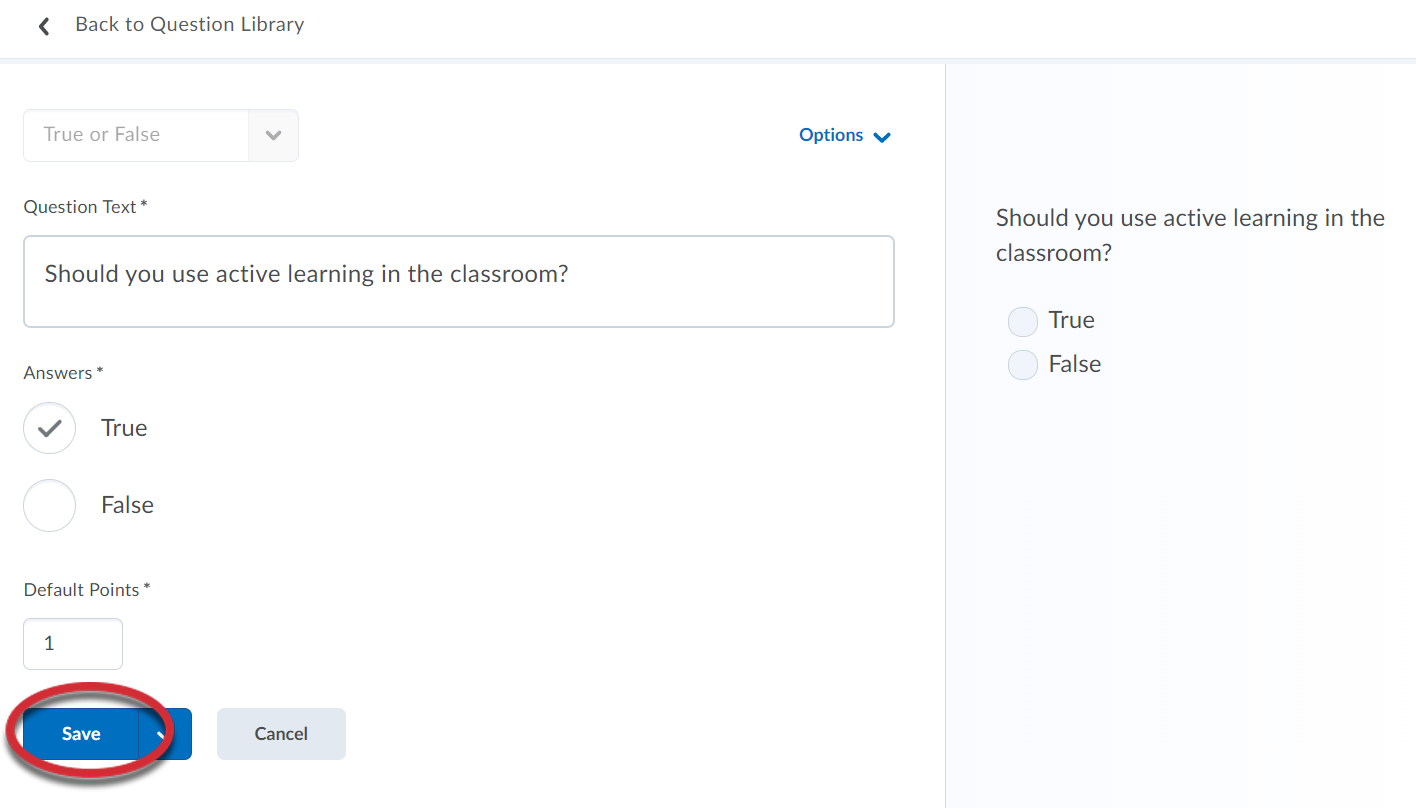
- When you are finished creating your question, click either Save, Save and Copy, or Save and New. Save and Copy will allow you to save the question you just created and create a new question of
the same type containing the current question's properties. Save and New will allow you to save the question you just created and to continue creating questions
of the same type.
Adding Sections and Questions to Quizzes
Once sections have been created and questions have been added to the Question Library, the questions can then be imported to a quiz. This tutorial covers how to import questions to a quiz from the Question Library.
- Open the Quiz tool. From your course navbar, click Tools and select Quizzes.
Alternatively, if you have the Quizzes option configured on the navbar, click it to access quiz tools.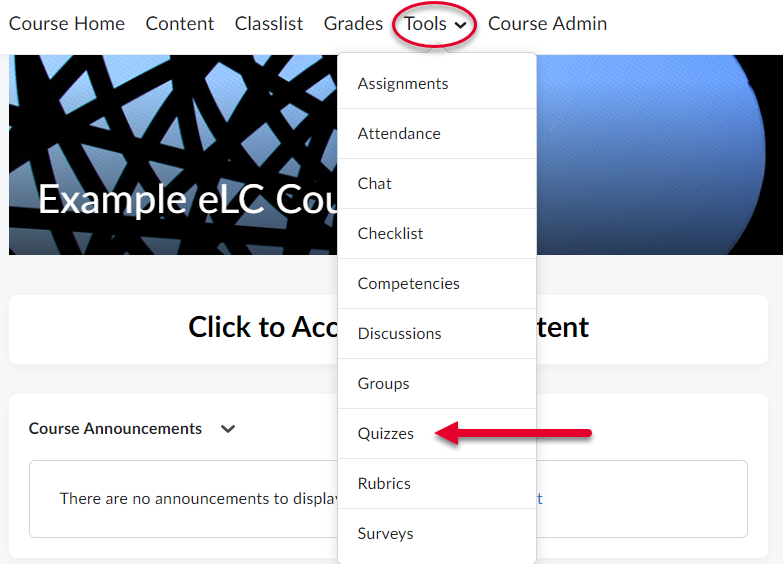
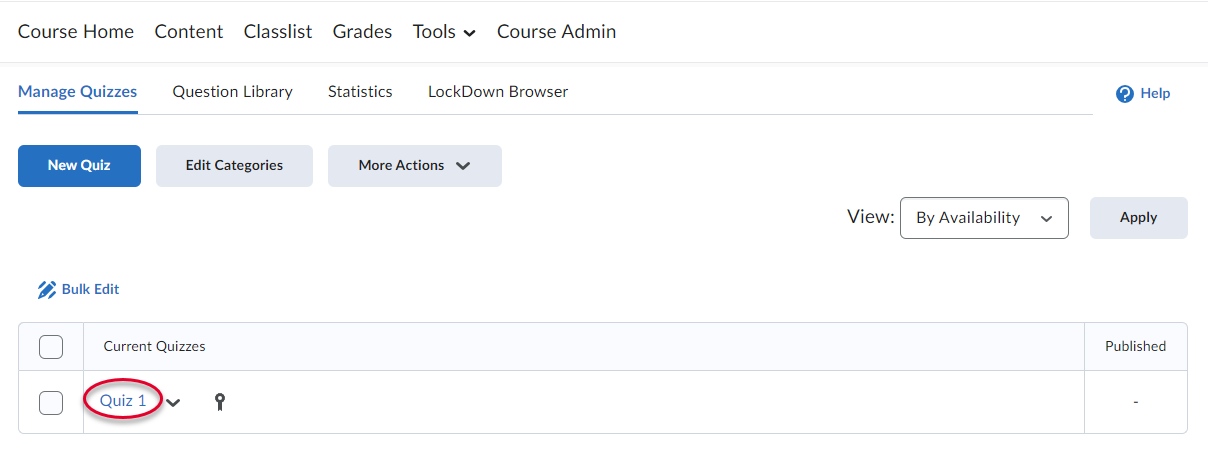
- Click on the name of the quiz you would like to edit.
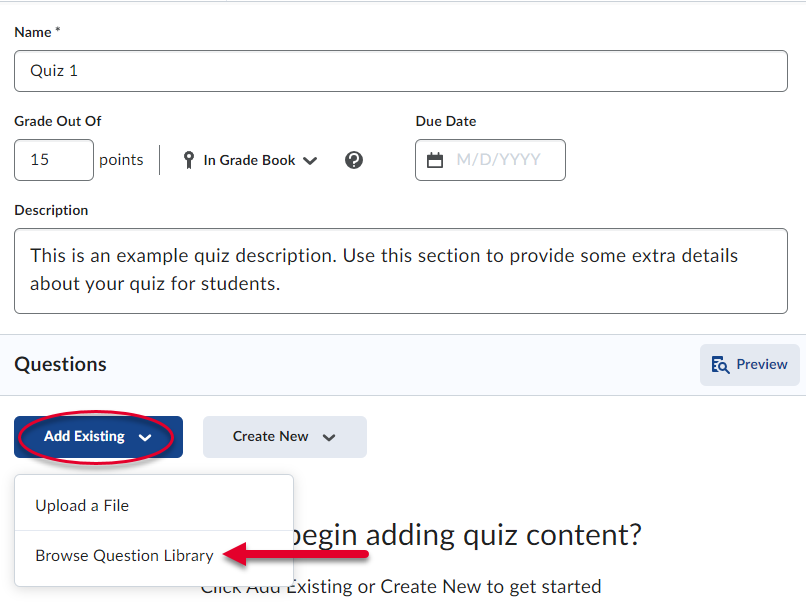
- Click Add Existing, then click Browse Question Library.
- Click the checkbox beside the section you want to add to your quiz.
Note: You can click the dropdown arrow beside a section to select specific questions instead of adding the entire section.
- Click Import to add your selections to the quiz. Clicking the dropdown arrow beside the import button will allow you specify where in the quiz to import your
questions:
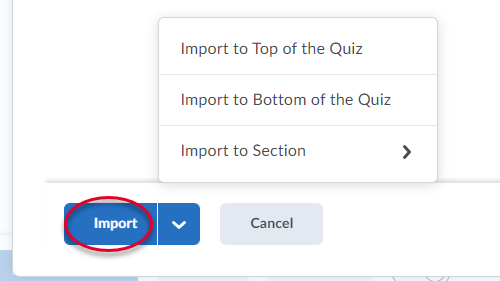 Note: You can select the dropdown arrow beside the import button to choose where in the quiz your questions will be imported.
Your options are:
- Import to Top of the Quiz
- Import to Bottom of the Quiz
- Import to Section
- Add more questions by repeating steps 3-5 above.
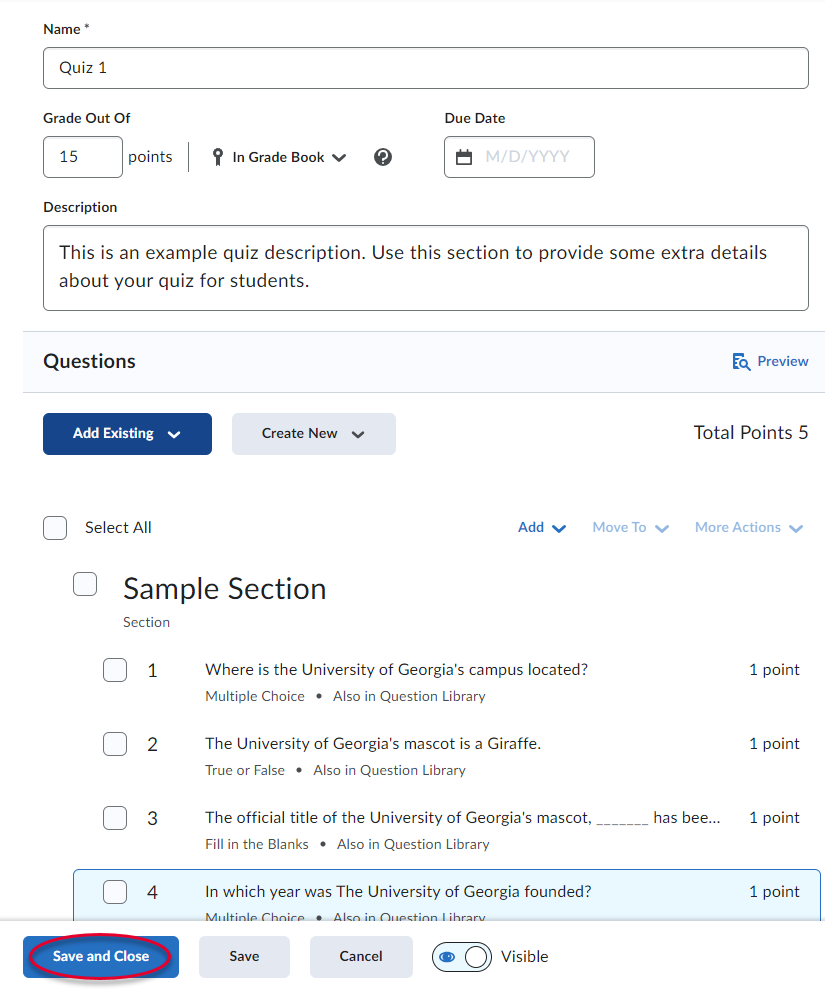
- Your questions will appear on your quiz. Click Save and Close if you are finished working with your quiz. Click Save to save your changes but continue working. Click Cancel to cancel any unsaved changes.
Creating a Question Pool
When creating a quiz in eLC, you can create a section that randomly selects questions from your Question Library. This ensures each user will receive a unique set of questions. This tutorial covers how to create a Random Section in a Quiz.
- Open the Quiz tool. From your course navbar, click Tools and select Quizzes.
Alternatively, if you have the Quizzes option configured on the navbar, click it to access quiz tools.
- Click on the name of the quiz you would like to edit.

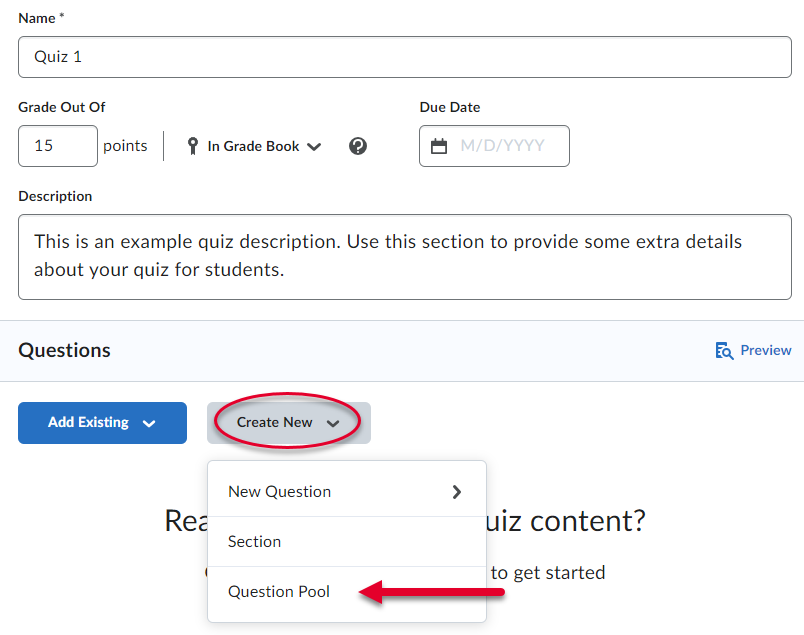
- Click the Create New dropdown, and select Question Pool.
- Give your question pool a Title, provide the Number of Questions to Select, and then decide the Points per Question.
When Finished, select Browse from Question Library.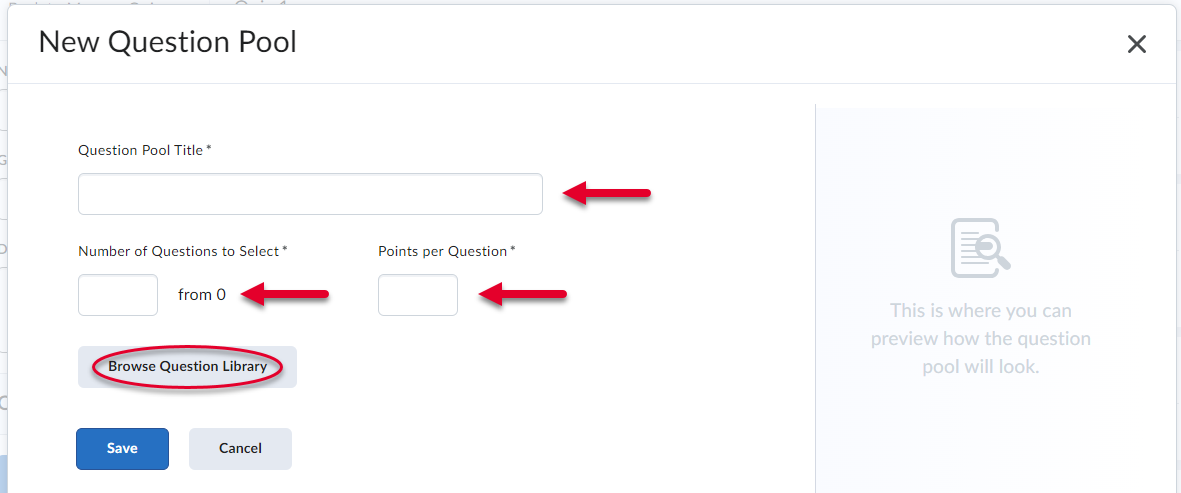
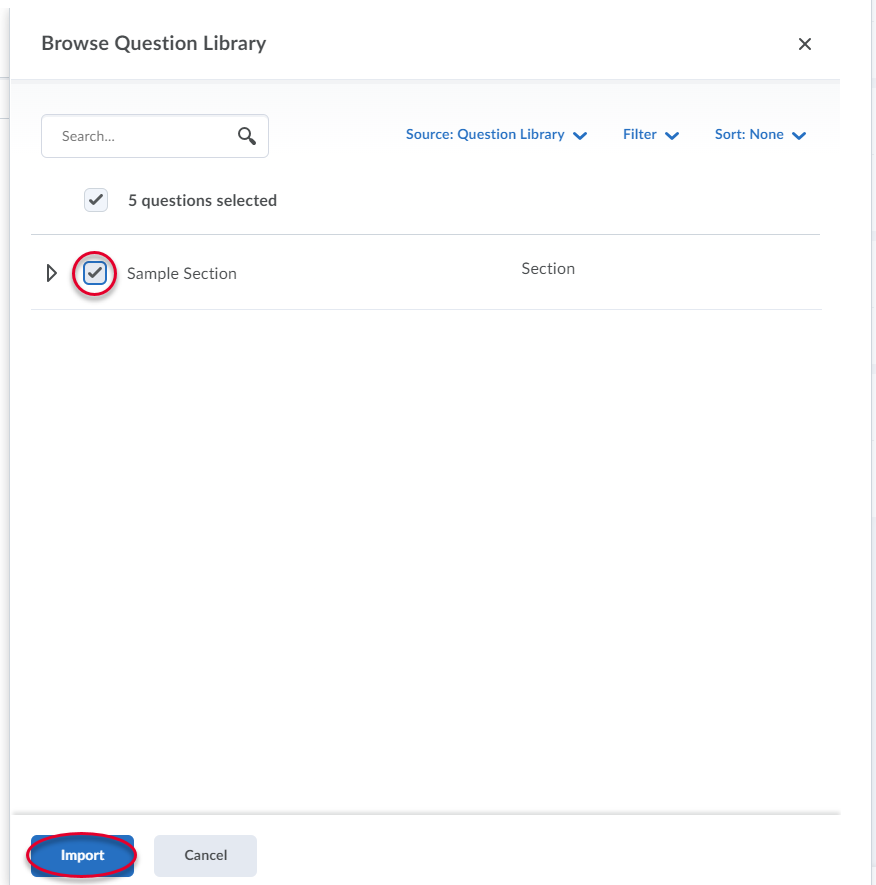
- Click the checkbox beside the section(s) you would like to pull from for your question pool. Click Import once you have made your selection.
- Double check to make sure the number of questions to select is less than the total number in your chosen section.
Click Save to save your question pool and add it to your quiz. Click Cancel to cancel all unsaved changes made to this question pool.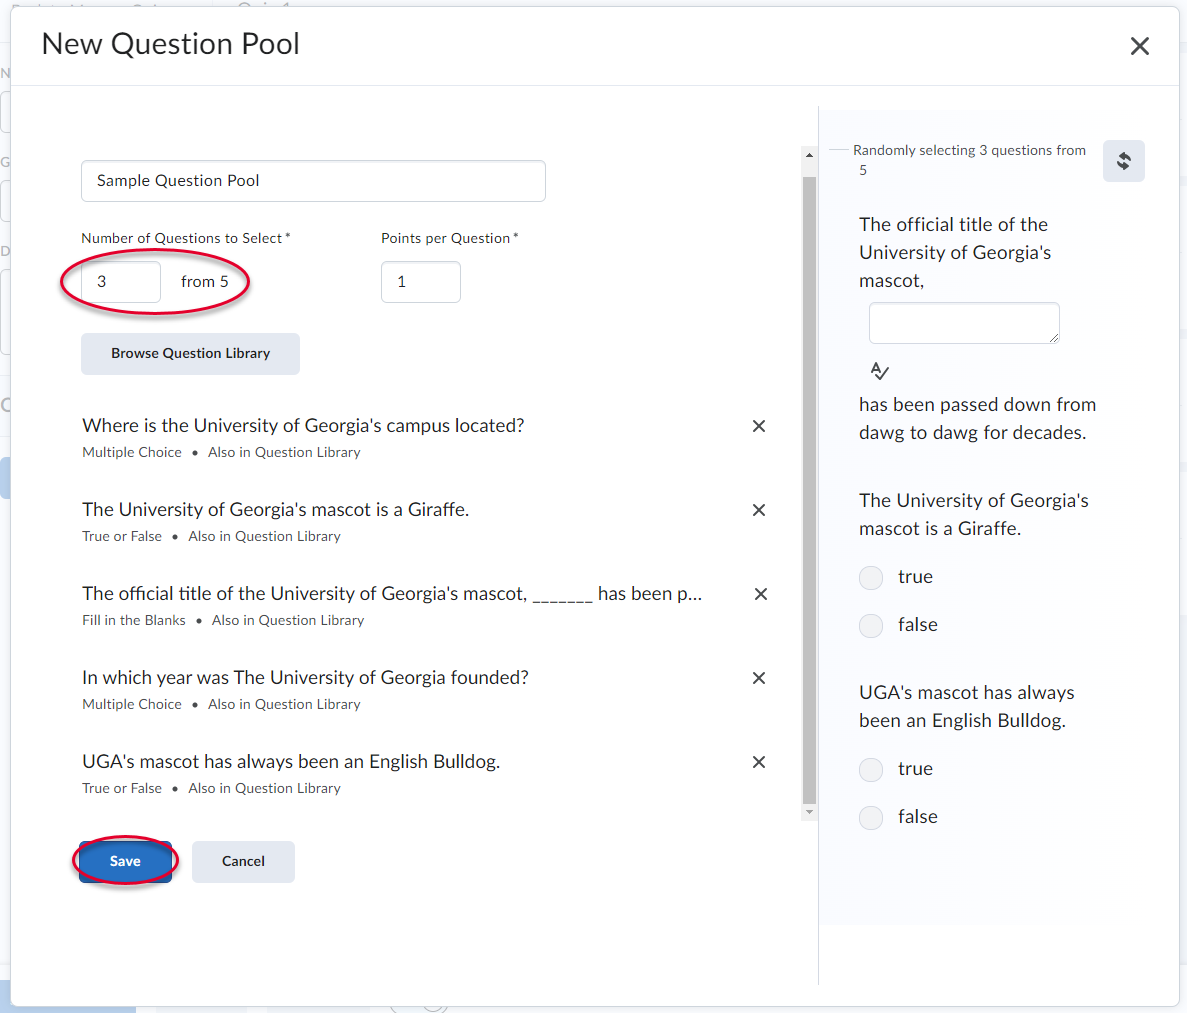
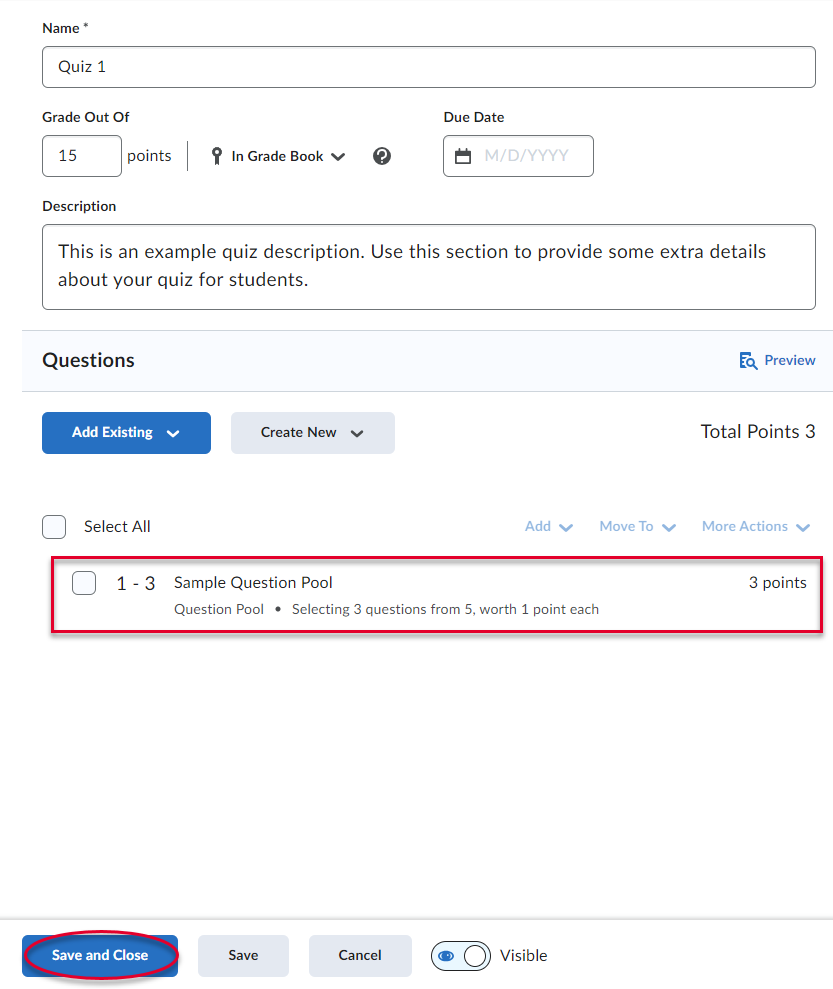
- Your question pool will appear on your quiz. Click Save and Close if you are finished working with your quiz. Click Save to save your changes but continue working. Click Cancel to cancel any unsaved changes.
 Back to Top
