
Students may need to share a video with other students or with the instructor. How videos are shared may depend on the size of the video, the author or owner of the video, or the content of the video.
Uploading a Video to a Discussion Post −+
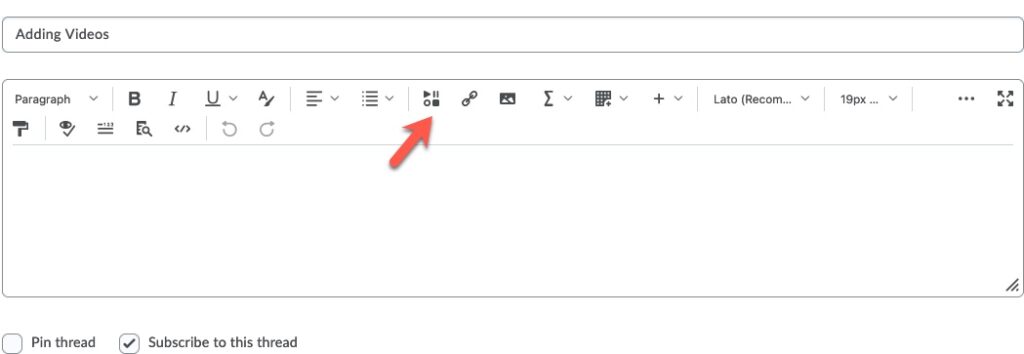
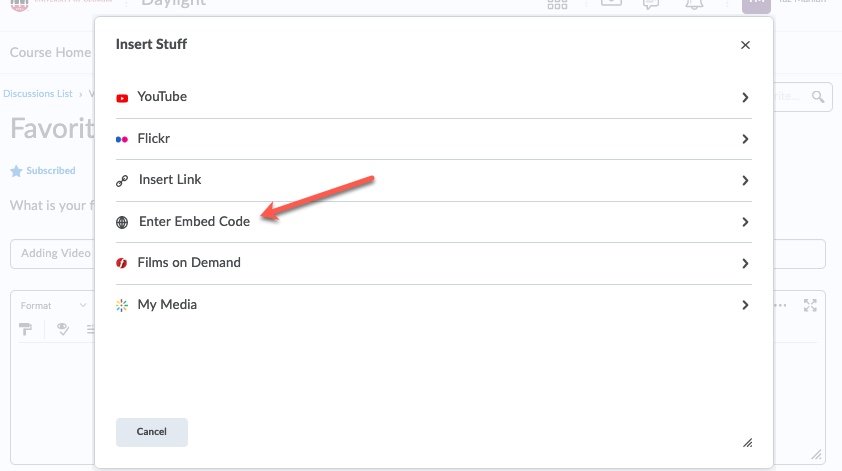
- Videos can be added to Threads in Discussion Posts by uploading a video stored on your computer or by creating a link to an external video host site such as Youtube. To upload a video, open a Discussion Thread and choose the icon that looks like this

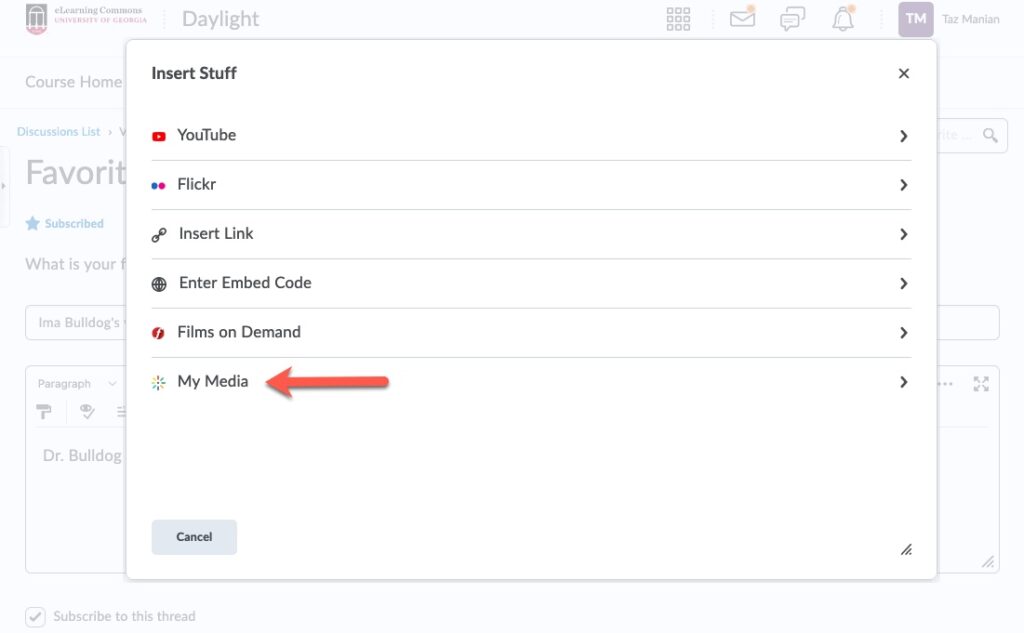
- After choosing the Insert Stuff Icon, choose My Media.
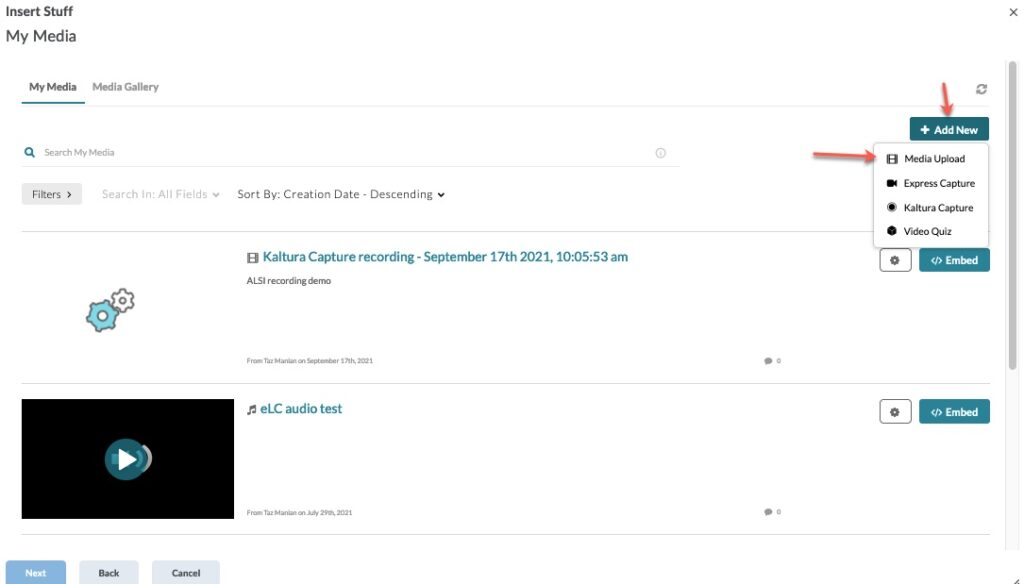
- Next, choose Media Upload if the .mp4 file is on your computer or choose Kaltura Capture if you have connected a camera to your computer and would like to use Kaltura Capture to record a video. When you locate your file, choose Next and wait for your video to upload to Kaltura Capture.
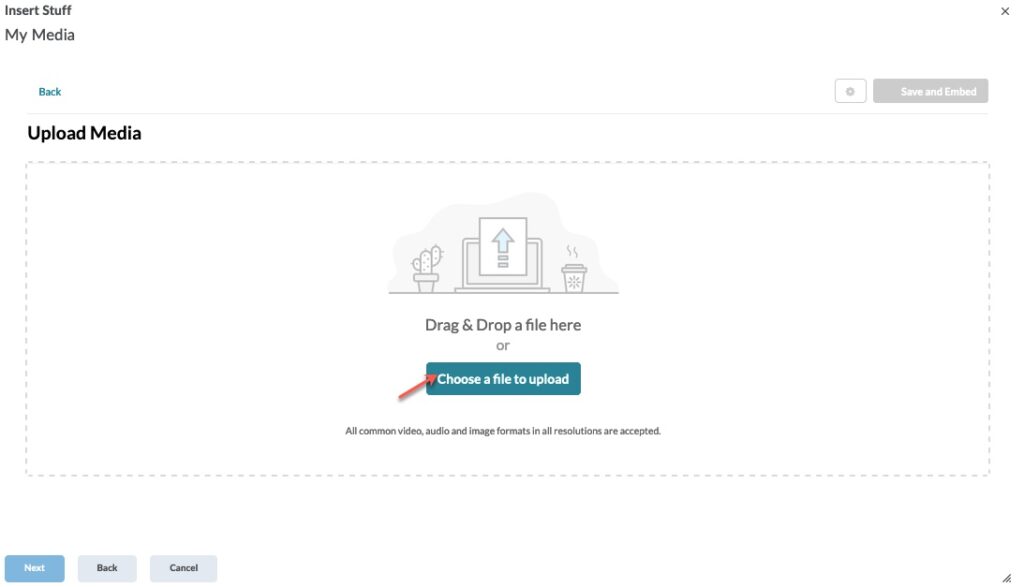
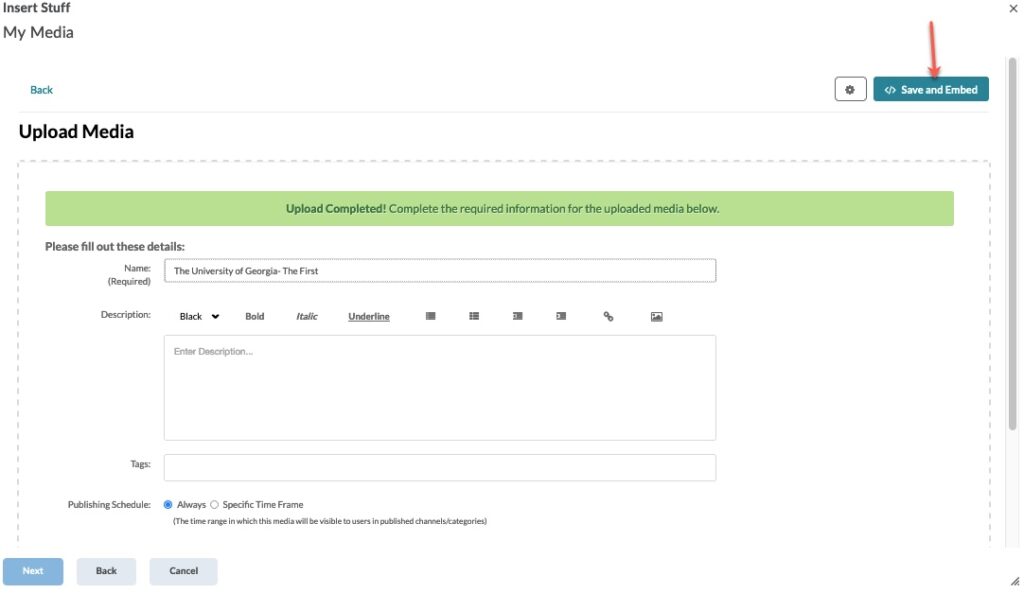
- Either Drag and Drop a file within the Upload Media area or click Choose a file to upload and locate the video file you wish to upload.
- Once the file has uploaded, give the file a Title and Description. Click </> Save and Embed.
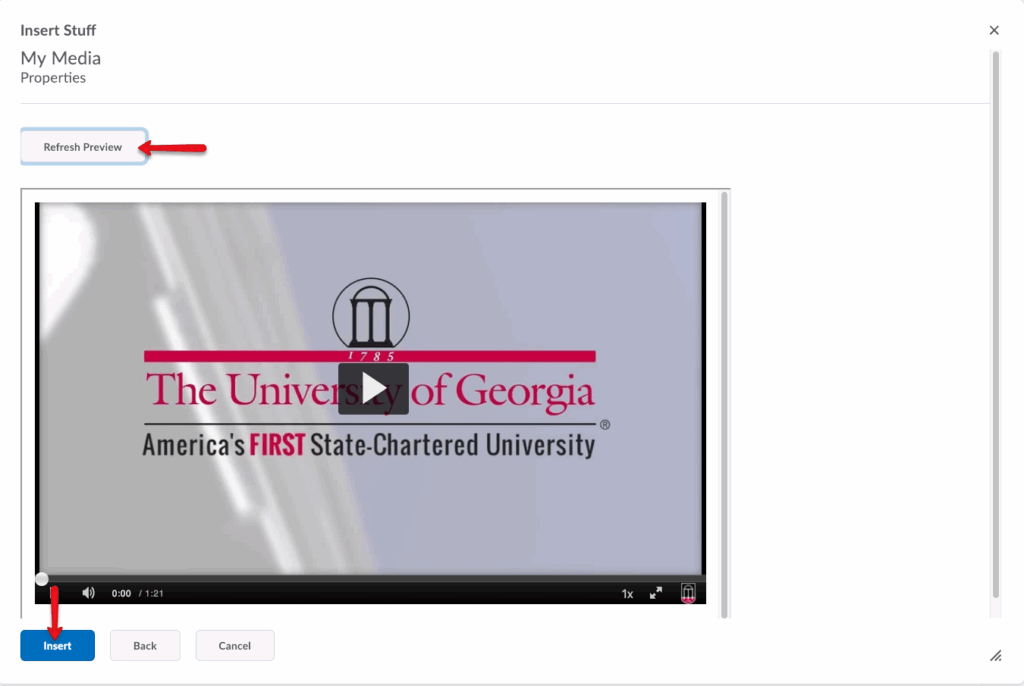
- Click Refresh Preview to see the video. Then, click Insert to add the video to your Discussion post.
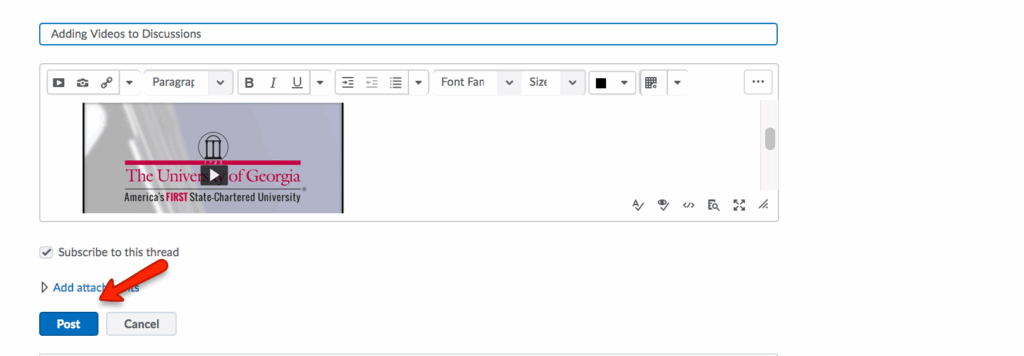
- When your Video has been Uploaded, you will see the file in your Discussion Post. Choose Post to save your Thread and make it visible.
Sharing a Video Link in a Discussion Post −+
- Students also have the option of providing a link to a video on an external hosting site, such as YouTube. Some students may choose to upload their own media file to YouTube or a similar site and provide a link rather than uploading it into Kaltura and inserting it into one of eLC’s tools (i.e., Discussion Post). To link to a video in the Discussion Tool, create a new thread and choose the Insert Stuff Icon insert stuff iconor the Link Icon
 .
.
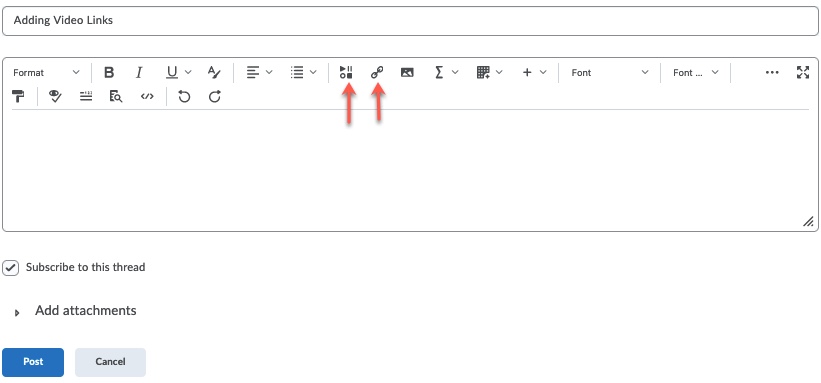
- If choosing Insert Stuff, choose Enter Embed Code and then insert the URL into the space provided.
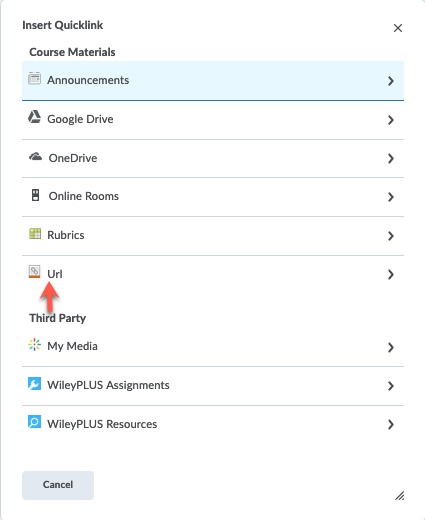
- If choosing the Link Icon, Click on URL. You will be prompted to provide a title for you link and to add the URL into the space provided.
- Choose Post when the link has been added.
Uploading a Video to the Assignment Dropbox −+
- Students can share Videos through the Assignment Dropbox. Once the dropbox has been opened, students can upload a video into Kaltura for sharing in eLC. Students can also add the video using the Insert Stuff icon or add a link to the video instead.

- Students must also add one file before submitting the assignment. The instructor may specify the content of this file. If not, a simple Word Document will allow students to submit assignments.
- When the video has been uploaded or link shared, add any necessary text to the Comments Box and choose Submit.
Uploading a Video to the Course Gallery −+
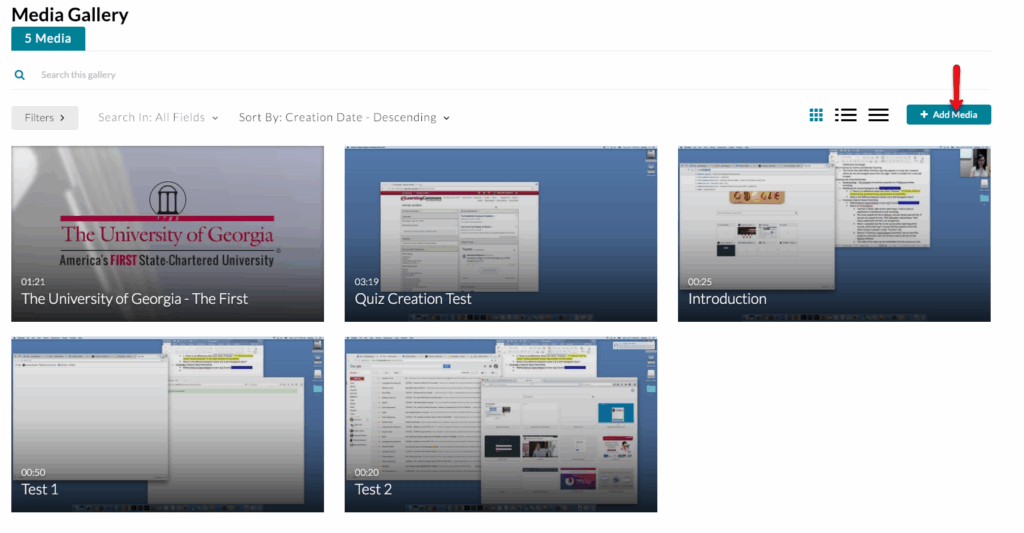
The Course Gallery is a space where instructors and students can upload video to be shared with the class. If your instructor has added the Course Gallery to your course, it will be accessible either via the course navigation menu or a widget on the course home page.
- To add an existing video to the Course Gallery, first, go to the course gallery by clicking the course navigation link or the link in the course gallery widget.

- Click +Add Media.
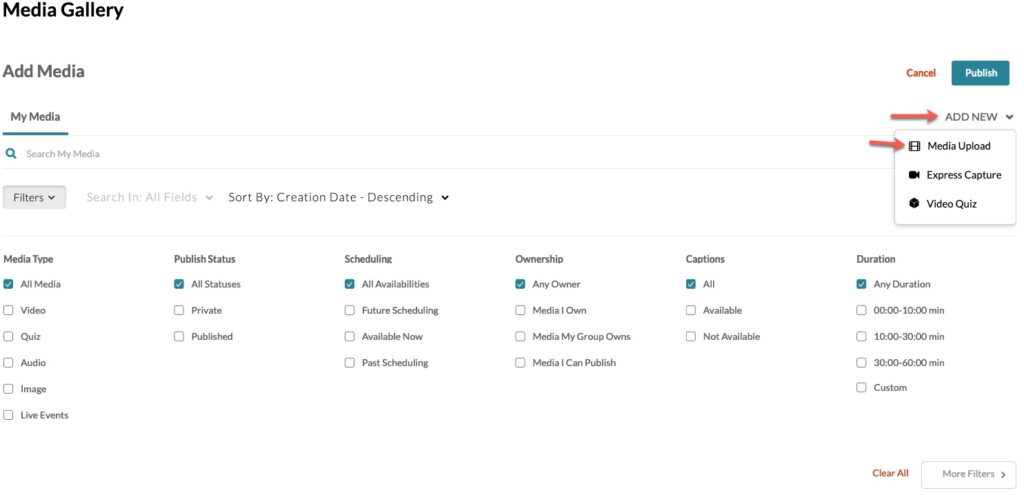
- On the next screen, click Add New, and select Media Upload. There is a 2GB file size limit.
- Either Drag and Drop a file within the Upload Media area or click Choose a file to upload and locate the video file you wish to upload.

- Once your file has uploaded, give it a name and a description. Click Save.
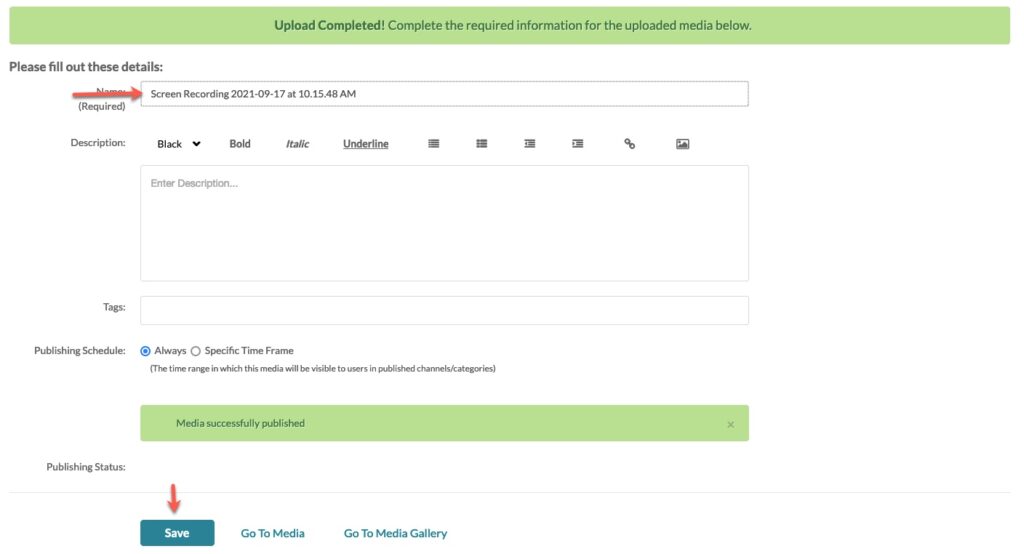
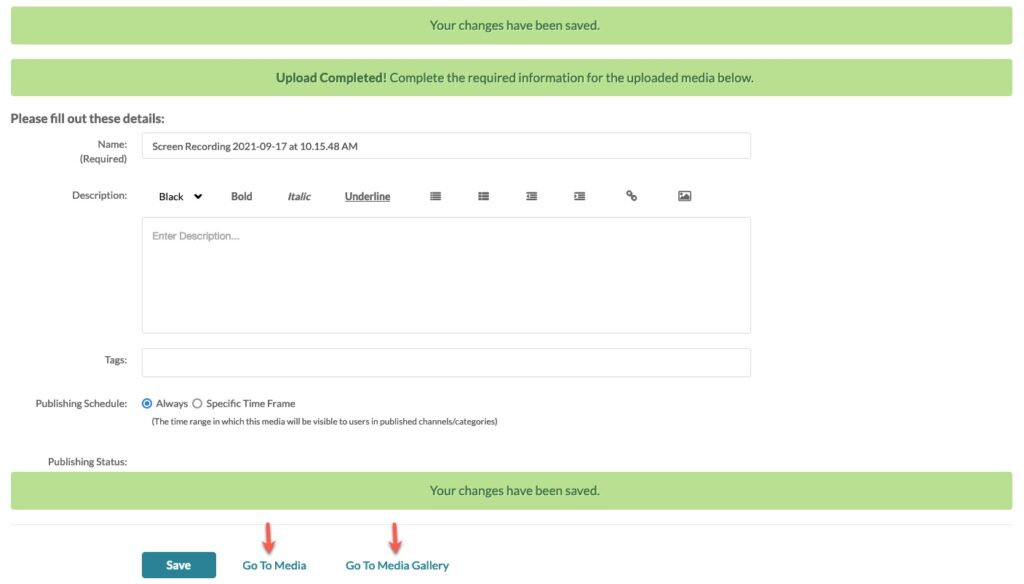
- Your video is now published in the Course Gallery. You can can then click either Go To Media to view the media that you just uploaded or Go To Media Gallery to view the Media Gallery.
- If your instructor is moderating video content that is added to the gallery, you will see a message in the course gallery that says “Your additional media will be presented once it is ready and approved. Refresh Now.” This means that your video will appear in the gallery once your instructor has approved it.
Troubleshooting −+
You may occasionally receive an error when trying to upload a video. This may occur because of the browser being used, the file name of the video, or the size of the video.
- To Troubleshoot, first attempt to upload the video while using eLC in a new Browser such as Chrome or Firefox. If the video will not upload, check the file name. If the name has any symbols added, it may not upload. Change the file name, eliminating any symbols, and retry the upload. Finally, if the video is a large file, it may be best to upload the video into an external host site, such as YouTube, and provide a link instead of uploading the video into Kaltura and eLC.