Email Settings
Emails are messages sent by other eLC users within a specific course.
Learn about:
Sending Email
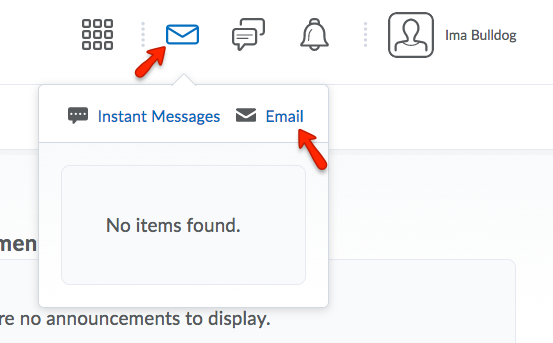
- To send a email, first click on the Mail icon found on the minibar. Then, select Email.
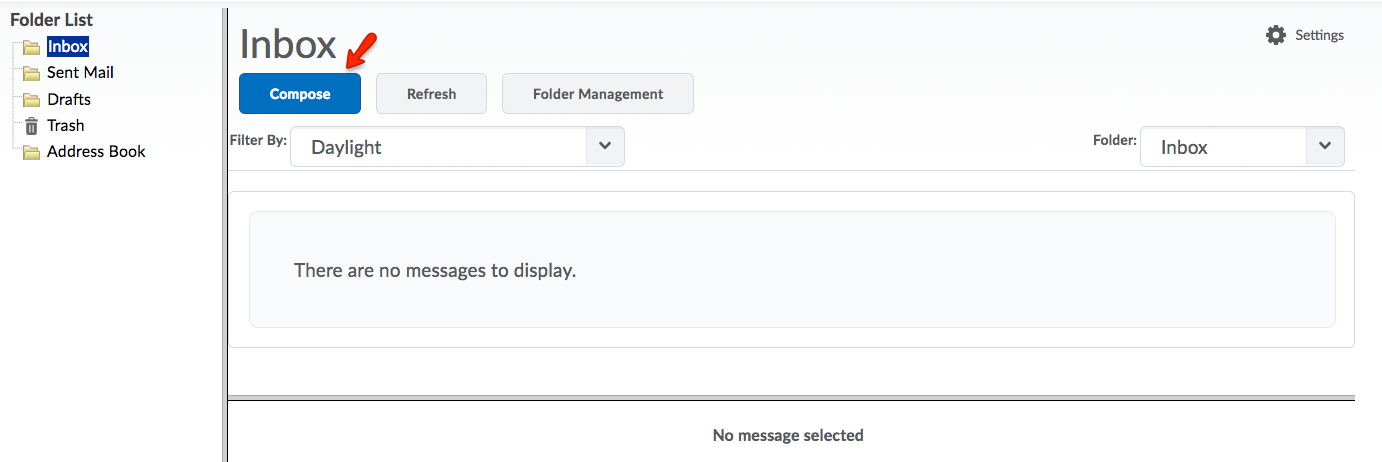
- You will then be directed to your Inbox. To compose a new message, click Compose.
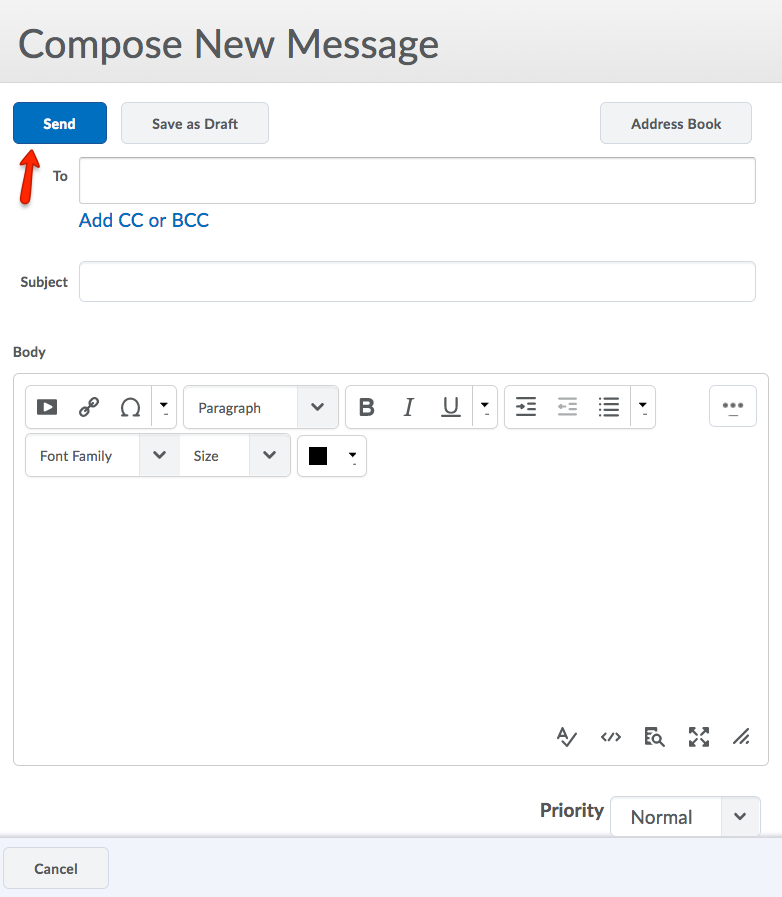
- A new window will be opened. Within this window, fill in the necessary information
to send the email: Recipient, Subject, and Body. You can also attached files within your email and select a Priorty (Low, Normal, or High). When finished composing your email, click Send.
- You will need to be logged into eLC in order to respond to any emails sent from within
eLC, but you can forward these course messages to a preferred email account.
- D2L Brightspace recently increased the limit for the To and CC fields from 50 to 200 recipients.
Email Forwarding Options
By default, all incoming course messages are forwarded to your external UGAMail email account, but you have some options as to how those messages are treated including where email is forwarded and how messages handled in eLC. This tutorial covers the setup of email forwarding in eLC. When you have completed the steps outlined below, you will know how to forward your email from inside eLC to your preferred email accout or opt out of email forwarding altogether.
- From your homepage, click on your name in the top right corner of the mini bar and select Account Settings from the drop down menu.

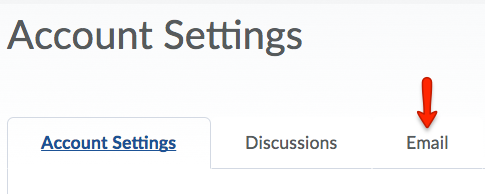
- Click the Email tab from the Account Settings navigation bar.
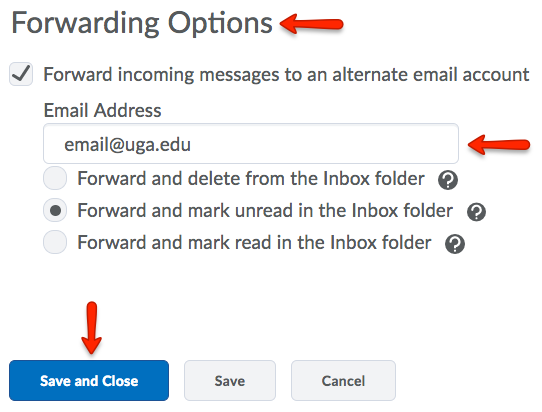
- To set up forwarding to another email account. Make sure that, under Forwarding Options, the box is checked next to Forward incoming messages to an alternate email account. By default, eLC is set to forward to your UGAMail address. If you would like to forward to a different email address, type your preferred email address in the Email Address field. You may also set your preferences for email handling in eLC once your message is forwarded including the message from your eLC inbox or marking it read or unread.
- To turn off email forwarding, simply uncheck the Forward incoming messages box.
- After making your selections, click the Save button at the bottom.
Last Updated: 11/05/2024
