Calendar Events
Instructors can make use of the eLC Calendar tool to help students keep track of important course-related dates and deadlines. Instructors can create individual calendar events, and include due dates for assignments, quizzes, and discussions in the calendar.
Learn about:
- Adding a Quiz to the Calendar
- Adding an Assignment to the Calendar
- Adding a Discussion to the Calendar
- Creating and Editing a Calendar Event
Note: Calendar items cannot be seen when viewing a course in the Collaborative Administrator role.
Adding a Quiz to the Calendar
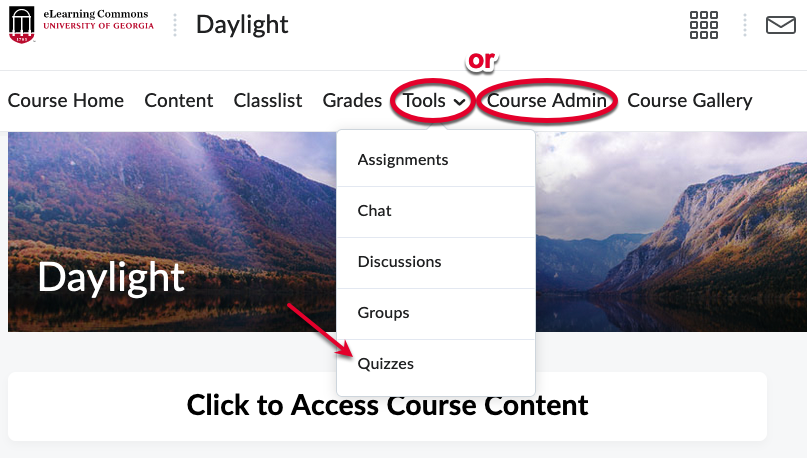
- Go to Quizzes from either the Tools dropdown or by clicking Course Admin.
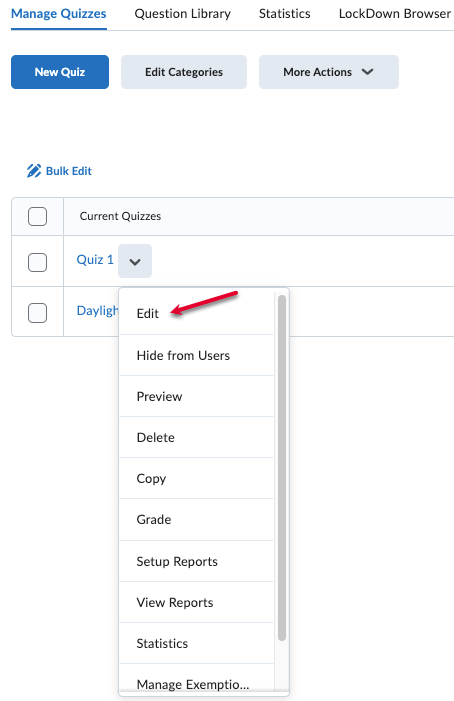
- In the dropdown next to the quiz for which you will create a Calendar Event, click Edit.
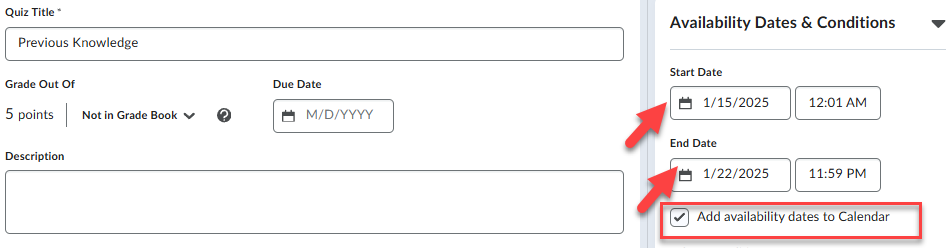
- Under Availability Dates & Conditions on the right side, you can set a start and end date, and you can check the Add Availability Dates to Calendar.
- Click Save and Close.

Adding an Assignment to the Calendar
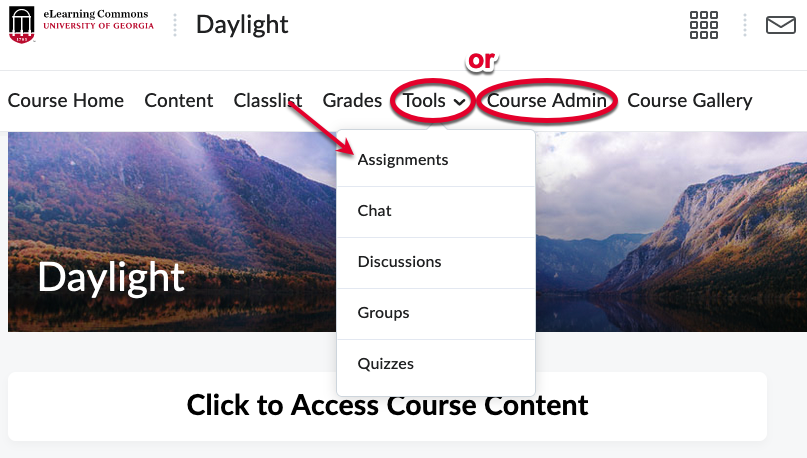
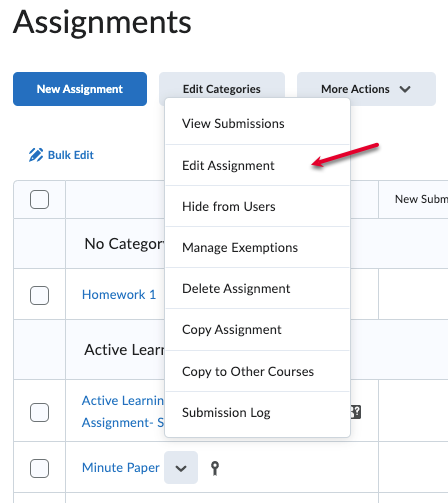
- Go to Assignments from either the Tools dropdown or by clicking Course Admin.
- In the dropdown next to the assignment for which you will create a Calendar Event, click Edit Assignment.
- The options to enter an assignment into your calendar, both of which automatically create a Calendar Event, are:
-
- Due Date (under Due Date)
- Start Date or End Date (under Availability Dates & Conditions)
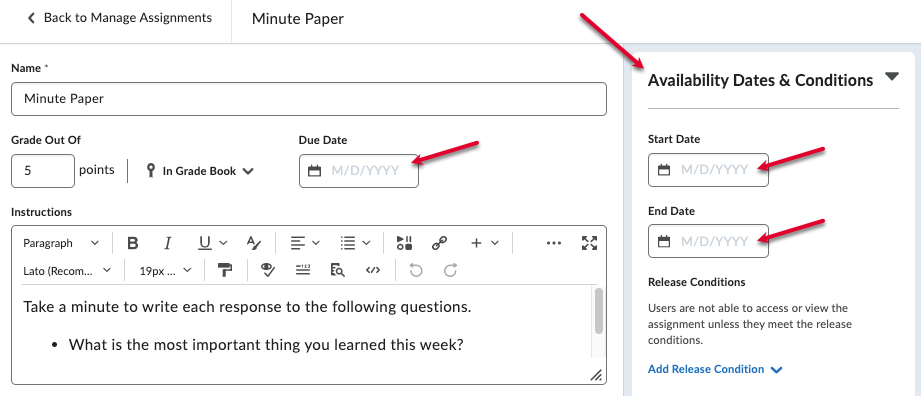
- Ensure that the assignment is set to Visible, otherwise, the dates will not appear in the student calendar view.

- Click Save and Close.

Adding a Discussion to the Calendar
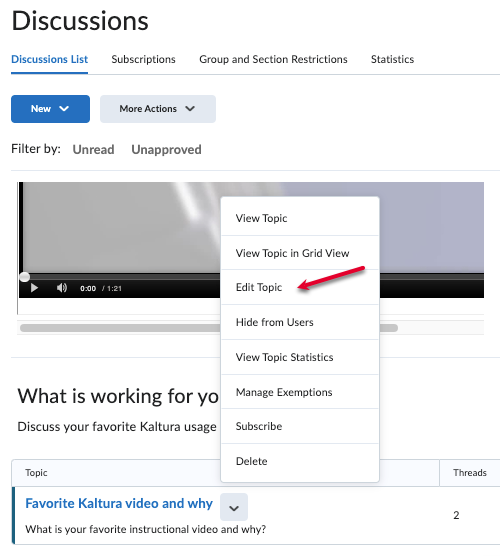
- Go to Discussions from either the Tools dropdown or by clicking Course Admin.

- In the dropdown next to the discussion for which you will create a Calendar Event,
click Edit Topic.
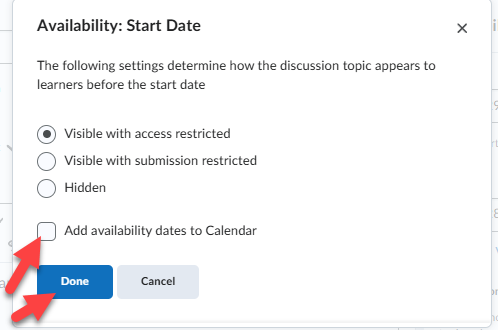
- Under Availability Dates & Conditions on the right side, you can set a start and end date.
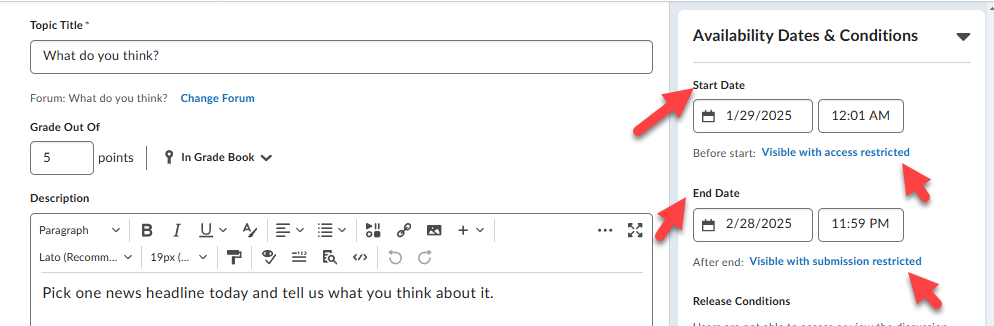
- After you set these dates, click on either Visible with access restricted or Visible with submission restricted. A windo will open and you can selecte Add availability dates to Calendar, then click Done.
- Click Save and Close.

Creating and Editing a Calendar Event
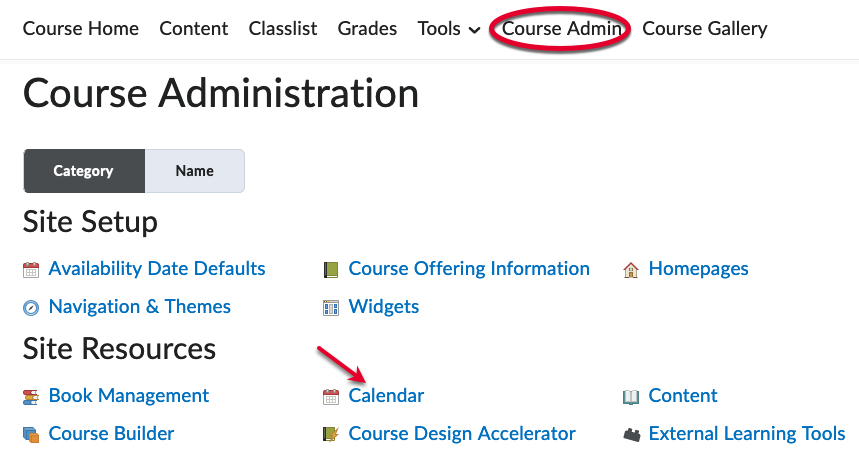
- In your course, click Course Admin, then click Calendar.
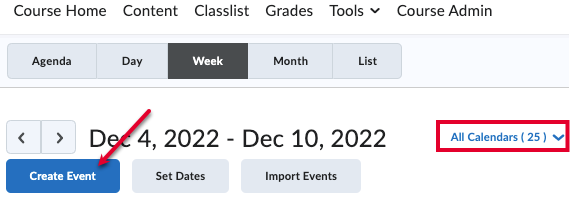
- Choose your preferred view from Week (default) to Agenda, Day, Month, or List (allows sorting by type: Assignments, Checklists, Discussions, Events, and more), then click Create Event. You may enter dates before or after clicking Create Event.
You may also filter the calendar by course by clicking the All Calendars dropdown on the right.
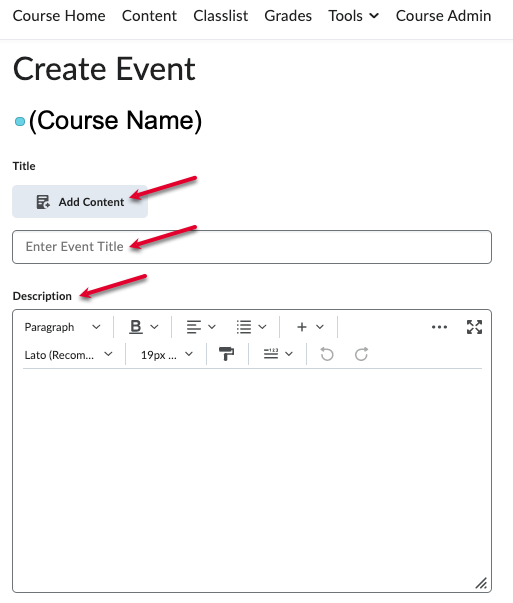
- Enter an Event Title and Description. If you wish to add information from the Content section of the course, click Add Content and choose the desired attachment.
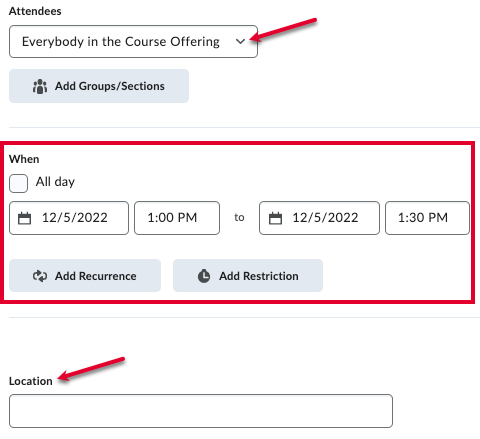
- Choose the event’s Attendees from the dropdown menu (this function will only work if the course has more than one person). Use the When section to enter the event’s date and time, including any Recurrences or Restrictions (visibility), then enter the Location.
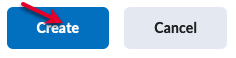
- Click Create.
Last Updated: 10/31/2024