Customizing the Course Navigation Bar
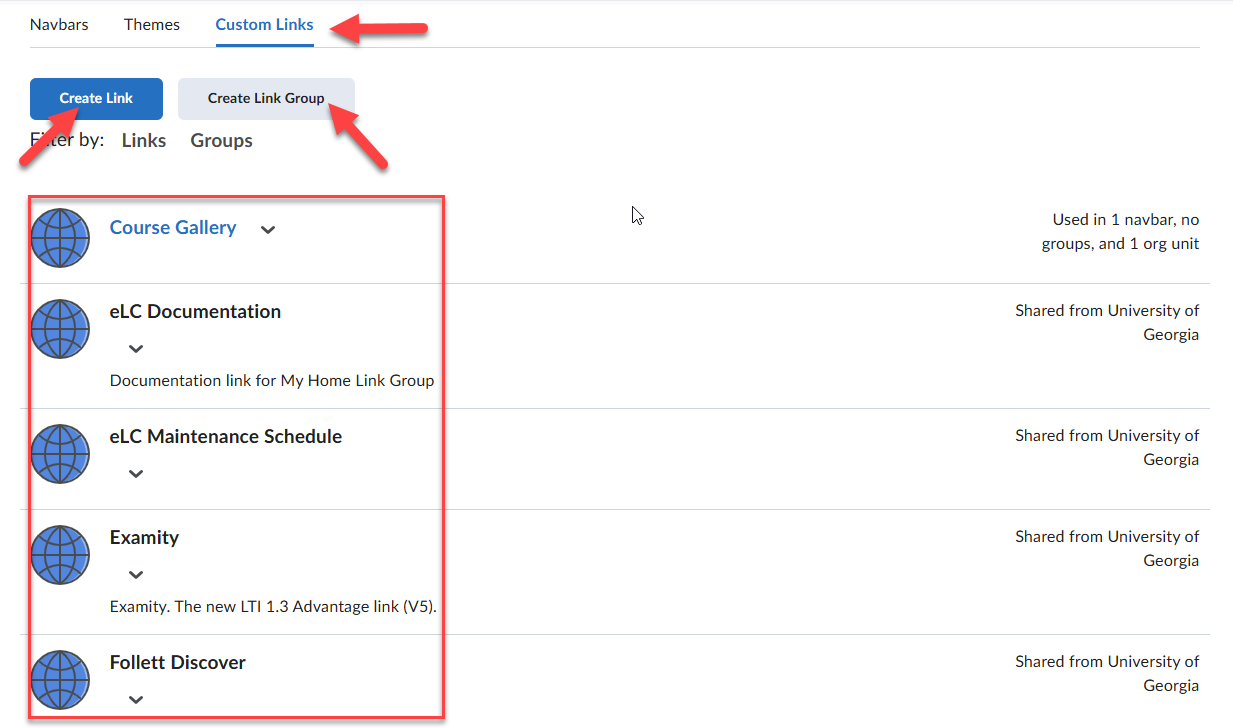
Modifying the Course Navigation allows you to customize the links to relevant tools for your course. When modifying the course navigation, or course navbar, you can add existing links and also create custom links and link groups if you want to include URL links to third-party tools and other areas of eLC.
Learn about:
- Editing the Current Navigation Bar
- Applying an Existing Navigation Bar
- Creating a Custom Navigation Bar
Editing the Current Navigation Bar
- To edit the current navigation bar, first, click the ... icon that appears when your mouse hovers over the Course Navbar. Select Edit This Navbar.

- When redirected to the Edit Navbar page, you have the ability to change the name and description of the navbar.
- Additionally, you may change the order of the links, or add pre-existing links from
within eLC.
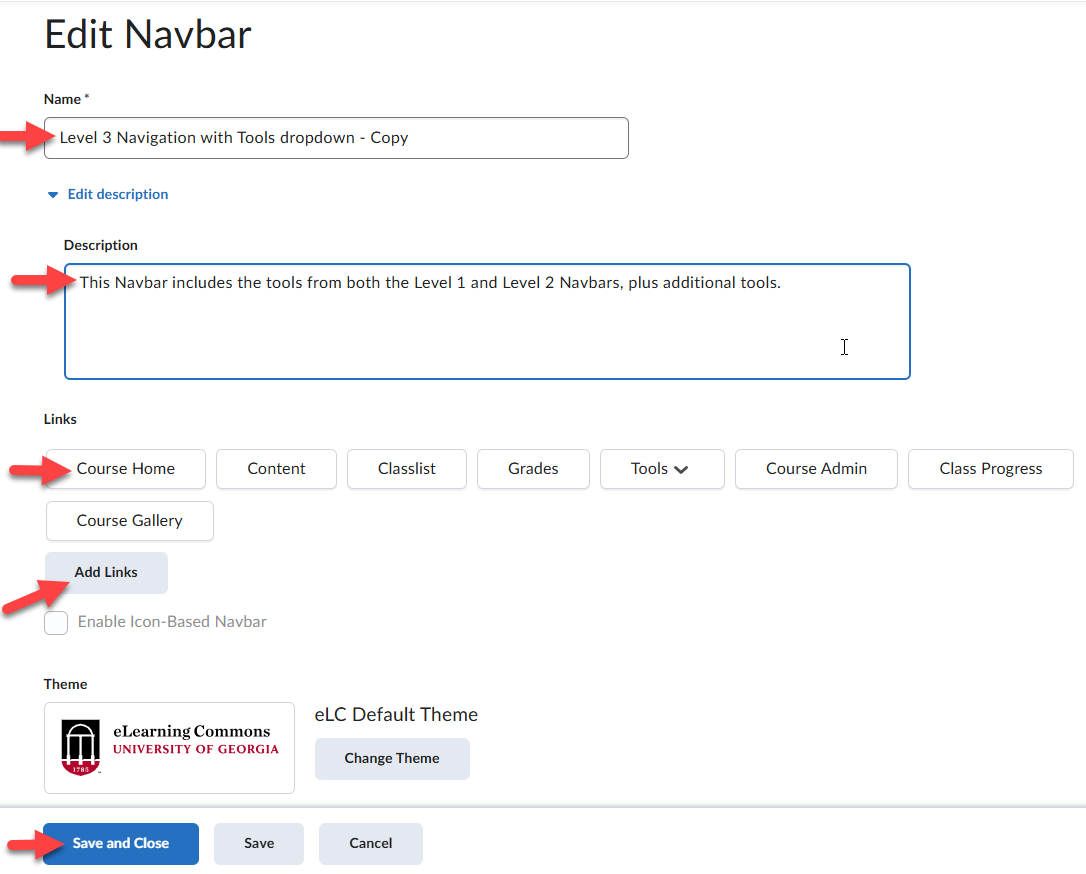
- When you have finished editing the navigation bar, click Save and Close.
Applying an Existing Navigation Bar
- From the Course Navbar, click Course Admin.
- Select Navigation and Themes.
- To select an existing navigation bar for your course, choose an existing navigation
bar from the Active Navbar drop-down menu. Click Apply.
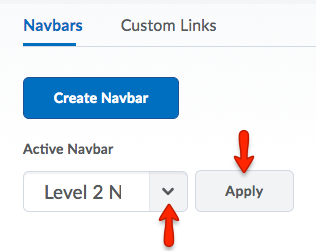
- There are multiple course navigation bars to choose from. To preview any navigation bar, click the drop-down arrow next to the name of the menu and click Preview.
Creating a Custom Navigation Bar
To customize any of the navigation bars, you must first make a copy.
- Click the drop-down arrow next to the name of the navigation bar you want to copy,
and click Copy.
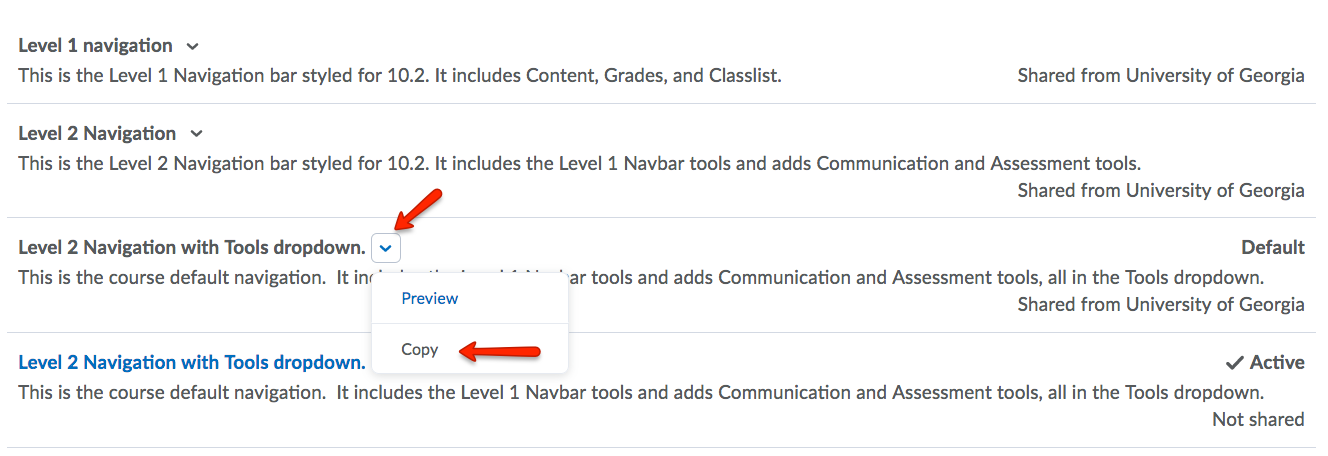
- Then, click on the copy to customize.
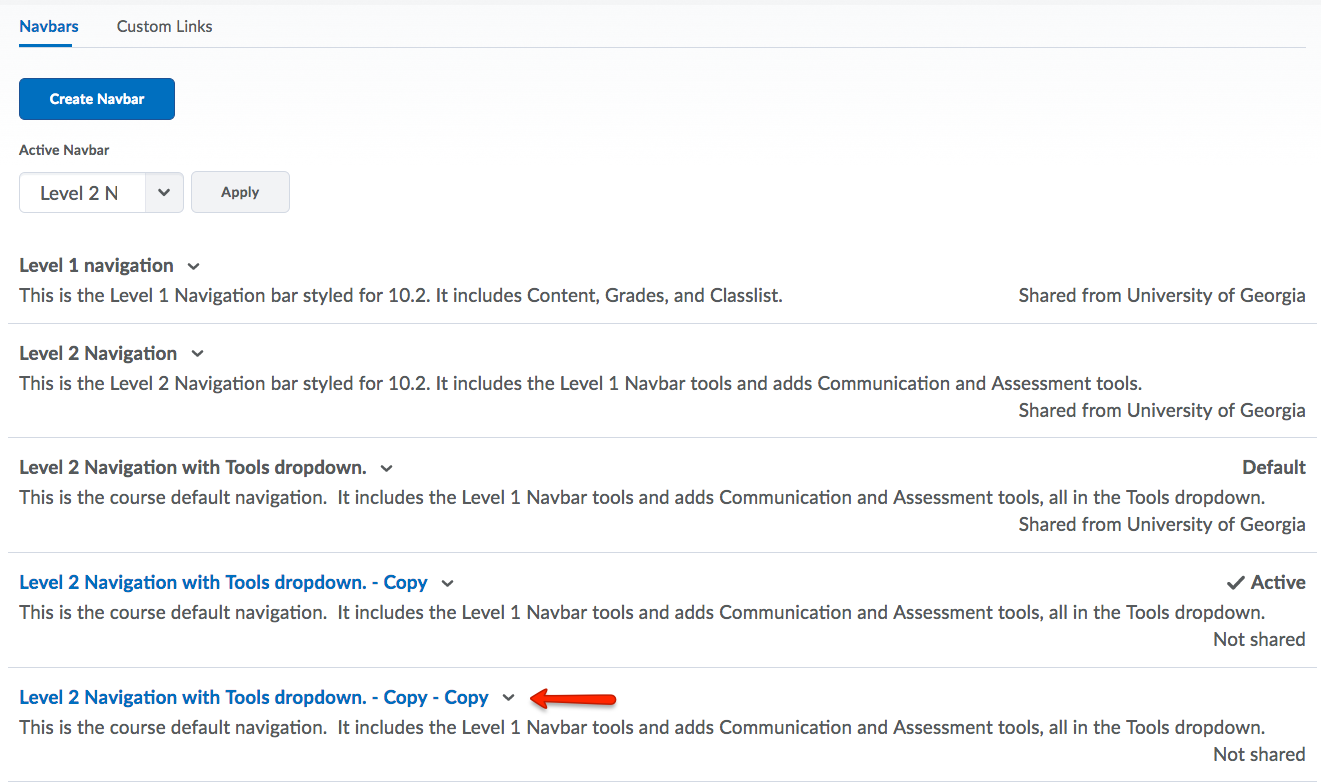
- You can change the name and description of your new navigation bar. In the links area,
you can reorder or remove existing links, or add new system links. After customizing,
click Save and Close.

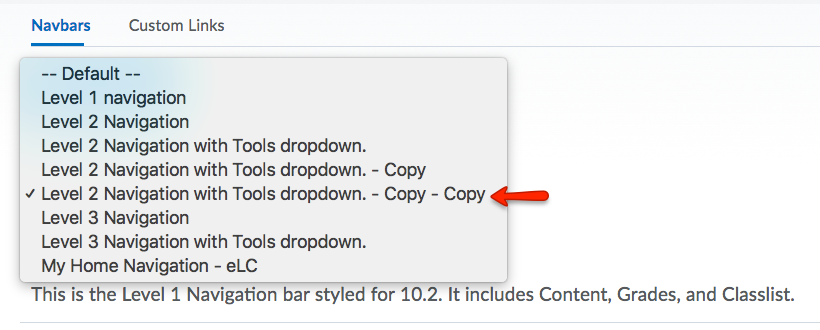
- Then, make sure to select your customized navbar under the Active Navbar drop-down.
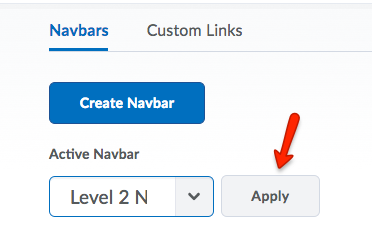
- Click Apply to make it the active navbar.
- You can create custom drop-down menus for your navigation bar, known as Link Groups
in eLC. To create a Link Group, click Navigation and Themes from the Course Administration Widget. Then click the Custom Links tab. Click Create Link Group. Then you can name your link group and add system links or custom links. Once you
have created the link group, it will be available for you to add to a customized navigation
bar. You can also create and add links to external websites from the same page.
