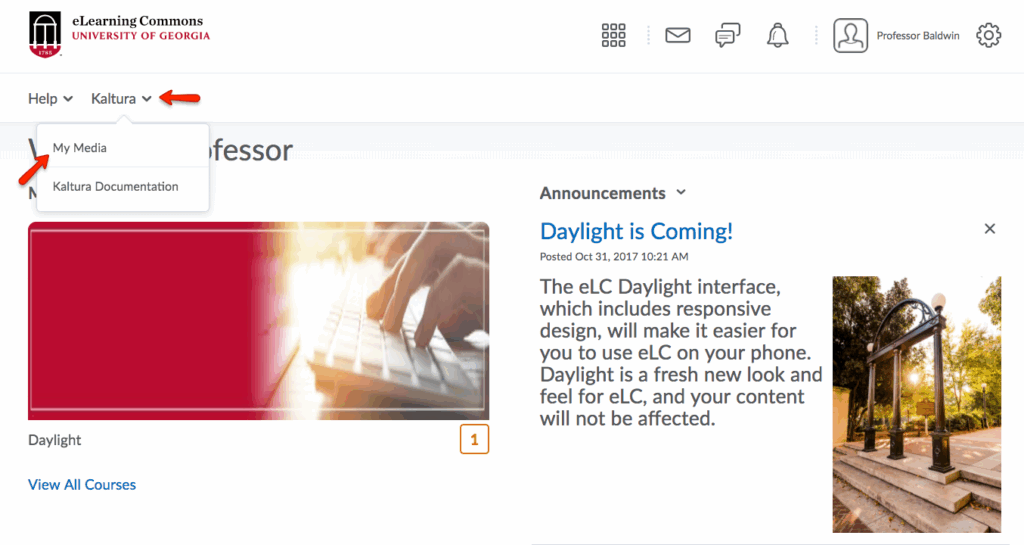
Kaltura is a media storage and streaming solution. Kaltura is integrated with eLC and can be used by instructors and students for any course related content.

For non-instructional content outside of eLC, you may login at kaltura.uga.edu to upload content or request a channel on kaltura.uga.edu to organize and manage content. Go to the UGA Status Page to see current service status for Kaltura.

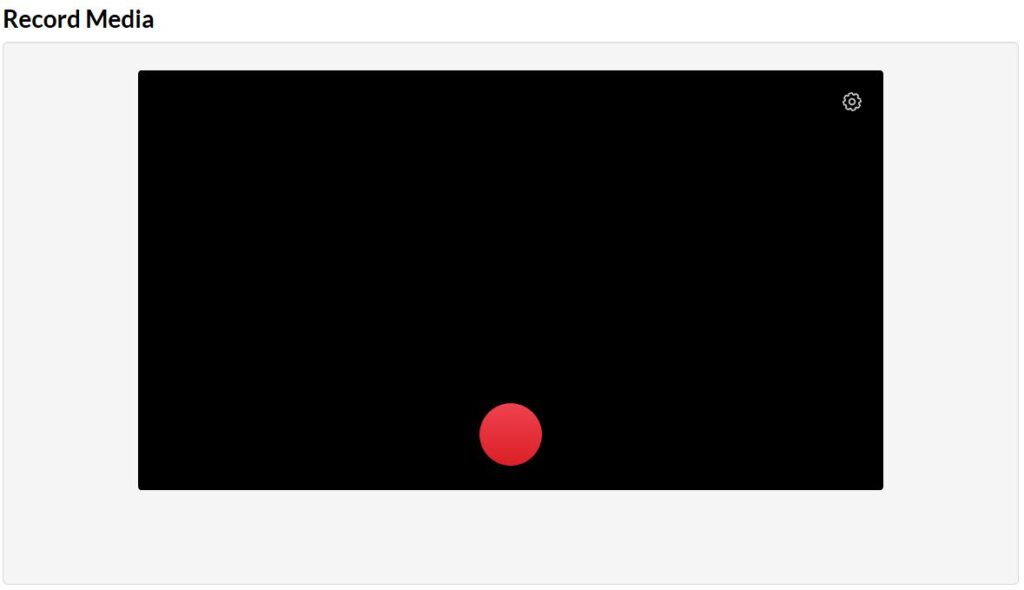
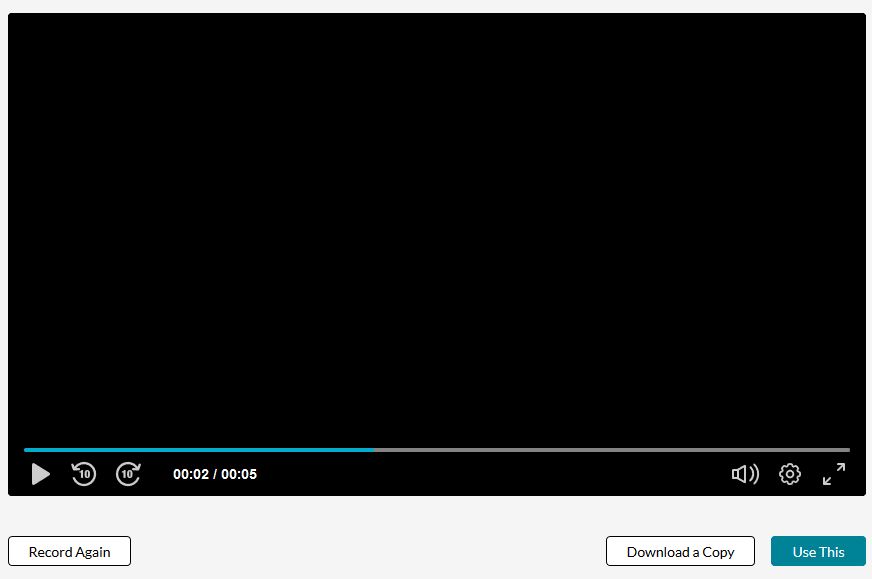
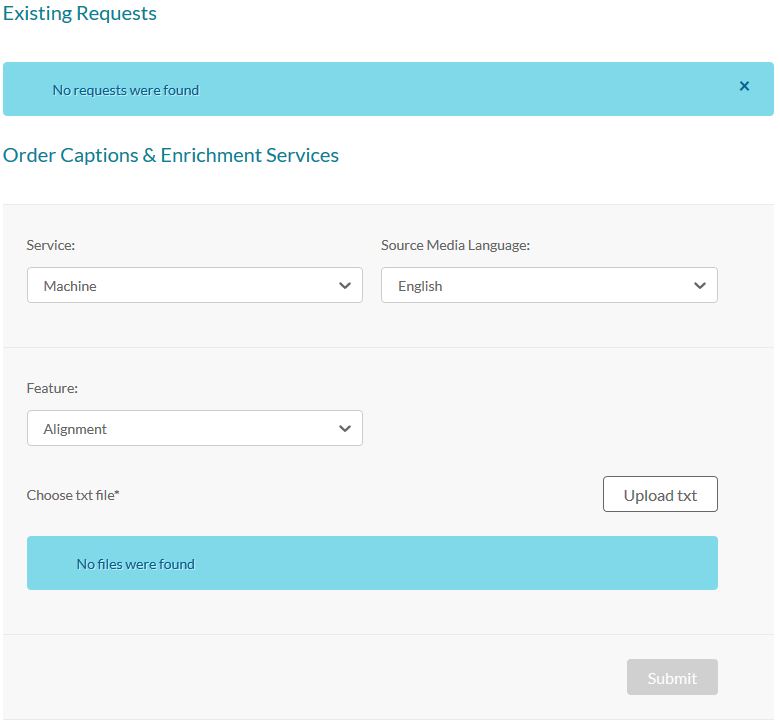
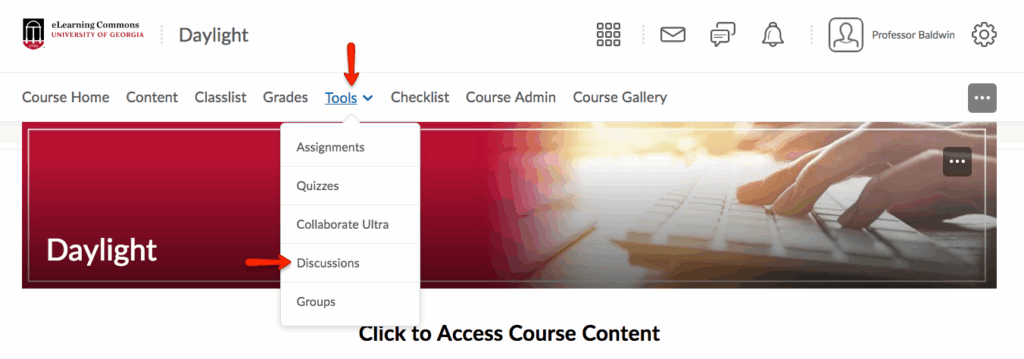
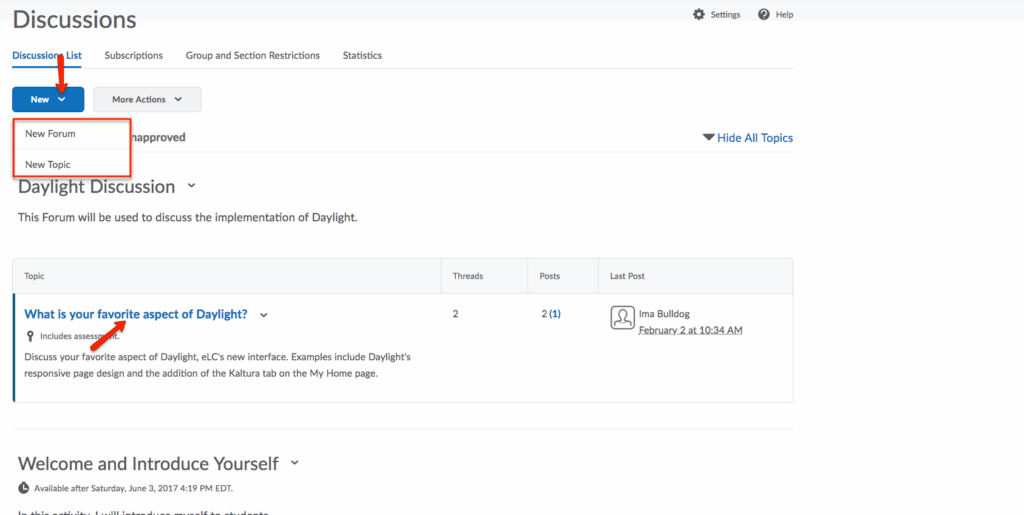
Kaltura Audio and Video can be uploaded anywhere in eLC where is a text editor, including discussions, assignments and within the Content tool. Additionally, Kaltura enables administrators and creators to create or request captions from Kaltura or upload an existing captions file.

Creating & Uploading Kaltura Videos

Uploading an Existing Video
+

My Media is a space where instructors and students can upload existing video to be shared with others within eLC courses.

  1. To begin, select Kaltura from the navigation bar on the MyHome screen. Then, click My Media.
  2. Click Create then select Upload.
  3. Either Drag and Drop a file into the Upload Media area or click Select Files and locate the video file you wish to upload.
  4. Once your file has uploaded, give it a name and a description. Click Save.
  5. Your video is now published in My Media.
  6. In order to share your media with students in eLC, the media must be added to your course. See below for more information about sharing Kaltura Audio and Video, and to learn the steps to add Kaltura media to your course.
Creating a Kaltura Capture Recording
+

Kaltura Capture can be used to record your screen, webcam, or a classroom discussion. The following steps outline the process of creating these recordings.

  1. To begin, select Kaltura from the navigation bar on the eLC homepage, then click My Media.
  2. This will open a page called “My Media” which shows all of the Kaltura media you own. Click Create. From the dropdown menu, select Capture.
  3. If you have never used Kaltura Capture before, you will be prompted to download the Kaltura Capture Desktop recorder. (If you’ve previously downloaded the recorder, it will open automatically.) If needed, download the recorder and open the application.
  4. Select what you’d like to record:
    • If you select an option with Screen, you will be prompted to select either Full Screen, or a specific area of the screen to record before recording.
    • If you select Webcam or Voice, the recording will start after a 5 second countdown.
    • You can turn on any of the three selections by clicking on the desktopwebcam, or voice icons.
  5. Once the recording starts, the Kaltura Capture toolbar will be down at the bottom of your screen. You can Pause your recording, and then start again by clicking the red record button. When you have completed the recording, hit the stop button and select Yes, Stop it.
  6. Once you have clicked Yes, Stop it, Kaltura Capture will process your recording and allow you to review the file. Additionally, you will be prompted to give the video a name and description. Add the information.
  7. When you’re satisfied with your recording, click Save to save the file locally to your computer or Save and Upload to upload the video to Kaltura. However, if you want to record again, click New Recording to start over.
  8.  Troubleshooting Kaltura Capture – If videos you have recorded using Kaltura Capture have audio out of sync or problems with video, try the following.
    • Close any programs which you don’t need during the recording
    • Do a test recording before you record a lecture or presentation to verify that Kaltura Capture works correctly on your device
    • High CPU or memory usage may cause issues with recorded video. If you are using a Windows PC, you can check your CPU and memory usage by using the Task Manager. Open the Task Manager by right-clicking the taskbar and choosing Task Manager. If you do not see a list of tabs, click More Details. Click the Peformance tab and look at the CPU and Memory usage — if these are close to 100% you may have problems recording.
Kaltura Express Capture
+

Kaltura Express Capture can be used to record video & audio from a webcam/microphone directly in the browser.

  1. To access Express Capture, click the Kaltura menu on the eLC homepage and choose My Media. Click Create then Express Capture.
  2. Your browser may ask you for permission to use your webcam / microphone. Click the Settings icon to enable / disable audio or video. Click the red Record button when you are ready to start recording.
  3. Click the Stop button once you are finished. You can review the recording and choose Record Again to start over or Download a Copy to download the video to your device. Click Use This to upload the video to Kaltura. It will be available from your My Media page once the upload completes.


Other Help Resources

Captioning Kaltura Videos

To maintain electronic and information technology accessibility, the University of Georgia requires every department to reasonably accommodate limitations to technology access experienced by individuals with disabilities. This can be accomplished by designing and implementing work and study environments that accommodate all users. One way to accommodate individuals with hearing impairments is to add captions to the media featured within your course in eLC.

Note: Captions can be added to your Kaltura audio and video by requesting machine captioning, alignment of a text transcript, or by uploading an existing captions file.

Requesting Machine Captioning
+

You can request machine captioning for any video that is uploaded to Kaltura. Machine captions are generated by a computer and have an accuracy rate of 70-80% so they must be reviewed and edited to ensure they are accurate. Machine captions are a great way to start when captioning a video.

  1. To request machine captions in Kaltura, first, select Kaltura from the course navigation bar. Then, click My Media.
  2. Click on the video that you want to caption. If you don’t see the video you are looking for, click Add New to either upload existing media, by selecting Media Upload, or record a new presentation, by selecting Record a Presentation.
  3. Click on the menu below the video and select Reach captions & enrich.
  4. Select the Source Media Language, then click the Order button.
  5. Review and edit your captions using the captions editor.
    • Note: If your order is processed, you will see the status of it listed under
    • Caption Requests. Machine captions are usually processed in 30 minutes. If the system is processing a large number of requests, the processing can take up to five times the length of the video.
  6. Once your captions are complete, you will see the CC icon on your video. To turn on the captions, click the CC icon and click English (or the appropriate language for the captions).
  7. Captions should now be visible on your video.
Editing Machine Captioning
+

Once your machine captions have been added to your video, you will need to review and edit the captions.

  1. To access the caption editor, first, select Kaltura from the course navigation bar. Then, click My Media.
  2. Click the video that you want to edit.
  3. Click on the menu below the video and select Reach captions & enrich.
  4.  Next, click the Edit icon. You can also access the captions editor by clicking the menu below the video, choosing Edit, then selecting the Captions tab and clicking the Edit Captions button.
  5. You will then be redirected to the Captions Editor.
  6. Once you are done making your edits, click Save and your edited captions will be published to your video. Click Revert to undo any changes and start over.
Requesting Alignment
+

If you already have a text transcript for a video, you can use Kaltura’s alignment service to automatically time and generate captions.

  1. From your My Media page, click the video you want to add captions to, then click the the menu below the video and select Reach captions & enrich.
  2. Select Alignment from the Feature dropdown, then click the Upload txt button and select the transcript file to use.
  3. Once you have uploaded the transcript, click Submit. After the alignment is complete a caption file will be added to the video. If needed, you can edit the captions file.
Adding an Existing Captions File
+

If you have an existing captions file, you can upload this file to a video in Kaltura Audio and Video.

  1. To begin the process of adding a captions file to your video, first, select Kaltura from the course navigation bar. Then, click My Media.
  2. ​Click on the video you want to caption. It must be a video that you have uploaded or that you can edit. If you don’t see the video you are looking for, click Add New to either upload existing media, by selecting Media Upload, or record a new presentation, by selecting Record a Presentation.
  3. Click the menu below the video and select Edit.
  4. Click the Captions tab. Click Upload captions file. Your file must be in SRT or DFXP format.
  5. Select the correct language in the dropdown, and give the captions file a label. This label will appear in the captions selector on the video. Click Save.
  6. Your captions should be uploaded and present under the Captions tab.
  7. After your captions have been uploaded, click the Details tab, and click Save to save your uploaded captions.
  8. Now, go to My Media, and select the video you just captioned. You will see the CC icon on your video, and you can click the label of the captions that were uploaded to apply the captions file.

Posting Kaltura Videos in eLC

Media that is uploaded to Kaltura can be shared a variety of ways within eLC.

Sharing Media within the Content Tool
+

To share video content with your students in your eLC course, upload it to Kaltura Audio and Video. Video in My Media can be uploaded anywhere in eLC using the text editor.

  1. To begin the process of uploading media within the Content tool, first, click Content from your course navbar or click Click to Access Course Content.
  2. Create a module by clicking Add a module…, or click on an existing module.

  3. Once you are within the module, click Existing Activities. Then, select My Media.
  4. If the video has already been uploaded to My Media, select a video to embed within the Content tool. If not, click Add New. Then, select Media Upload.
  5. Either Drag and Drop a file within the Upload Media area or click Choose a file to upload and locate the video file you wish to upload.
  6. Once your file has uploaded, give it a name and a description. Click </> Save and Embed.
  7. Your uploaded media should now be featured within the Content tool within your selected module.
Sharing Media through Insert Stuff
+

If you want to share video with your students in your eLC course, you can upload video to Kaltura Audio and Video Kaltura Audio, and video can be uploaded anywhere in eLC there is a text editor, including discussions, assignments, and within the Content tool.

  1. For the following tutorial, media will be shared using the Discussions tool. To begin the process of uploading media to a discussion post, first, click Tools from your course navbar, and then select Discussions.
  2. Select the discussion topic in which you would like to share a video, or click New to create either a New Forum or a New Topic.
  3. Preexisting topics and forums can also be edited to include a shared video. To edit a topic or forum, click the dropdown menu of the discussion topic or forum. Then, select either Edit Topic or Edit Forum. For this tutorial, a new forum will be created.
  4. To share video while creating or editing the forum or topic, within the text editor, click Insert Stuff, and find the icon on the tool bar that is made up of play, pause, stop and record symbols.
  5.  Select My Media.
  6. At this point, you will see a list of any videos you have previously uploaded to Kaltura. You may choose one of the previously uploaded videos, or, if you click Add New, you have the option to select Kaltura Capture or Media Upload. To upload an existing video, select Media Upload.
  7. Either Drag and Drop a file within the Upload Media area or click Choose a file to upload and locate the video file you wish to upload.
  8. Once the file has uploaded, give the file a Title and Description. Click </> Save and Embed.
  9. Click Refresh Preview to see the video. Then, click Insert to add the video to your Discussion forum, topic, or post.
  10. Your video should now be present within the text editor. To save the discussion forum, click Save and Close.
  11. The new forum containing the shared video should now be displayed within the Discussion List.
Player Embed Settings
+
  1. You can change embed settings when you are embedding media in Content or embedding media using Insert Stuff.
  2. Click the Embed Settings (gear) button to show additional embed settings.

    • Choose Player: Choose Kaltura Player w/Download to allow students to download the media by clicking a download button on the player.
    • Max Embed Size: Choose the size of the embedded player used with Insert Stuff
    • Thumbnail Embed: The player will not be loaded until the media thumbnail is clicked
  3. Check Set as my default settings for media type to use the selected settings for all embeds of the displayed media type. Click Embed once you have finished selecting embed options to embed the media.
Sharing Media in the Course Gallery
+

The Course Gallery is a space where instructors and students can upload video to be shared with the class. To access the Kaltura Course Gallery, you will need to add the the Course Gallery to your course navigation or as a widget in your course. The following tutorials demonstrate how to complete the steps necessary to access the Course Gallery.

Adding the Kaltura Course Gallery to the Course Navigation

Adding the Course Gallery link to your course navigation makes the Course Gallery visible to anyone who is enrolled in your course. With this option, students can also upload video and you have the ability to approve or reject the video. Any video uploaded by the instructor or approved by the instructor will be visible to anyone in your course in the Course Gallery.

  1. To begin the process of adding the Kaltura Course Gallery to the Course Navigation, first, click the … icon that appears when your mouse hovers over the Course Nav Bar. Select Edit This Navbar.
  2. When redirected to the Edit Navbar page, click Add Links.
  3. Click Create Custom Link.
  4. Give the link a name, and then click Insert Quicklink.
  5. Click External Learning Tools.
  6. Select Kaltura Course Gallery.
  7. When finished choosing the appropriate settings, click Create. The Course Gallery link should now be present on your course navbar.
Adding the Kaltura Course Gallery Widget to your Course Homepage
+

Adding the Course Gallery widget makes the Course Gallery visible to only the instructor (and teaching assistant, if you choose). Students will not see any videos that you upload here unless you use the Insert Stuff button to add a video to a Content page. In the Course Gallery, you can upload video, edit video, and add captions.

  1. To add the Kaltura Course Gallery widget to a course homepage, first, go to the Course Home, and … icon that appears when your mouse hovers over the bottom right portion of the page. Then, click Manage Homepages.
  2. Select the Active Homepage. If the option to select a homepage is not present, you will need to create a copy of the default homepage that can be modified. To learn how to do this, please refer to our documentation on Creating a Copy of the Default Template of the Homepage.
  3. Select the Add Widgets button in the desired area.
  4. In the pop-up window, use the search bar or scroll through the list to find the desired widget. Check the box next to the Kaltura Course Gallery – Instructors Only to select, and click Add.
  5. To edit the Kaltura Course Gallery widget’s default settings, click on the widget.
  6. You can give the widget a custom name. To do this, select Custom, and type the name you would like to give the widget.
  7. When you have finished editing the Kaltura Course Gallery widget, click Save and Close.
  8. The Kaltura Course Gallery widget should now be present on your Course homepage.
Uploading a Video to the Course Gallery
+
  1. To add an existing video to the Course Gallery, first, go to the course gallery by clicking Course Gallery on the course navbar or the link in the Course Gallery widget.
  2. Click Add Media.
  3. Then, click Add New, and select Media Upload.
  4. Click Choose a file to upload and locate the video file you wish to upload. Note: There is a 2GB file size limit.

  5. Once your file has uploaded, give it a name and a description. Click Save.
  6. Your video is now published in the Course Gallery.
Adding a Playlist to the Course Gallery
+
  1. You can create and add playlists to the course gallery which will be displayed in a separate tab.
  2. Click the Edit menu in the Course Gallery and choose Create channel playlist.
  3. Enter a Title for the playlist and an optional Description or Tags and click Add.
  4. Click the Add to Playlist button to add content to the playlist.
  5. Choose content which has already been added to the Course Gallery or content from My Media to add to the playlist. Click the + icon next to an item to add it to the playlist. Click Done when you have finished adding content.
  6. Drag the handles on the left to reorder playlist items. Click the Menu (…) icon and choose Remove to remove an item from the playlist. Click the Save button once you are finished editing the playlist.
  7. Click Back to Media Gallery on the Edit Media Gallery page to go back to the course gallery. A Home tab with the playlist you created will be displayed when you access the course gallery.
  8. Click a video in the playlist to view it or click the playlist name to view the entire playlist.
  9. To edit playlists displayed in the course gallery, click the Edit icon on the course gallery page, choose Edit, then click the Playlists tab. Drag the handles on the left to reorder playlists. Click the Edit (pencil) icon to edit the playlist. Click the Delete (trash can) icon to delete the playlist. Click Embed </> to get embed code for the playlist.

Kaltura Video Quizzes

You can create interactive quizzes using videos you have added to your Kaltura My Media by creating a Video Quiz. Video quizzes can also be associated with grade items in eLC.

Create a Video Quiz
+
  1. Go to your Kaltura My Media page by clicking the Kaltura menu on the eLC homepage and choosing My Media.
  2. Click the Add New button and choose Video Quiz.
  3. Click Select next to the video you want to use to create the quiz or upload a new video by clicking Upload Media.
  4. The video quiz editor will be displayed.
  5. Click Details, Scores, or Experience to change the settings for the quiz.
Quiz Settings
+

Details

  • Quiz Name: The name of the quiz
  • Show Welcome Page/Welcome Message: If checked, the entered message will be displayed when the viewer clicks the Play button to start the quiz
  • Allow Download of Questions List: Allows viewers to download the list of questions before starting the quiz
  • Instructions: Displays instruction text before the quiz begins


Scores

  • Allow Multiple Attempts: Allow viewers to take the quiz more than once
  • Do Not Show Scores/Show Scores: Select Show Scores to display the quiz score after the quiz is submitted
  • Include Answers: Viewers will be able to see correct/incorrect answers


Experience


  • Allow Answers Change: 
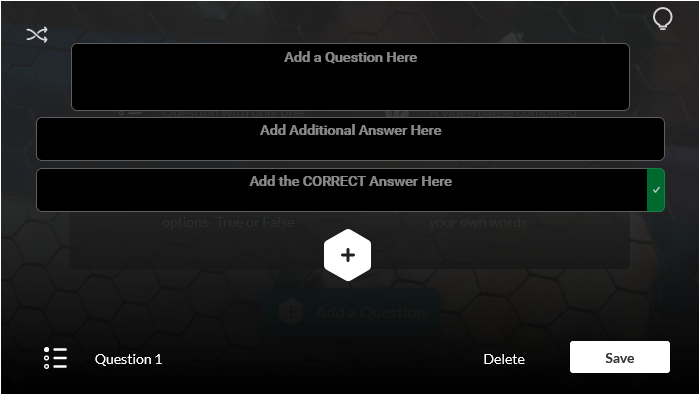
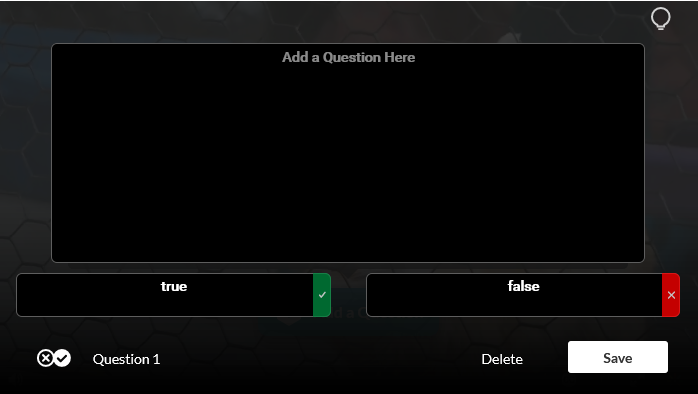
Allow viewers to change answers before submitting
  • Allow Skip/Do not Allow Skip: Allow viewers to skip questions or make them submit an answer
  • No seeking forward: Viewers will not be able to use the seek bar to jump ahead in the video.
Add Questions
+
  1. Click on the timeline below the video where you want to add a question, then click the Add a Question button on the video.
  2. You can choose to add a Multiple ChoiceTrue/FalseReflection Point, or Open-Ended Question.


Multiple Choice

Multiple choice question

  • Enter the correct answer in the box with the green checkmark.
  • Click the + to add additional answers.
  • Click the Shuffle icon at the top left to shuffle the answers.
  • Click the bulb icon to add a Hint or Why? to the question.
True/False

True/False question

  • Enter different text for correct / incorrect answer if needed
  • Click the checkmark/x to swap the correct / incorrect answer
Reflection Point

Reflection point question

  • The video will be paused and the text entered will be displayed to the viewer
Open-Ended Question

Open-Ended question

  • Viewers can enter up to 270 characters to answer the question in their own words

3. After you Save a question you can move it by clicking the question icon on the timeline and then dragging it to a new place. Click the Preview button to view what the quiz will look like to viewers. Click Done when you are finished adding questions.


4. To edit a video quiz after you have created it, go to your My Media page, click the video quiz title in the list, then click the Actions button and choose Launch Editor.

Add a Video Quiz to Content and Associate a Grade Item
+
  1. From a module in Content in your course, click the Existing Activities button and choose My Media. Click the Embed button next to the video quiz in the list to add a link to the video quiz to the content module. Click the link to view the video quiz.
  2. To associate a grade item with the video quiz, scroll down to the bottom of the page and click Add a grade item… under Assessment on the Activity Details tab.
  3. Choose a grade item to associate from the dropdown, or click the + button to create a new item, then Save. Students will now receive a grade after they submit the video quiz.

Note: If you use Insert Stuff to embed a video quiz, a grade item will automatically be created when the first student submits the quiz. Points will not scale if you change the max points for the automatically created grade item.

View Quiz Results
+
  1. To view video quiz results, go to your My Media page and click the video quiz in the list, then click the Actions button below the video and choose Analytics.
  2. Click the Quiz Questions tab and click a question to see all responses to it.
  3. Click the Quiz Users tab and click a user to view their responses to the quiz.
Additional Resources
+

Need more help with eLC?

Visit our support page to identify your best help options

FIND SUPPORT